Login in to your Azure portal and Click on >> + new useful resource and Choose >> Blockchain and Click on >> Azure Blockchain workbench (Preview).
The next subsequent step is to offer the fundamental necessities in order that blockchain workbench might be created.
Present a Useful resource prefix title & present a VM consumer title.
Choose >> Authentication sort to Password and supply a password to the VM consumer title.
After that present a database and blockchain password and Choose >> OK.
Proceed to the subsequent step. In superior settings, depart the values to be the default. If required, you may change the worknode VM dimension as per your want and Click on >> Okay.
Step 4
The Subsequent step is to examine on the abstract and eventually, Click on >> create, then the deployment course of will happen. Be sure you have time since you need to wait greater than 1 hour (90 minutes). After that, the deployment course of might be profitable.
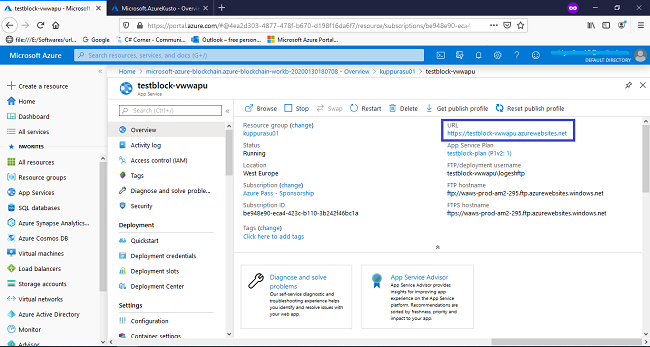
As soon as the deployment course of is profitable, the useful resource group will comprise the blockchain sources. Principally, the workbench might be accessed utilizing the online URL for that
Swap to the create a useful resource group and you’ll see the sources with app service and we have to choose >> App service with out the -API suffix.
Step 5
From the app service, we now have created will comprise the deployed workbench, copy the URL and paste it in a brand new tab in order that we are able to have the ability to see the created workbench with the default area title.
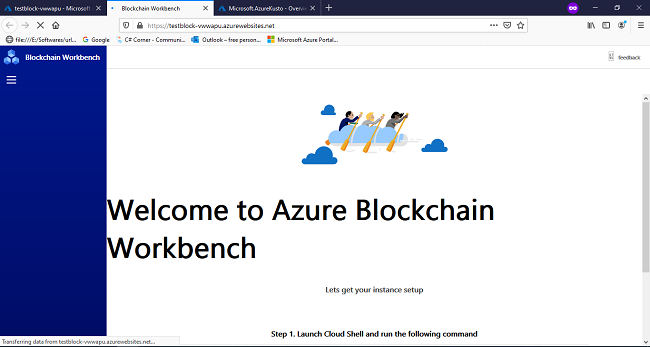
Step 6
The subsequent step is to register the Blockchain API app registration, for that Switchback to Azure Lively Listing and Choose App registration and Choose >> New registration.
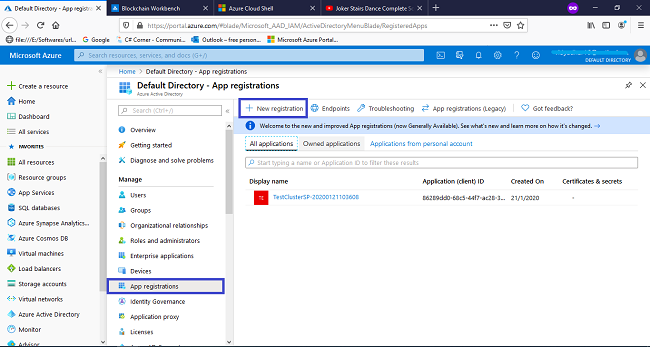
Present a reputation for it and Choose >> Accounts on this group solely (Default listing only- single-tenant) and Choose >> Register.
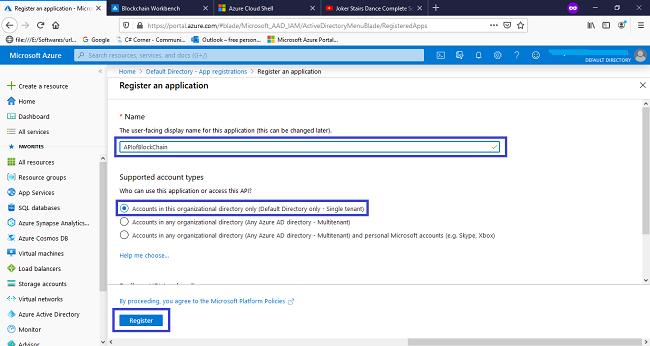
Step 7
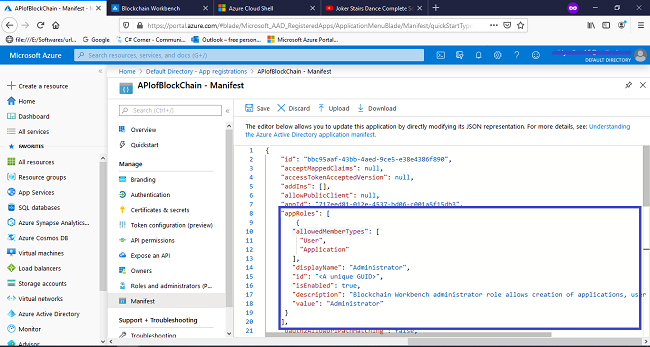
The subsequent step is to manifest the appliance roles with the Azure Lively Listing for specifying the blockchain workbench directors. For that generate a GUID for the manifest by Deciding on >> Manifest within the handle part and replace the appRoles part with the next code and alter the Oauth2AllowImplicitFlow worth to true.
Replace the next code within the approles part.
- “appRoles”: [
- {
- “allowedMemberTypes”: [
- “User”,
- “Application”
- ],
- “displayName”: “Administrator”,
- “id”: “<A distinctive GUID>”,
- “isEnabled”: true,
- “description”: “Blockchain Workbench administrator function permits creation of functions, consumer to function assignments, and so on.”,
- “worth”: “Administrator”
- }
- ],
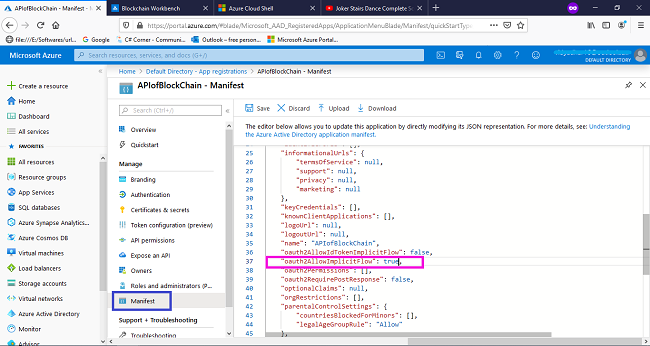
The ultimate step is to save lots of the manifest and for that Choose >> save to save lots of the manifest modifications.
I hope this text, might be helpful for you and when you’ve got any queries remark beneath and thanks for studying.


