In this article, I will explain how you can integrate Huawei Mobile Services. Integrating Huawei Mobile Services (HMS) is a prerequisite for using all the kits Huawei is offering in your application.
Integration
1. Create an App in AppGallery Connect
1.1 – Sign In/Register to Huawei Developer website and click to Console

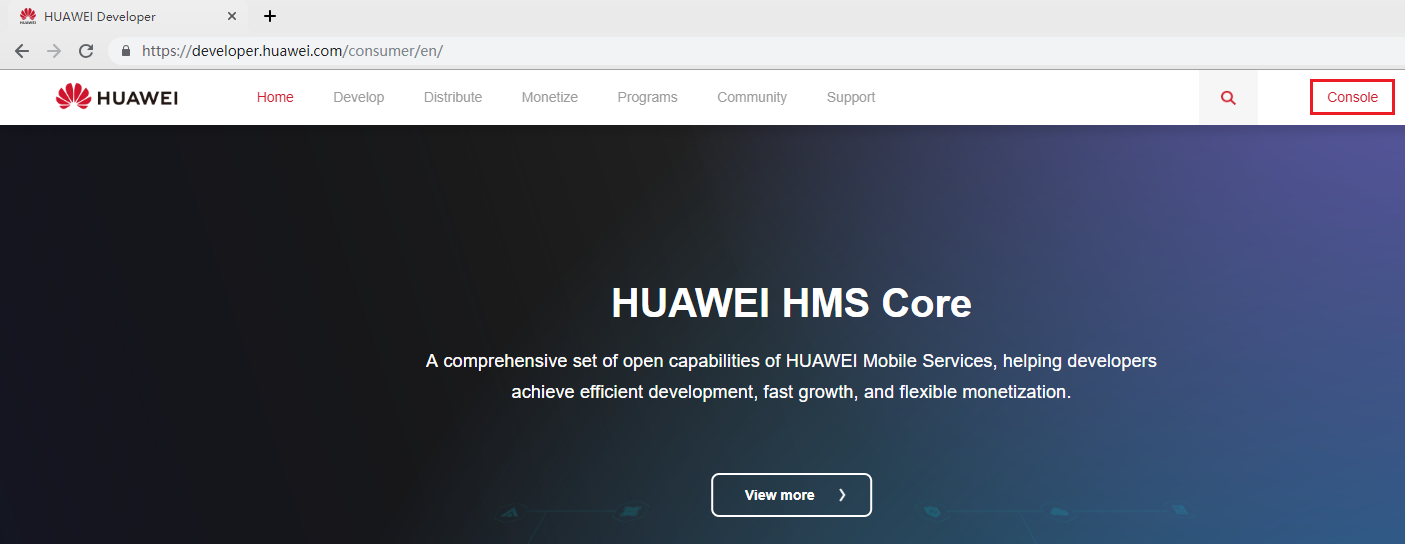
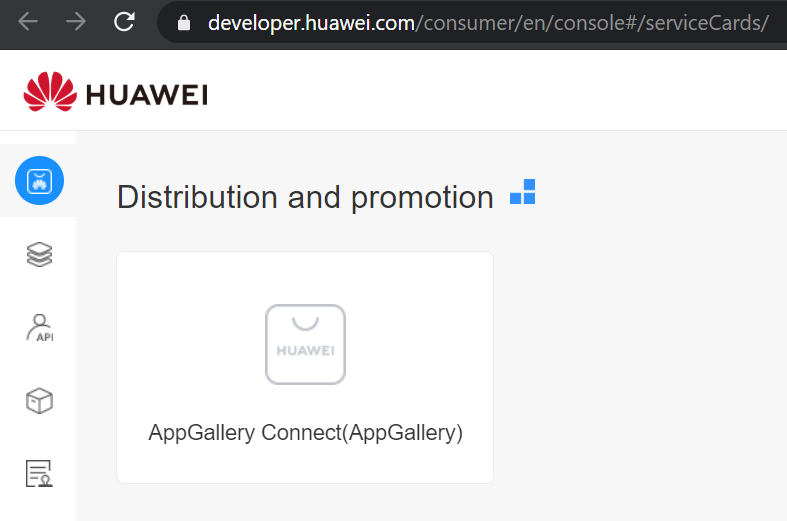
1.2 – Click to the AppGallery Connect button in order to access AppGallery connect.

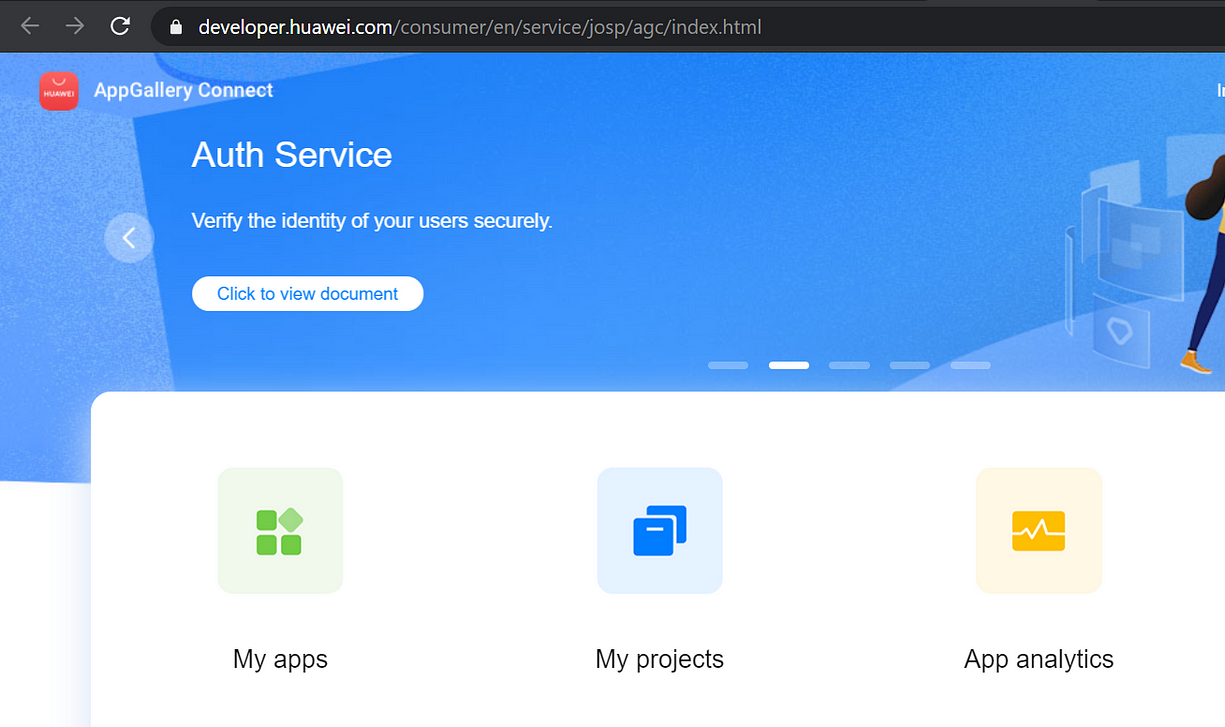
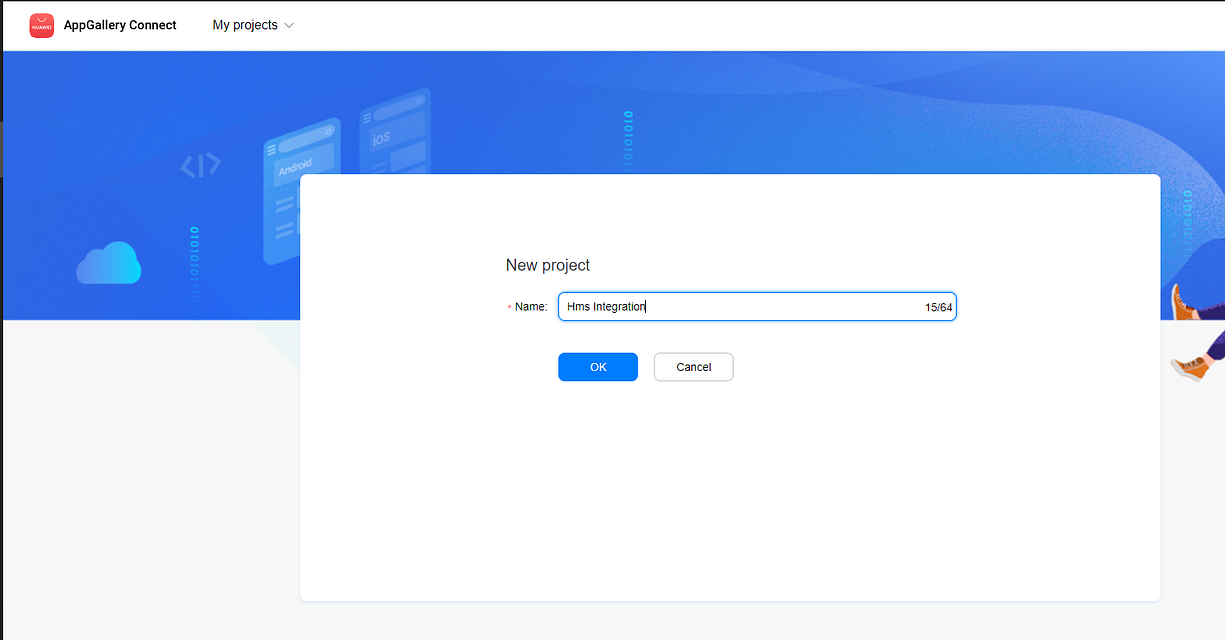
1.3.1 – Click My projects button to create new project or add new app to existing your projects.
1.3.1.1 Create new project
1.3.1.2 Click Add App button to add new application to your project.

1.3.2 Or click My apps button to create/modify/view all of your applications

1.3.2.1 Click on New app button to create new application.


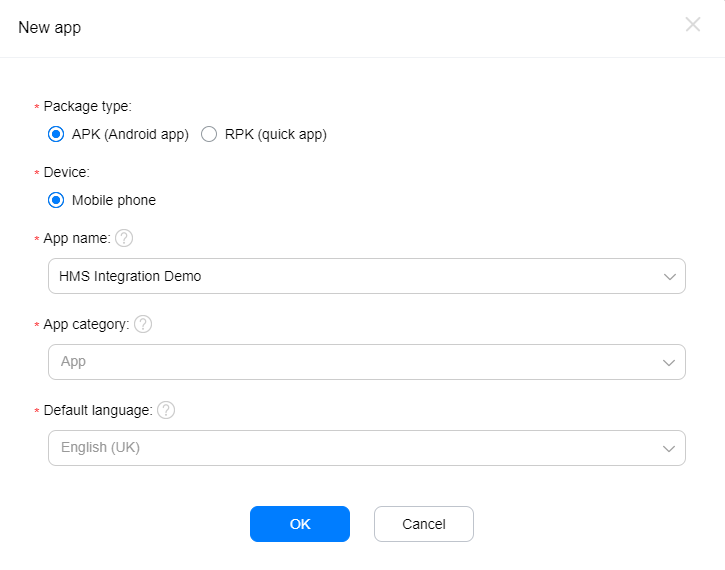
1.4 -Adding a new app
Enter name, category and default language for your application, then click create button to finish app creation.

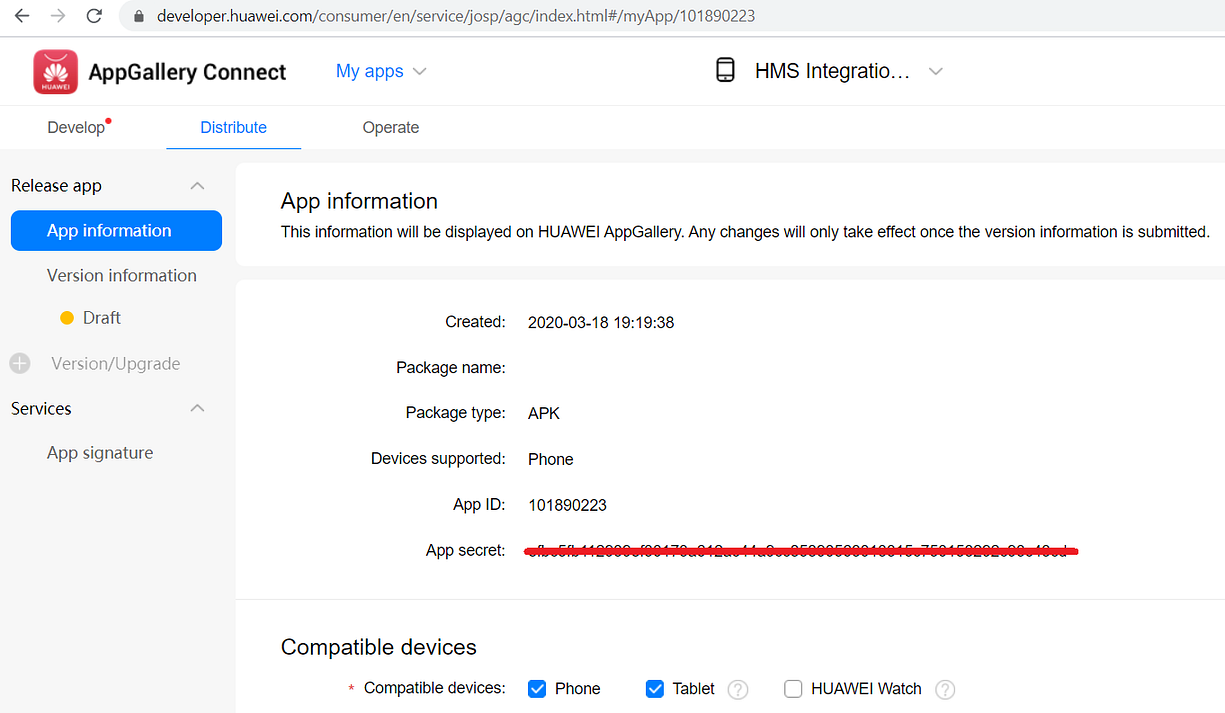
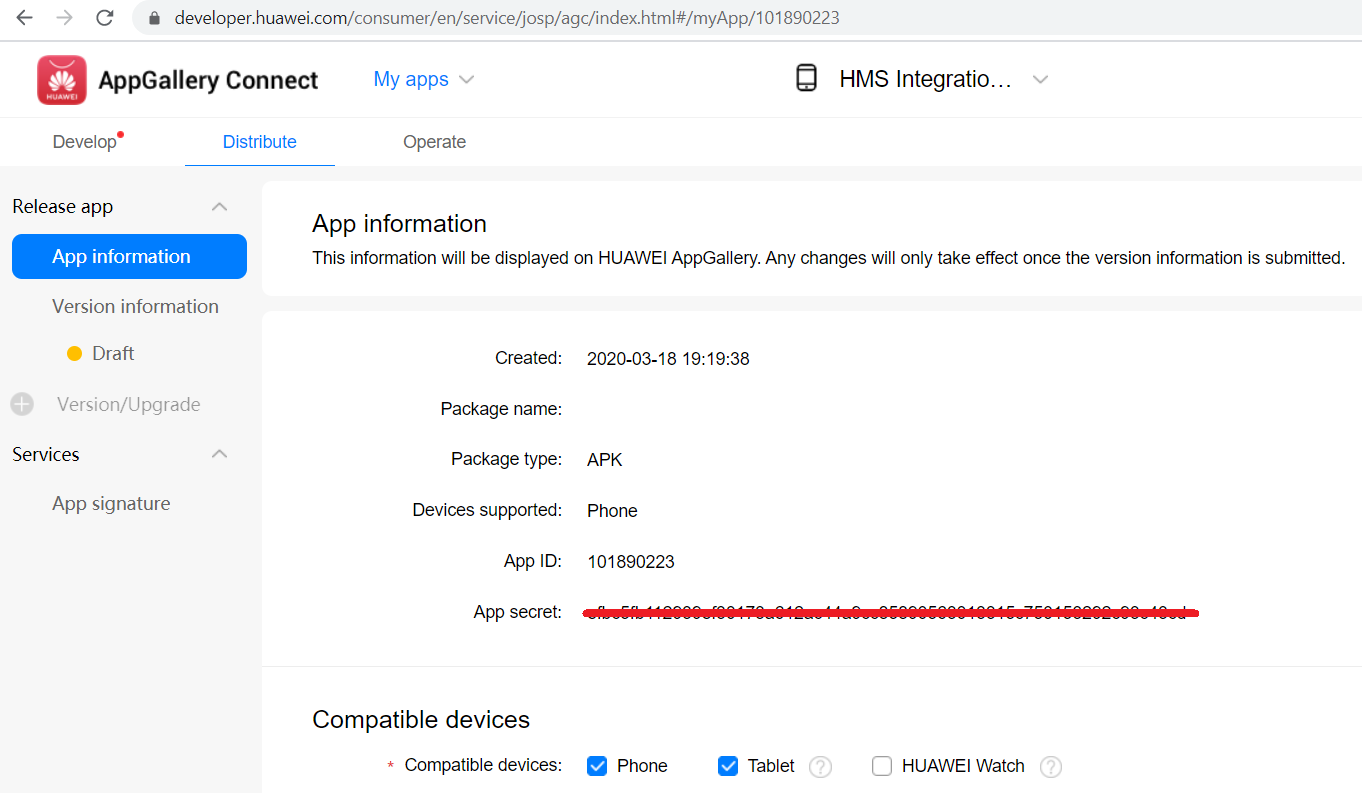
1.5 – If the app creation is successful the page will navigate you to the App Information page. On this page, you can find your APP ID and APP SECRET of your application.
2. Add Package Name
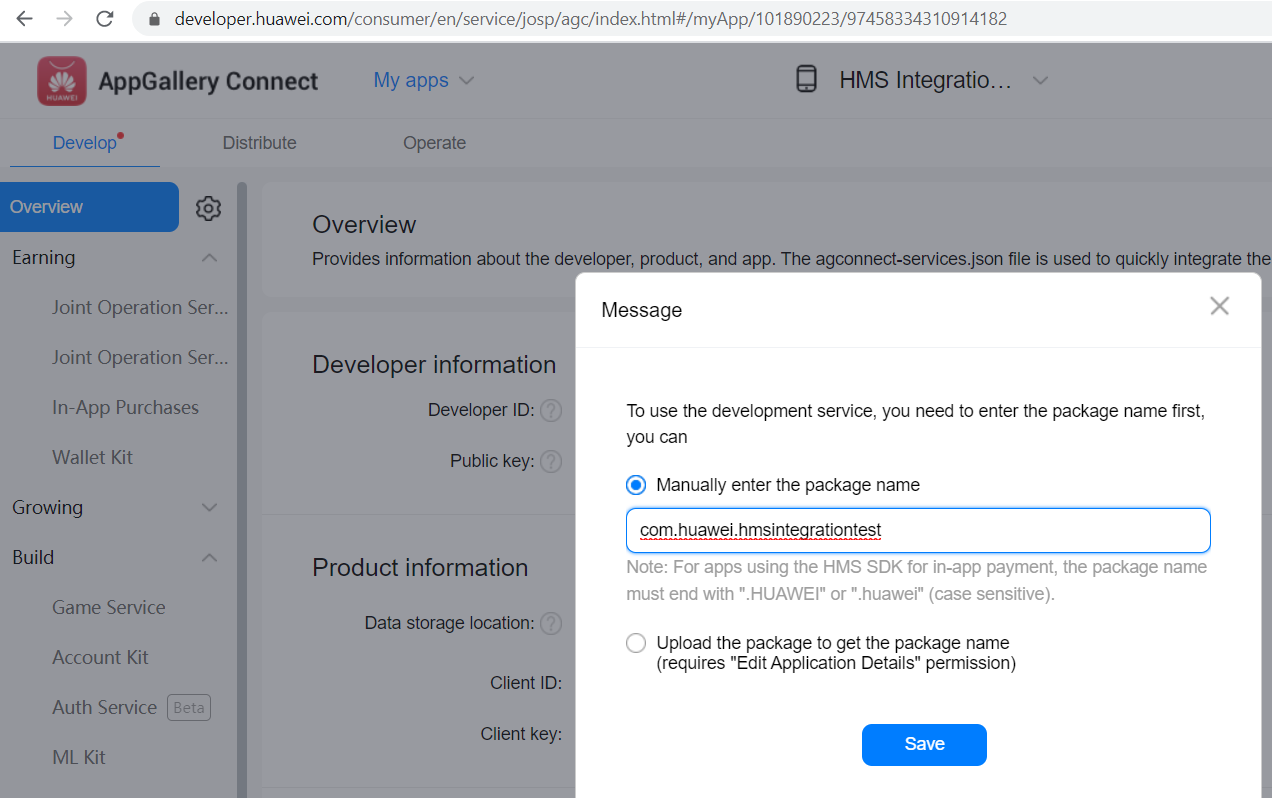
2.1- After completing the steps above you should go to the Develop tab on the page. If you are opening Develop tab first time, it will ask you to enter your package name. You have two options here. You can either write your package name manually (Package name must be same with your project) or you can upload your apk and the system will fetch the package name automatically. For this tutorial we are going to use manual section.

3. Creating a Signing Certificate (Keystore)
Android requires that all apps be digitally signed with a certificate before they can be installed. Android uses this certificate to identify the author of an app. So you need to generate your certificate after completing the steps above.
If you don’t know how to generate Signing Certificate (Keystore) for your application please click here to go related article.
4. Generating SHA-256 Fingerpring from Signing Certificate (Keystore)
After completing the steps above, you should extract SHA-256 fingerprint with using keytool provided by JDK.
If you don’t know how to generate SHA-256 fingerprint please click here to go related article.
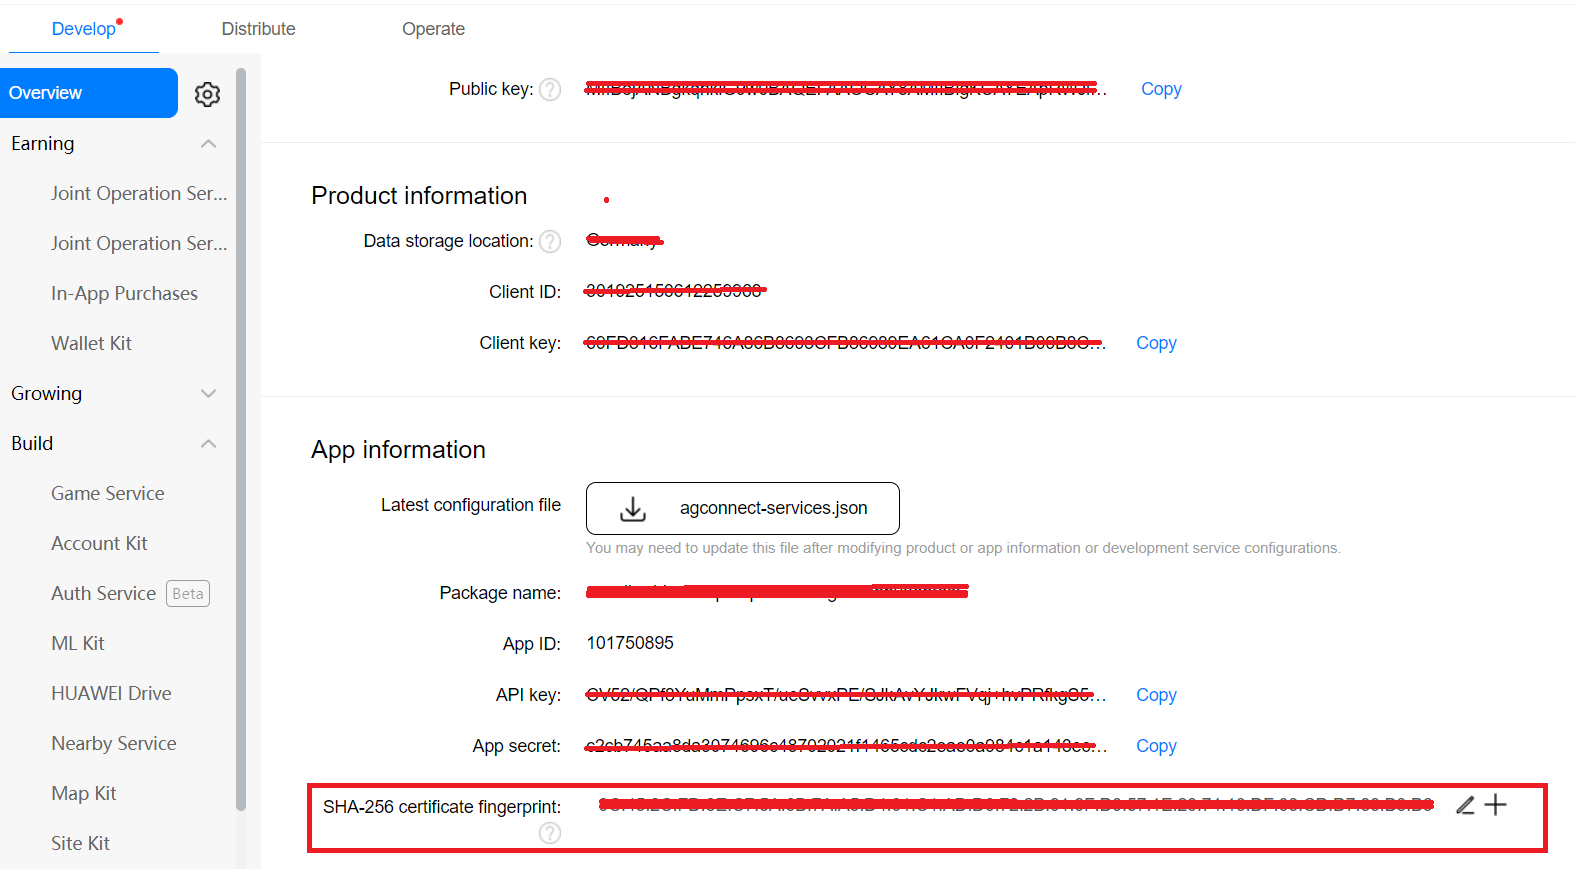
5. Add SHA-256 Fingerprint to the AppGallery Connect
After generating your SHA-256 fingerprint, you need to add your fingerpring to the AppGallery Connect by navigating to the bottom of Develop tab in AppGallery Connect and you will find “App Information” section. At the end of this section you will find a field named “SHA-256 certificate fingerprint:” and you should add your fingerprint there.

6. Add HUAWEI Maven Repository and AGCP Plugin to Project
6.1- Add HUAWEI agcp plugin and HUAWEI Maven repository to the project-level(root-level) build.gradle file


// Top-level build file where you can add configuration options common to all sub-projects/modules.

buildscript {
    ext.kotlin_version = '1.3.72'
    repositories {
        google()
        jcenter()
        // Check that you have the following line (if not, add it)
        maven { url 'http://developer.huawei.com/repo/' } // HUAWEI Maven repository

    }
    dependencies {
        classpath 'com.android.tools.build:gradle:4.0.0'
        classpath "org.jetbrains.kotlin:kotlin-gradle-plugin:$kotlin_version"
        // Add the following line
        classpath 'com.huawei.agconnect:agcp:1.2.1.301'  // HUAWEI agcp plugin

        // NOTE: Do not place your application dependencies here; they belong
        // in the individual module build.gradle files
    }
}

allprojects {
    repositories {
        google()
        jcenter()
        // Check that you have the following line (if not, add it)
        maven { url 'http://developer.huawei.com/repo/' } // HUAWEI Maven repository

    }
}

task clean(type: Delete) {
    delete rootProject.buildDir
}
6.2- To your module (app-level) build.gradle file (usually app/build.gradle), add the HUAWEI agconnect plugin.

apply plugin: 'com.android.application'
apply plugin: 'kotlin-android'
apply plugin: 'kotlin-android-extensions'
// Add the following line
apply plugin: 'com.huawei.agconnect'  // HUAWEI agconnect Gradle plugin

android {
7. Configure Project Signature
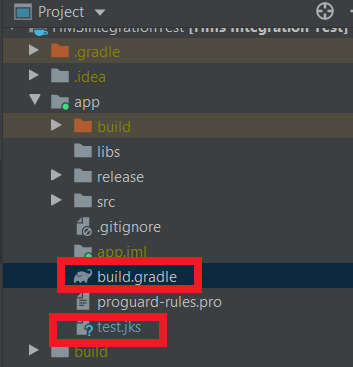
7.1- Copy the generated signature file test.jks into the app folder and open your module (app-level) build.gradle file (usually app/build.gradle).

7.2- Add the signature configuration to the app-level build.gradle file
signingConfigs {
 release {
  storeFile file('test.jks')
  keyAlias 'hmsintegrationtest'
  keyPassword '123456'
  storePassword '123456'
  v1SigningEnabled true
  v2SigningEnabled true
 }
}buildTypes {
 release {
  signingConfig signingConfigs.release
  minifyEnabled false
  proguardFiles getDefaultProguardFile('proguard-android-optimize.txt'), 'proguard-rules.pro'
 }
 debug {
  signingConfig signingConfigs.release
  debuggable true
 }
}
apply plugin: 'com.android.application'
apply plugin: 'kotlin-android'
apply plugin: 'kotlin-android-extensions'
// Add the following line
apply plugin: 'com.huawei.agconnect'  // HUAWEI agconnect Gradle plugin

android {
    compileSdkVersion 29
    buildToolsVersion "29.0.3"

    defaultConfig {
        applicationId "com.ibrahimrecepserpici.hmslocation"
        minSdkVersion 28
        targetSdkVersion 29
        versionCode 1
        versionName "1.0"

        testInstrumentationRunner "androidx.test.runner.AndroidJUnitRunner"
    }

    signingConfigs {
        release {
            storeFile file('keystore.jks')
            keyAlias 'android'
            keyPassword 'android'
            storePassword 'android'
            v1SigningEnabled true
            v2SigningEnabled true
        }
    }

    buildTypes {
        release {
            signingConfig signingConfigs.release
            minifyEnabled false
            proguardFiles getDefaultProguardFile('proguard-android-optimize.txt'), 'proguard-rules.pro'
        }
        debug {
            signingConfig signingConfigs.release
            debuggable true
        }
    }

}

dependencies {
    implementation fileTree(dir: 'libs', include: ['*.jar'])
    implementation "org.jetbrains.kotlin:kotlin-stdlib-jdk7:$kotlin_version"
    implementation 'androidx.appcompat:appcompat:1.1.0'
    implementation 'androidx.core:core-ktx:1.2.0'
    implementation 'androidx.constraintlayout:constraintlayout:1.1.3'
    testImplementation 'junit:junit:4.12'
    androidTestImplementation 'androidx.test.ext:junit:1.1.1'
    androidTestImplementation 'androidx.test.espresso:espresso-core:3.2.0'
}
7.3- Synchronize your project
![]()
If the synchronization successfully completed, everything is ready and now you can use awesome kits Huawei is offering.
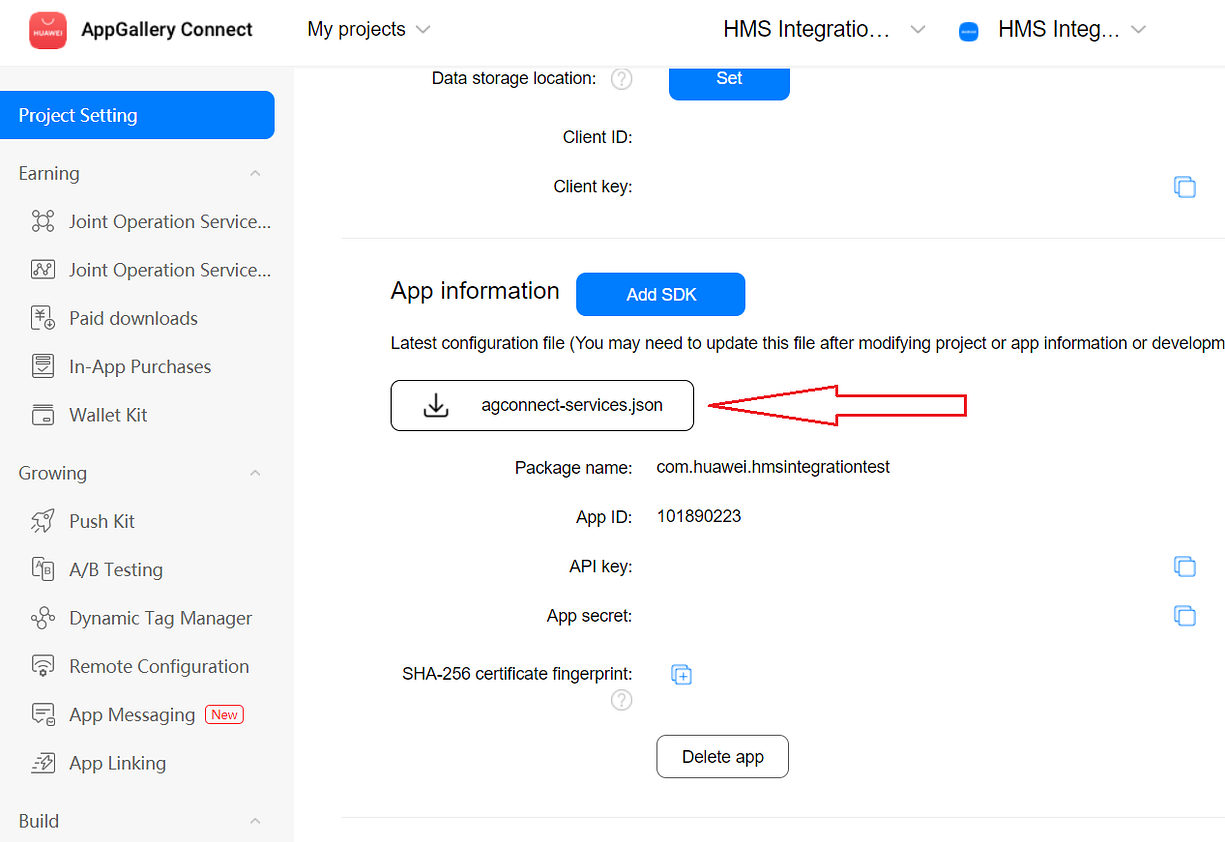
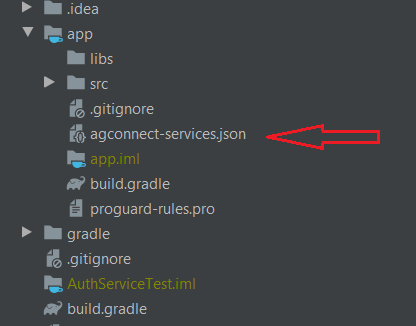
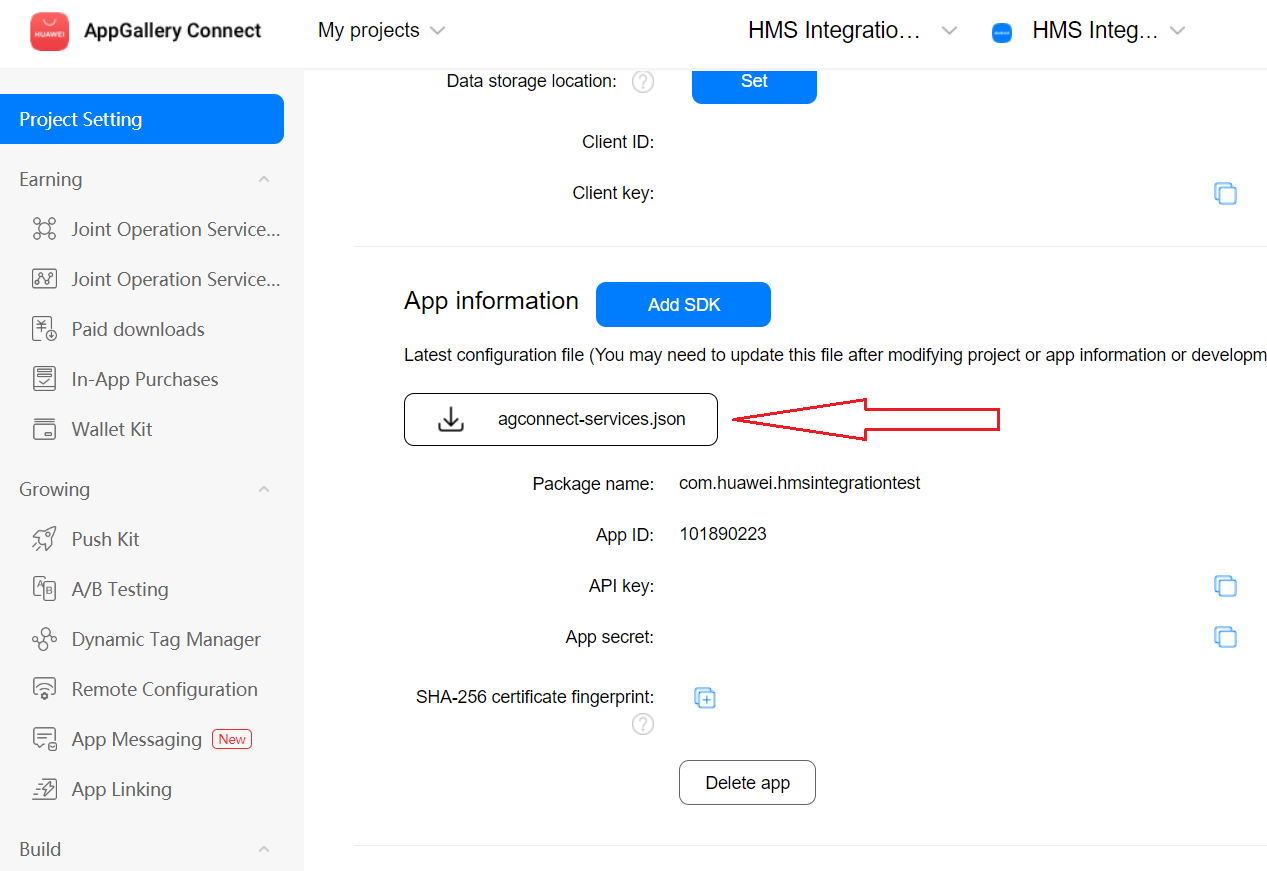
8. Add Ability Gallery Connect Json to Your Project
After finishing all the steps above, “agconnect-services.json” file needs to be downloaded from developer.huawei.com and this downloaded json file needs to be moved to the under “app” folder of your project.

If you are reading this line and completed the steps above, congratulations you have successfully implemented HMS Core to your project.
Related Documentation
Codelab for HMS Integration
Preparations for Integrating HUAWEI HMS Core
During this step, you will create an app in AppGallery Connect (AGC) of HUAWEI Developer. When creating the app, you…
developer.huawei.com