On this article, I wish to share the steps to register an app within the Azure Energetic Listing.
Objective of app registration
- It’s used to combine the appliance and repair with Azure AD.
- Utilizing Azure App, we are able to generate the token to authenticate the appliance.
- If we wish to use the Azure AD capabilities, we should register the app.
- After we register the app, we are able to get the “Shopper ID, Secret key”.
Steps to register the brand new utility in Azure AD
Observe the below-listed steps to register the appliance.
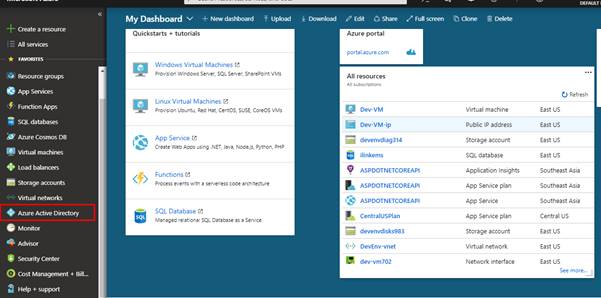
Step 1. Log into the Azure portal utilizing your Azure account.
Step 2. Choose Azure Energetic Listing from the left navigation.
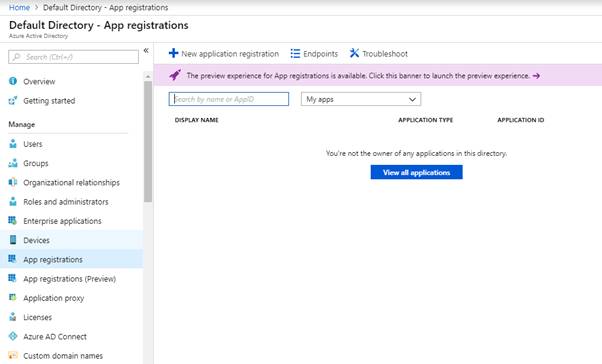
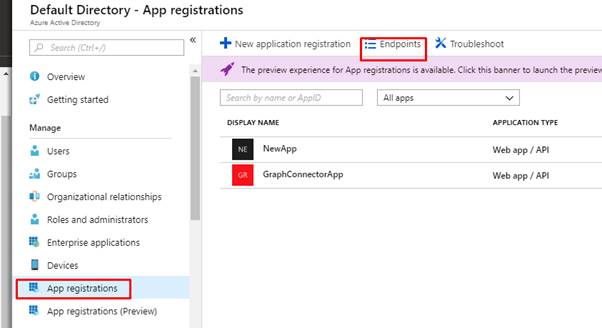
Step 3. On the “Default listing” web page, choose the “App registrations” from the left panel, as proven beneath.
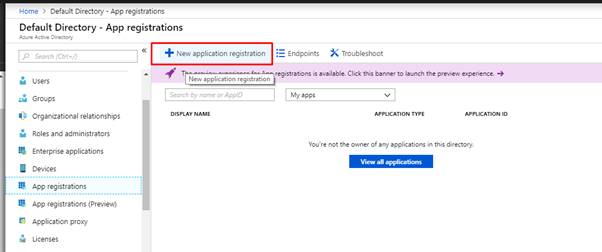
Step 4. From the App Registration pane, click on the NewApplication Registration choice.
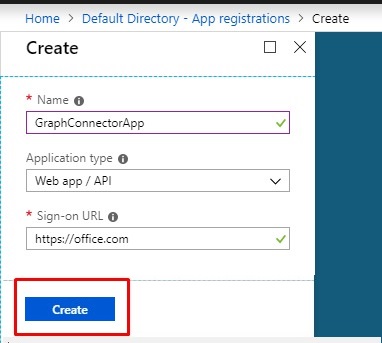
Step 5. On the “Create” pane, sort within the following data after which click on the “Create” button.
| Subject | Description | Pattern |
| Identify | Identify for the brand new utility. Kind within the desired utility title. | GraphConnectorApp |
| Software sort | Depart as Internet app/API | Internet app/API |
| Sign up URL | Login URL. (To get the information from Graph API, we don’t want to offer the correct login URL. Simply give the workplace URL) | https://workplace.com |
Step 6. As soon as the appliance is created, edit the manifest file and alter the worth of the oauth2AllowImplicitFlow parameter to true.
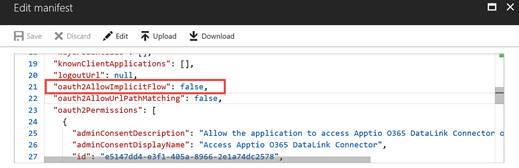
Earlier than
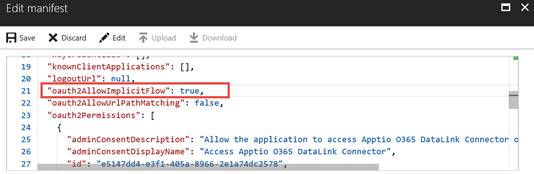
After
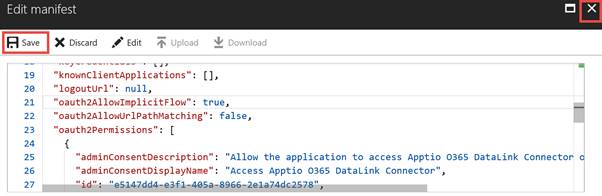
Step 7. Save the adjustments first after which click on X to shut the pane.
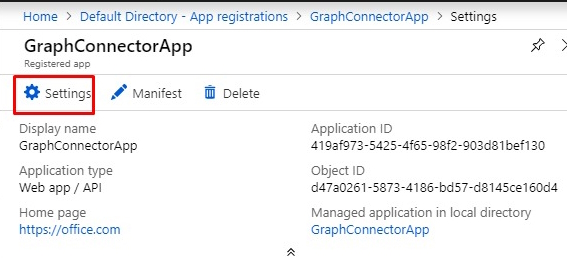
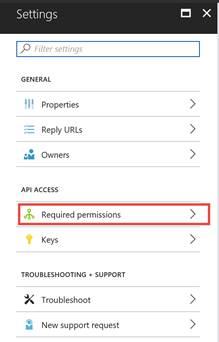
Step 8. Then, we have to add the permissions. From the Registered App pane, click on the “Settings” choice.
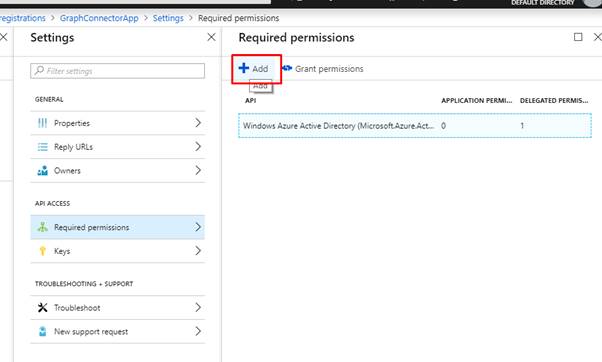
Step 9. From the Settings pane, click on the “Required Permissions” choice.
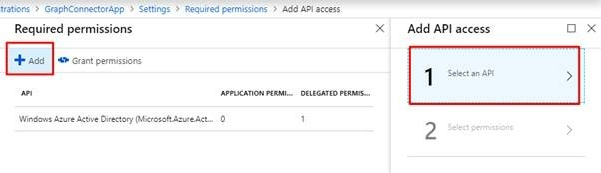
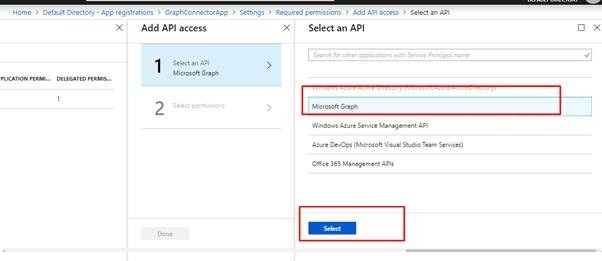
Step 10. Now, click on on + Add, then select “Choose API”.
I’ve deliberate to make use of the brand new app for Graph API so I’ve chosen Microsoft Graph. As per your want, you’ll be able to choose a unique API.
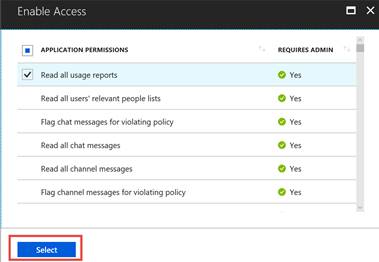
Step 11. From the “Allow Entry” pane, place a verify within the checkbox in entrance of the next permissions from the Software Permissions and Delegated Permissions sections. Then, click on the “Choose” button.
Software Permissions

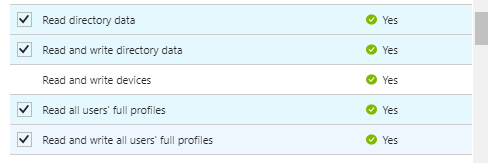

Delegated Permissions

Save the permissions
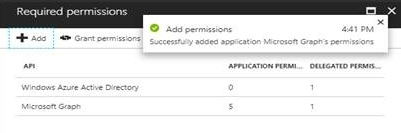
Step 12. From the Add API Entry pane, confirm the rely of roles and scope. Then click on the Completed button.
Step 13. On the Required Permissions pane, click on the “Grant Permissions” choice.
Notice: Solely Azure listing admin is in a position to do that.
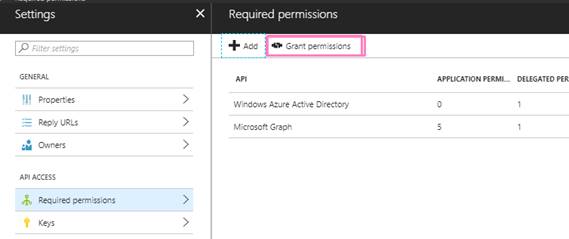
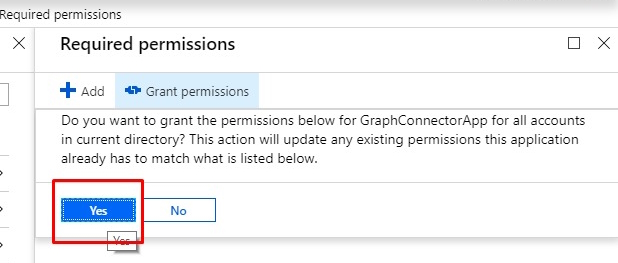
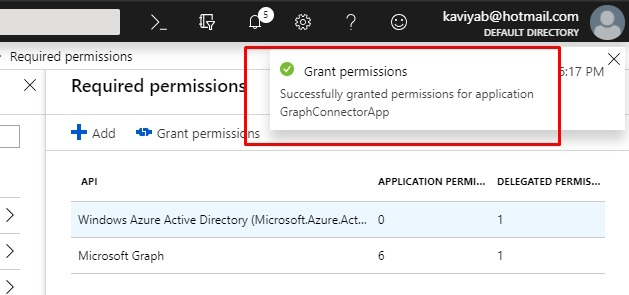
Lastly, you’ve granted permission to the Azure app.
Generate Secret key
Step 1. From the Azure Energetic Listing Admin Centre, open the created utility and click on the Settings choice.
Log into https://aad.portal.azure.com/ > Azure Energetic Listing > App Registrations > choose the created utility title.
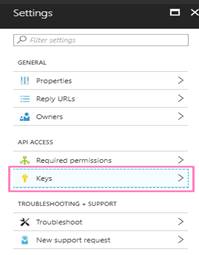
Step 2. From the Settings pane, click on the Keys choice.
Step 3. From the Keys pane, sort within the following data after which click on the “Save” button.
| Subject | Description | Instance |
| Description | Identify for the important thing. Kind in a descriptive title. | Secret Key |
| Expires On | Choose the By no means Expire choice. | By no means expire |
| Worth | You’re going to get the important thing if you click on on the save |
Step 4. From the Keys pane, copy the encoded key worth. This key worth can’t be retrieved after leaving this web page. This encoded key worth is the Shopper Secret Key that can be part of the authentication credential.
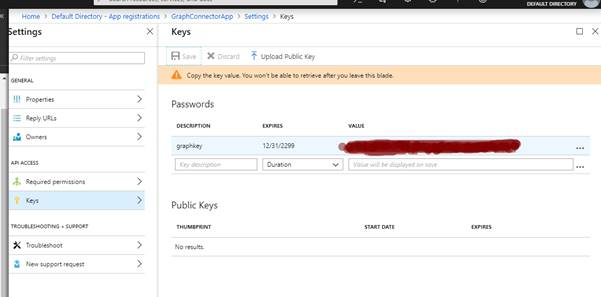
Then, shut the important thing pane.
Steps to get the Tenant ID
Step 1. From the Azure Energetic Listing Admin Middle, navigate to the App Registrations pane.
Log into https://aad.portal.azure.com/ > Azure Energetic Listing > App Registrations.
Step 2. From the App Registrations pane, click on the Endpoints choice.
 &;
&;
Step 3. From the Endpoints pane, click on on the copy icon subsequent to the OAuth 2.0 Token Endpoint choice and save the worth.
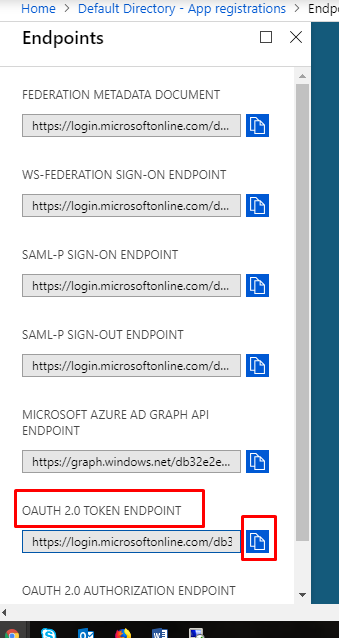
From the copied endpoint URL, copy the worth between microsoftonline.com/ ….and / oauth2/token. That is the Tenant ID that can be a part of the authentication credential.
Get the Shopper ID
Step 1. From the Azure Energetic Listing Admin Middle, open the created utility and click on the Settings choice.
Log into https://aad.portal.azure.com/ > Azure Energetic Listing > App Registrations > choose the created utility title.
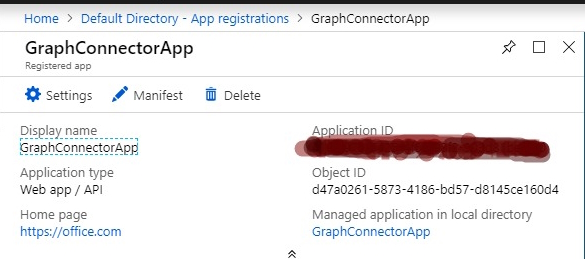
Step 2. From the Settings pane, copy the Software ID worth. That is the Shopper ID that can be a part of the authentication credential.
Abstract
On this article, we have now explored easy methods to register an app within the Azure lively listing. We additionally noticed that we’d like a consumer ID, secret key, and Tenant ID to generate the OAuth token for Graph API.
Completely happy studying.
Know extra about our firm at Skrots. Know extra about our companies at Skrots Providers, Additionally checkout all different blogs at Weblog at Skrots


