Introduction
In my earlier article, I had deployed a Kubernetes cluster How To Create An Azure Kubernetes Cluster and understood the fundamental ideas of Understanding Software Deployment On Kubernetes Cluster of deployment, now I’m going to elucidate how we will deploy an Nginx Container on to the cluster.
I’ve created these two .yml information, you possibly can go and execute these information for deployment.
- App.yml
- Service.yml
These configuration information are utilized by the kubectl instrument and primarily based on the configuration of those information, The Kubernetes cluster will take all of the contents of the file and do the deployment accordingly.
The primary file referred to as app.yml,
apiVersion: apps/v1
sort: Deployment
metadata:
title: nginx-deployement
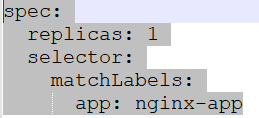
spec:
replicas: 1
selector:
matchLabels:
app: nginx-app
template:
metadata:
labels:
app: nginx-app
spec:
containers:
- title: nginx
picture: nginx:1.17.0
sources:
requests:
cpu: 100m
reminiscence: 128Mi
limits:
cpu: 250m
reminiscence: 256Mi
ports:
- containerPort: 80
On this file I’ve given all of the configurations associated to deployment, mainly, on this deployment, Kubernetes goes to select the Nginx picture from Docker Hub,
Azure Kubernetes may also choose up the picture from ACR(Azure container Registry).
Let’s undergo a few of the necessary sections of this deployment file.
- apiVersion: apps/v1
This part specifies the model of the deployment. Once we replace the deployment we will additionally replace the model of deployment. - sort: Deployment
It specifies that it is a deployment that must be carried out on the Kubernetes cluster. - Specification
Duplicate specifies what number of replicas are required to be created for this software/container since it is a demo, I’ve talked about only one. Selector specifies which software goes to be related to this duplicate.
- Template
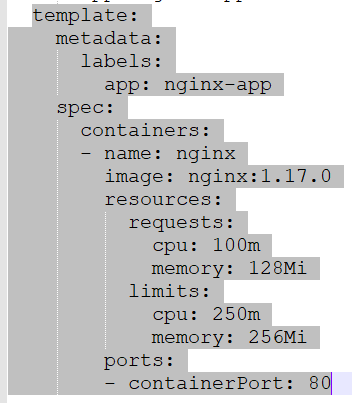
This part specifies the definition of container which goes to be created on Kubernetes cluster with the title “nginx” and the picture “nginx:1.17.0” will going to be pulled from Docker Hub with a view to deploy on the container. The sources part specifies the configuration of the actual container when it comes to CPU, reminiscence, and most restrict. I’ve additionally uncovered the containerPort as 80 which is required to speak for http requests. I’ve given the title of the appliance as “nginx-app” which is able to run on this container.
Now let’s discuss concerning the second file service.yml
apiVersion: v1
sort: Service
metadata:
 title: nginx-service
spec:
 sort: LoadBalancer
 ports:
 - port: 80
 selector:
 app: nginx-app
One other file that’s required for this deployment known as the service.yml file. It acts as a load balancer behind that our Nginx container will run on the Kubernetes cluster. It will permit reaching the house web page of the appliance of the Nginx container which is operating on the Kubernetes cluster.
Some necessary sections of this file are as follows,
sort: Service
This says it is a service sort of deployment. Which will probably be a entrance service for the backend container.
Specs
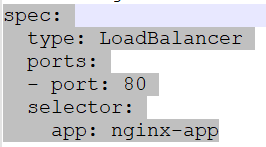
It specifies the opposite required configuration of the service file like “sort” which suggests it’s a load balancer that’s going to be uncovered on port 80 with a view to serve the http requests and the selector specifies the title of the appliance to speak.
Now now we have created our deployment and repair file so let’s undergo some Kubernetes instructions these are going for use to finish the deployment.
We are going to use the KuberCtl instrument which I’ve talked about in my earlier articles intimately what’s it and what’s the usage of this. Principally, it’s used to speak with the Kubernetes cluster.
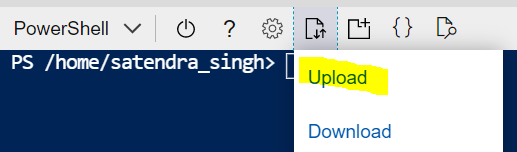
As a primary step, I’ll add each information to azure cloud shell from my native machine. that you must login into the Azure portal to entry the cloud shell.
Then will execute the instructions one after the other.
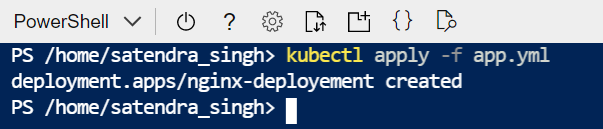
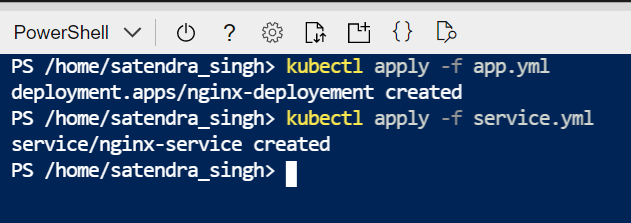
Kubectl apply -f app.yml
Kubectl apply -f service.yml
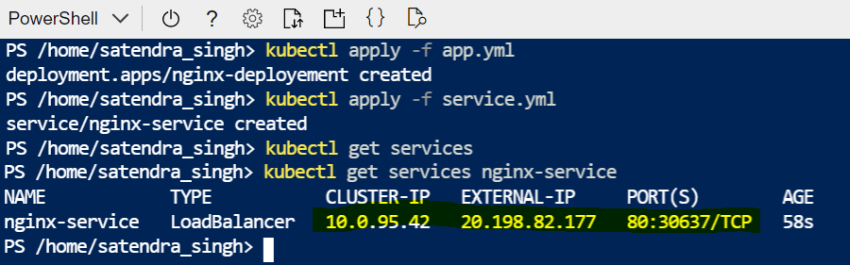
Kubectl get service nginx-service –watch
Right here we will see that our nginx-service has gotten an external-IP which will probably be used to achieve the appliance deployed on a container behind this load balancer service. It has been related to port 80.
So, If I copy this exterior IP and attempt to entry my deployment nginx software. We can see the Nginx web page meaning deployment has efficiently been accomplished.

Right here what now we have performed that now we have deployed our software to a POD that’s operating on a container on the Kubernetes cluster then now we have taken the external-IP/publicIP that has been assigned to our service in the course of the deployment so that each one http requests may be redirected to the backend software “nginx-app” therefore “nginx-service” acts as a load balancer right here.
Kubetl delete providers nginx-service
Through the use of this command, we will delete our deployed service.
Conclusion
We have now efficiently deployed an Nginx-app to the Kubernetes cluster with a load balancer service that’s operating on a container. We have now additionally mentioned how we create the deployment and repair file with a view to execute the deployment. We have now additionally seen how we outline the picture of the appliance which additional be pulled from both Docker Hub/ Azure Container Registry as each are used as a registry to retailer the pictures, once more that may be personal and public. The picture which now we have used is a public picture supplied by Nginx. I hope this demo is helpful for the educational path of Azure Kubernetes service and about its necessary ideas.