As an administrator, you could must lock a useful resource group, or useful resource to forestall different customers from unintentionally deleting or modifying important assets. The Azure useful resource supervisor offers two ranges of performance (CanNotDelete or ReadOnly) to have the ability to make acceptable settings. Within the portal, the locks are known as Delete and Learn-only respectively.
- CanNotDelete
This implies these customers who’re approved can nonetheless learn and modify the useful resource, however they aren’t in a position to delete the useful resource. - ReadOnly
This implies these customers who’re approved can learn a useful resource however they aren’t in a position to delete or replace the useful resource. Making use of this position means granting the Reader position entry to the approved customers.
Azure useful resource locks could be utilized to particular person assets or to useful resource teams. Whenever you apply a lock at a mother or father scope, all assets inside that scope inherit the identical lock. Even assets you add later inherit the lock from the mother or father. When utilized to a useful resource group, all assets in that group, together with any created after the lock has been put into place will likely be locked.
Let’s take a look so as to add an Azure Useful resource Locks performance to your Azure useful resource group, carry out the next steps.
Step 1
Step 2
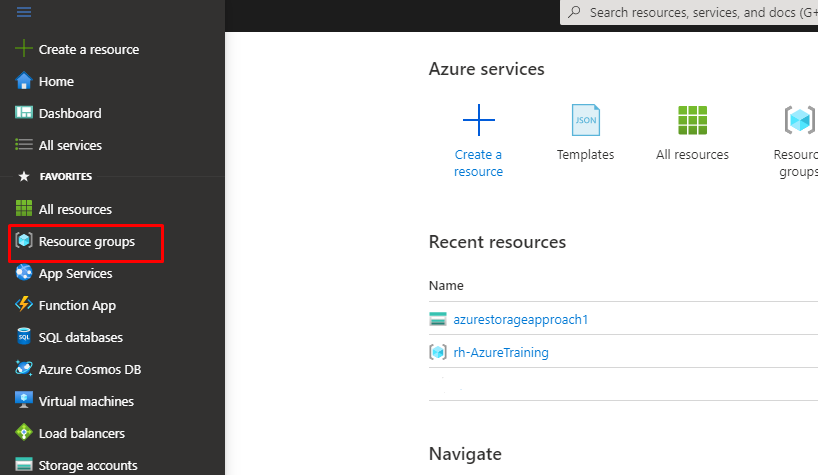
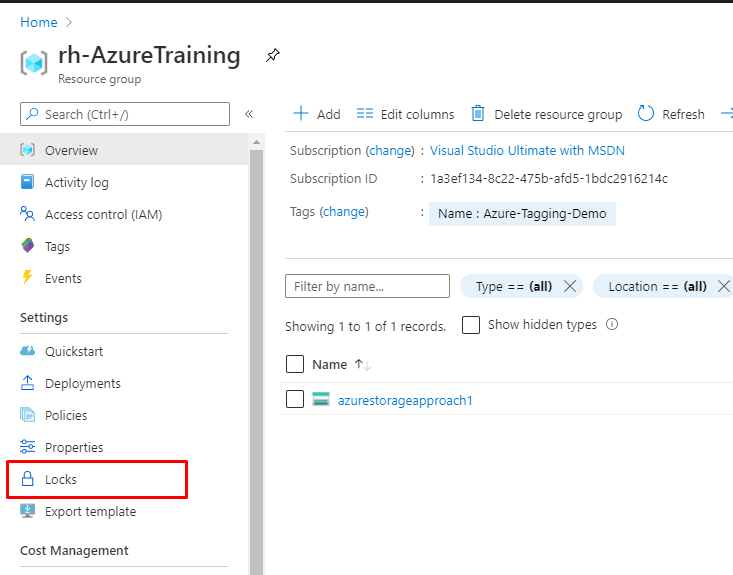
Within the portal, click on on the facet blade click on on the Useful resource teams,
Step 3
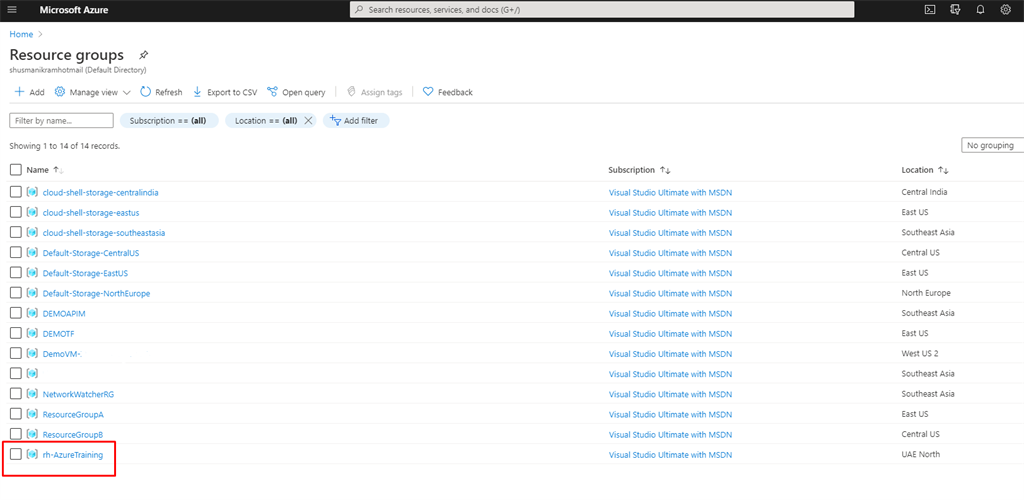
On the Useful resource teams blade, click on on the Useful resource group in my case identify rh-AzureTraining area.
Step 4
Within the navigation part on the Useful resource teams dashboard, click on on the Locks button
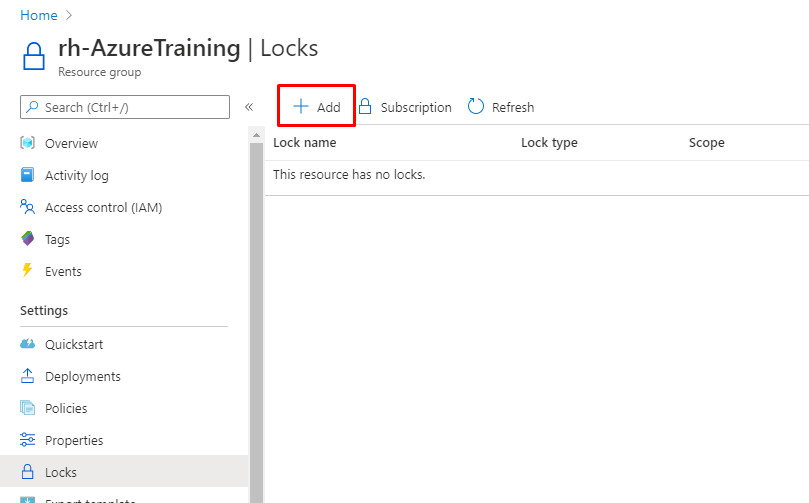
Step 5
On the Locks blade, click on on the Add button
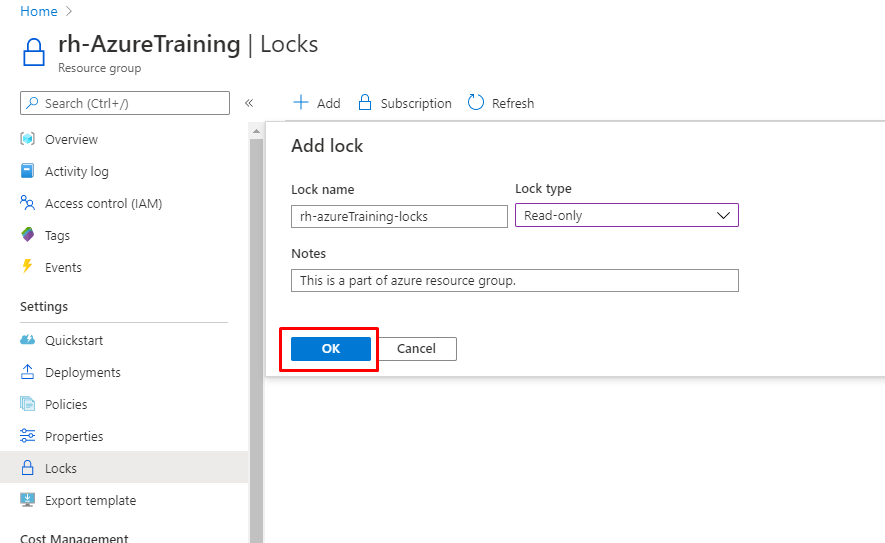
Step 6
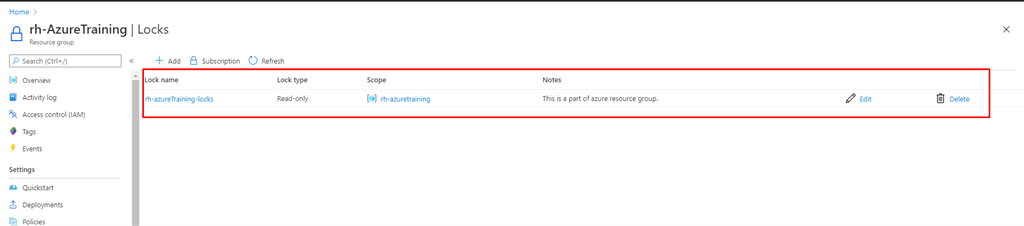
Now kind rh-azureTraining-locks within the Lock identify textbox, choose a Lock kind. In my case I choose Learn solely, write Notes for description and click on on OK
Step 7
Your first lock is prepared, you may see the main points of your Lock display screen panel.