Combine Or Authenticate ASP.NET Core Internet APIs And Angular Software With Azure Energetic Listing
This text explains combine an internet utility that’s constructed utilizing Angular and ASP.NET core net APIs, with Azure Energetic Listing. That is going to be a protracted put up so I’ve divided this into three components:
To observe alongside you’ll want to know or have the next:
- Primary Understanding of Azure Energetic Listing
- Azure Subscription
- Primary information of angular 2+
- Primary information of Asp.Web Core Internet APIs
All proper, now we’re good to go for step one. Let’s get began.
Arrange Azure Energetic Listing
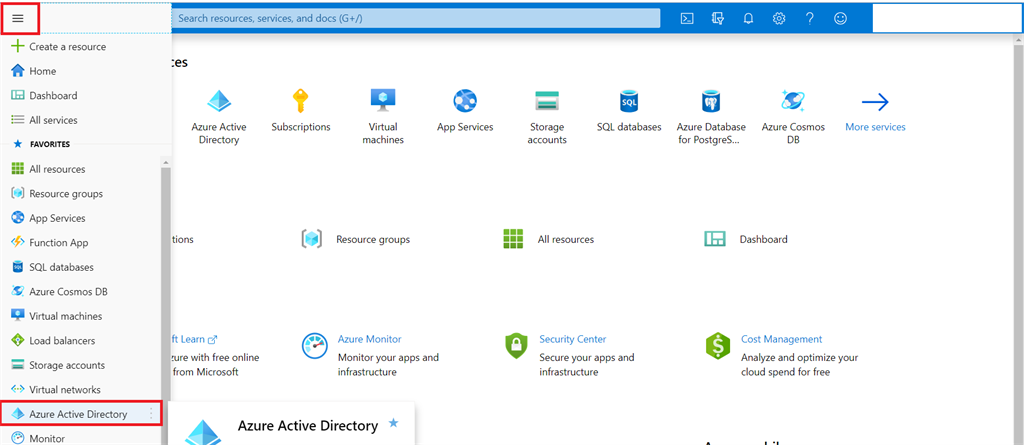
- Navigate to Azure energetic listing, yow will discover it in your favorites as proven beneath. If not obtainable then go to all companies and seek for energetic listing.
- Create a brand new listing by clicking on the Create Listing as proven beneath
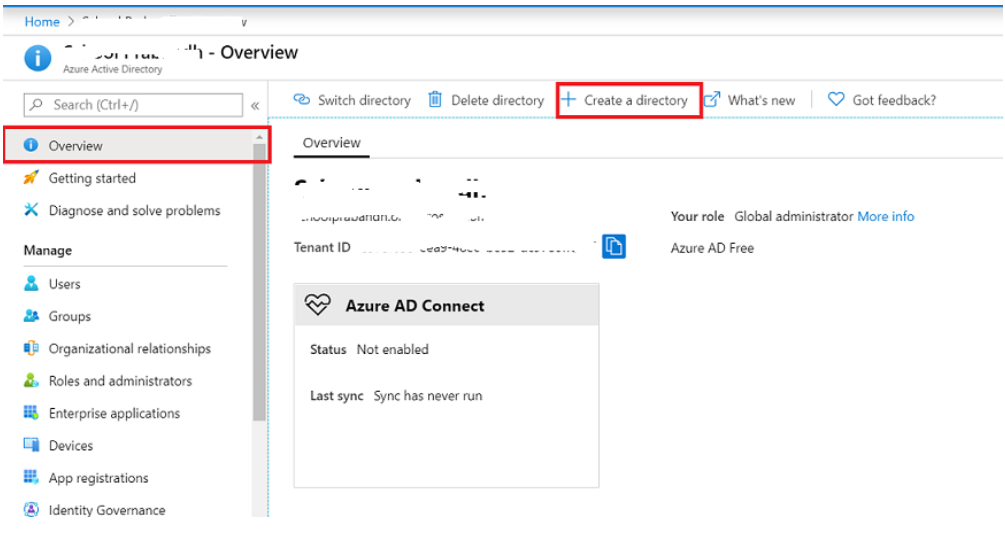
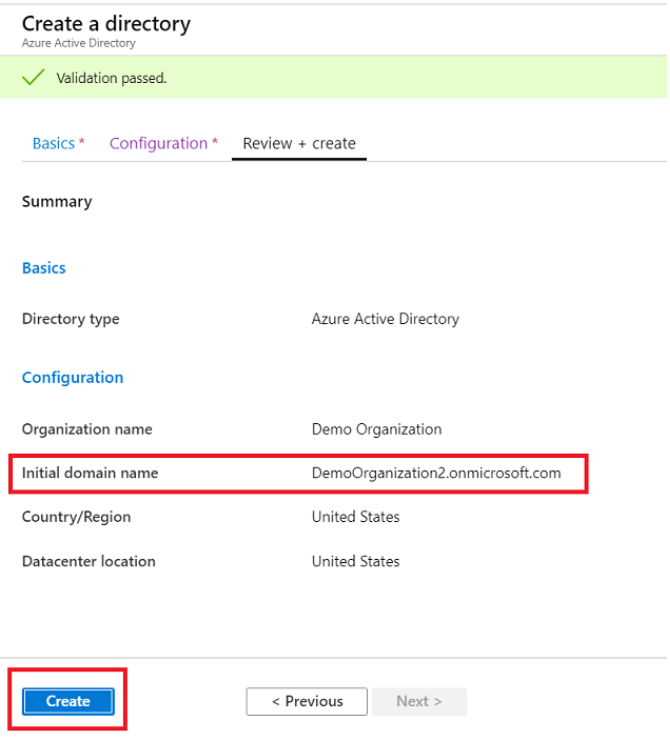
- Create an energetic listing by filling within the fundamental particulars, please make a remark of area identify.
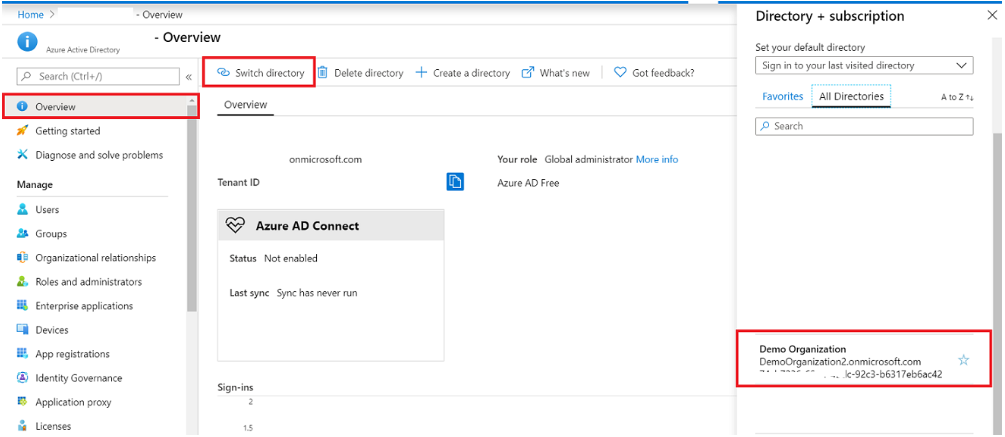
- After the profitable creation of the listing, let’s change the listing to the newly-created listing as proven beneath.
At this time limit, we’ve a brand new listing and now all we have to do is to register our purposes within the listing and provides some permissions. Let’s do this subsequent.
Register Consumer Software
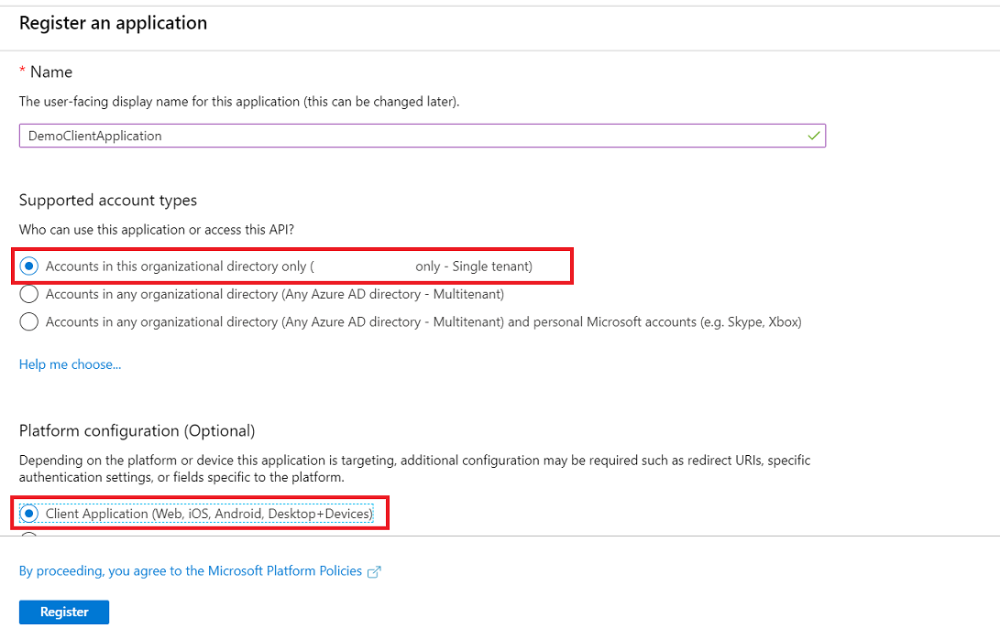
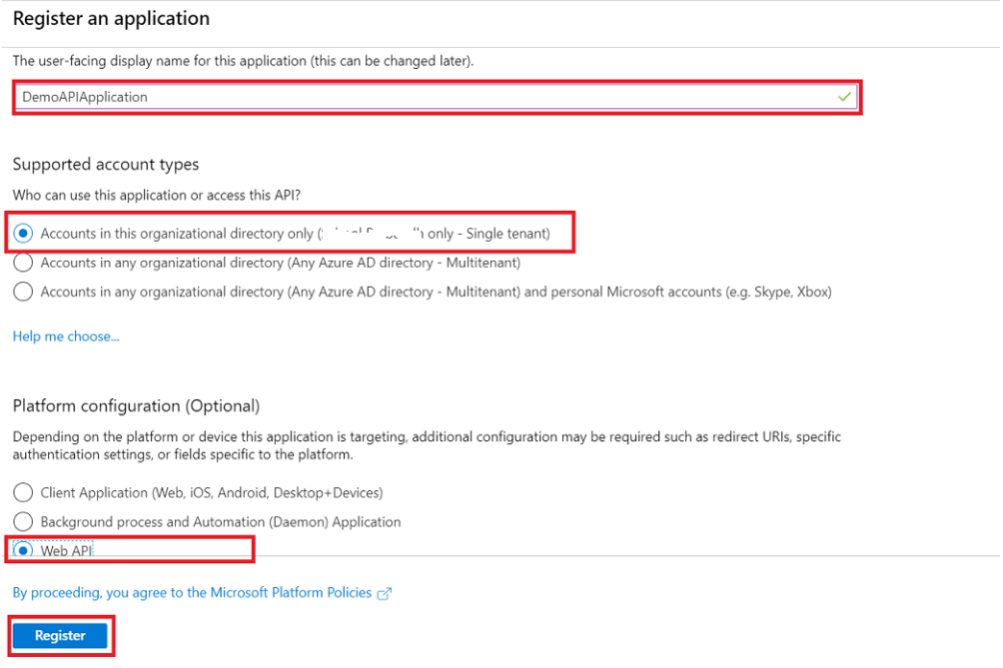
To register purposes click on on App registrations and fill within the particulars as proven beneath. As I do not need individuals from different organizations to entry this utility, I’ve chosen the primary choice. As soon as fundamental particulars are stuffed in please click on on Register.
Now go to the overview of this utility and observe the steps as proven beneath. Right here the quantity explains the sequence wherein you need to click on the hyperlinks.
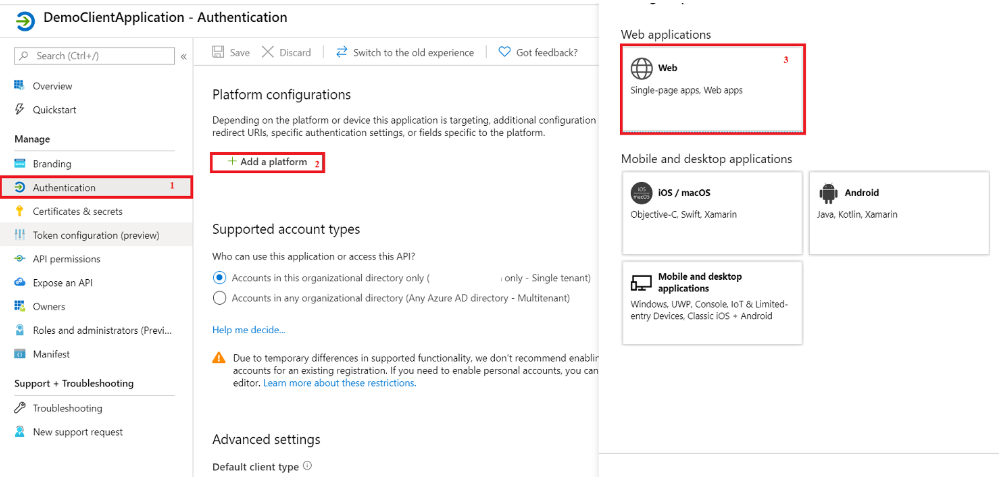
and fill within the required particulars.
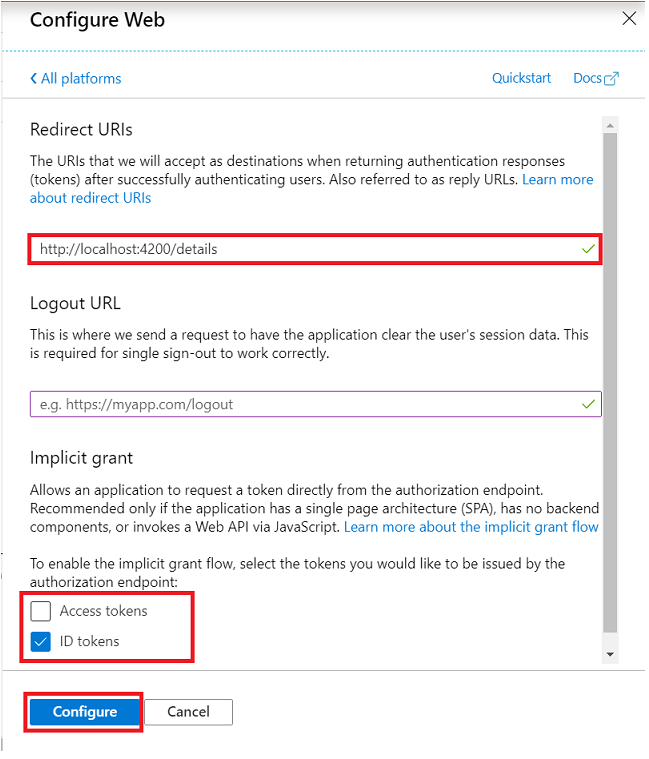
- Redirect URI
AD will redirect the person to the talked about URI as soon as authentication is profitable. These URI might be modified later as properly – for now simply give localhost URI. - Implicit grant
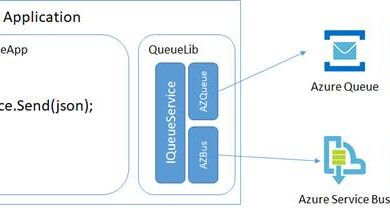
I solely want ID tokens after authentication as my utility is SPA and would not have any backend. Entry tokens are required to entry your backend. In our case, we can be constructing one other utility for our API and must get entry tokens in another way, which I’ll present you within the subsequent half.
That’s it – simply click on on configure and we’re executed with consumer utility registration. Subsequent can be API utility registration.
Register API utility
API utility registration can be nearly just like the consumer utility registration.
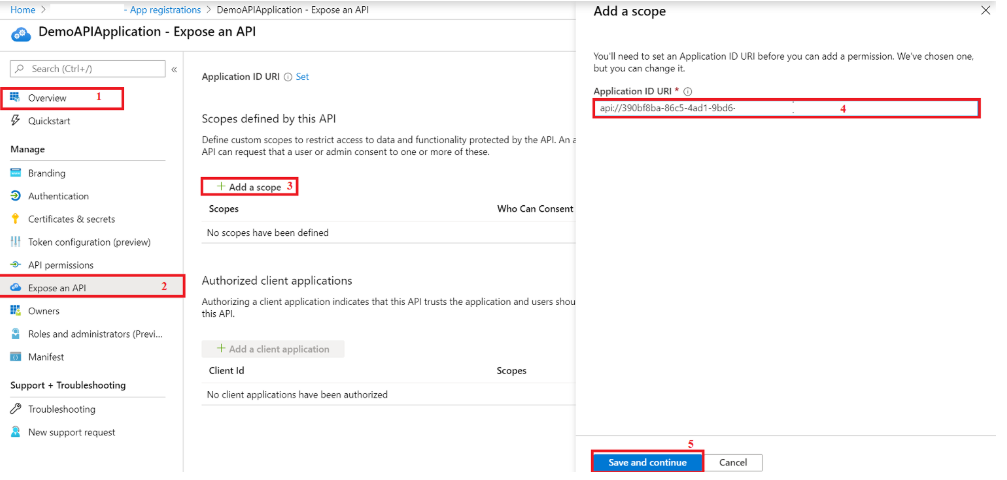
After registration let’s expose this API as proven beneath in order that our consumer utility can entry it.
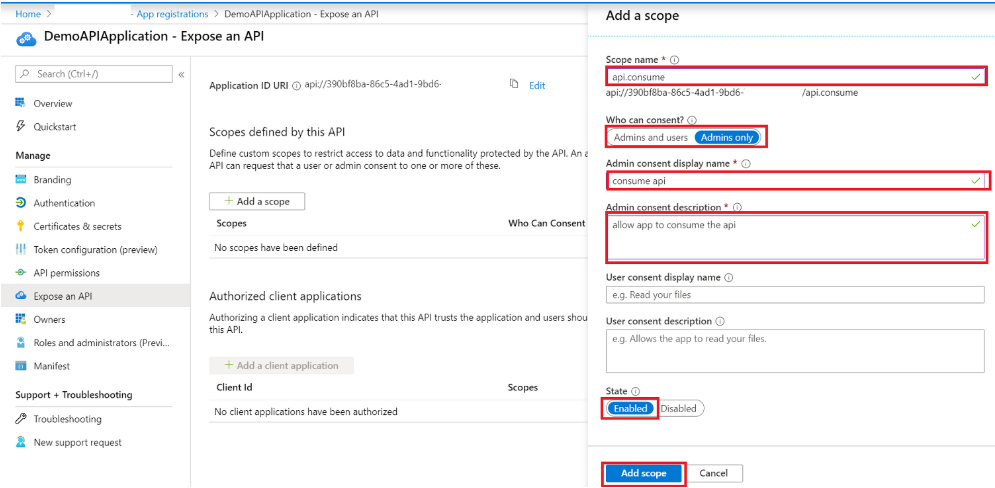
Fill within the particulars as talked about beneath. Right here we’ll solely be creating admin consent since API consumption is important for the consumer utility and solely admin consent can be required not every person who’s signing in. If we have been to make use of some third celebration API like a graph then we have to have person consent as properly.
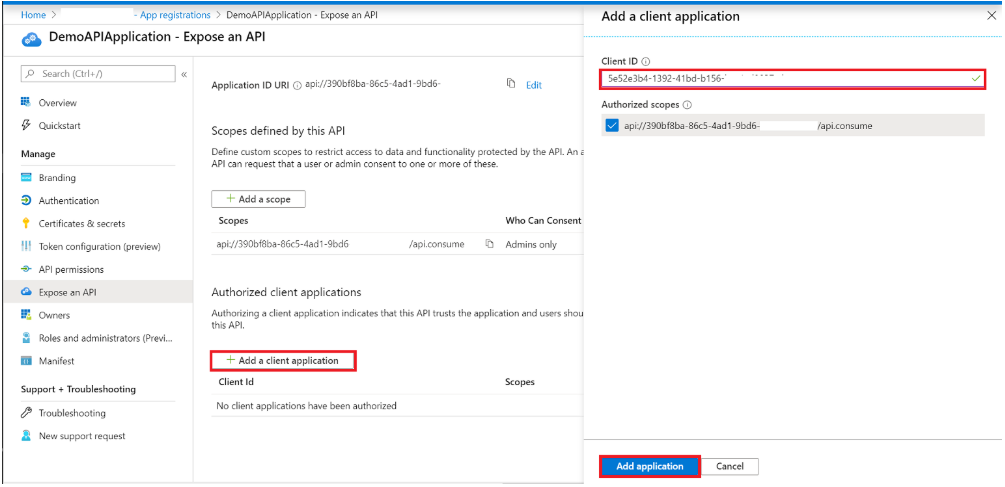
After including the scope, authorize the consumer utility by clicking on including a consumer utility as proven beneath. Right here consumer Id is the DemoClientApplication’s consumer ID which we created earlier. You may copy it from the consumer utility overview display screen.
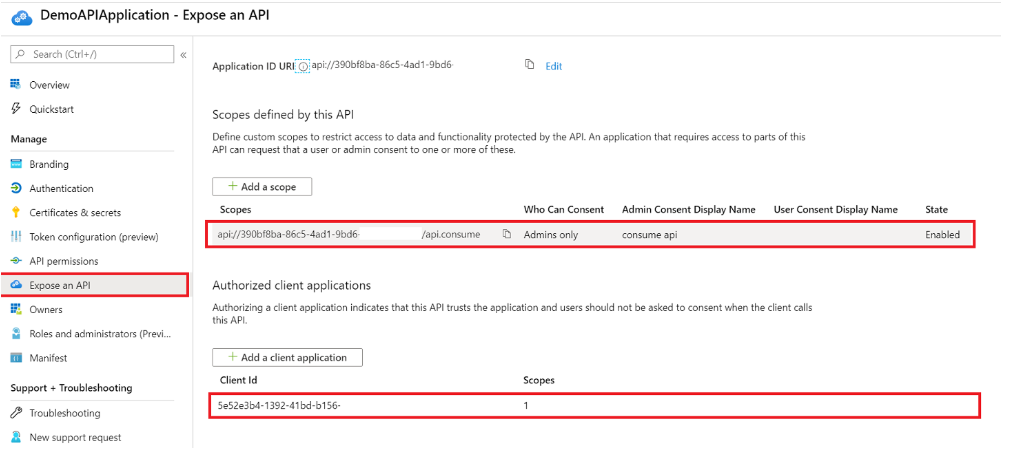
After performing all of the steps, expose an API blade ought to appear like beneath screenshot.
Thanks for studying this text, and please be at liberty to share the suggestions and any questions you’ve got.