Introduction
Microsoft Azure makes use of a DNS-based load balancer known as Site visitors Supervisor to regulate how customers are routed to their companies’ endpoints throughout a number of knowledge facilities. This software can defend your companies from subpar availability and response instances in Azure’s international areas.
On this article, we’ll discover ways to create a Site visitors Supervisor profile that gives excessive availability for our net utility.
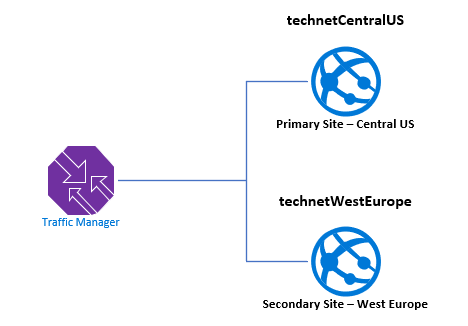
We’ve already created two situations of an internet utility. Each situations are positioned in numerous areas.
- WebApp1- technetCentralUS – Main Website
- WebApp2- technetWestEurope – Backup / Failover Website
Primarily based on endpoint precedence, we’ll create a Site visitors Supervisor profile. The profile directs consumer site visitors to the primary web site (Main web site) that hosts the net utility. The online utility is continually monitored by Site visitors Supervisor. If the first web site is unavailable, it routinely switches to the backup web site (secondary web site).
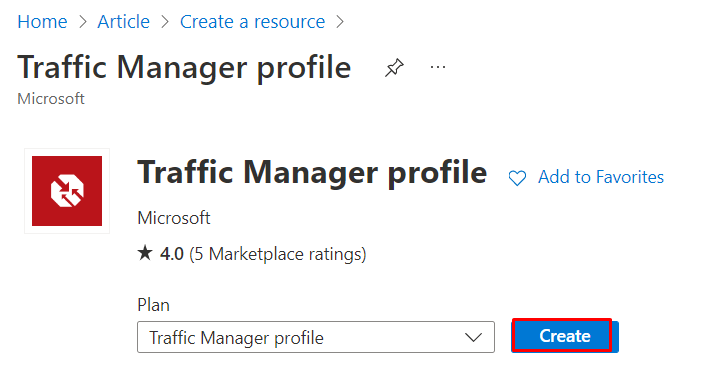
Step 1
On the Azure Portal, Click on + Create, and within the search bar, sort Site visitors Supervisor Profile. Then, choose Site visitors Supervisor Profile, and click on Create.
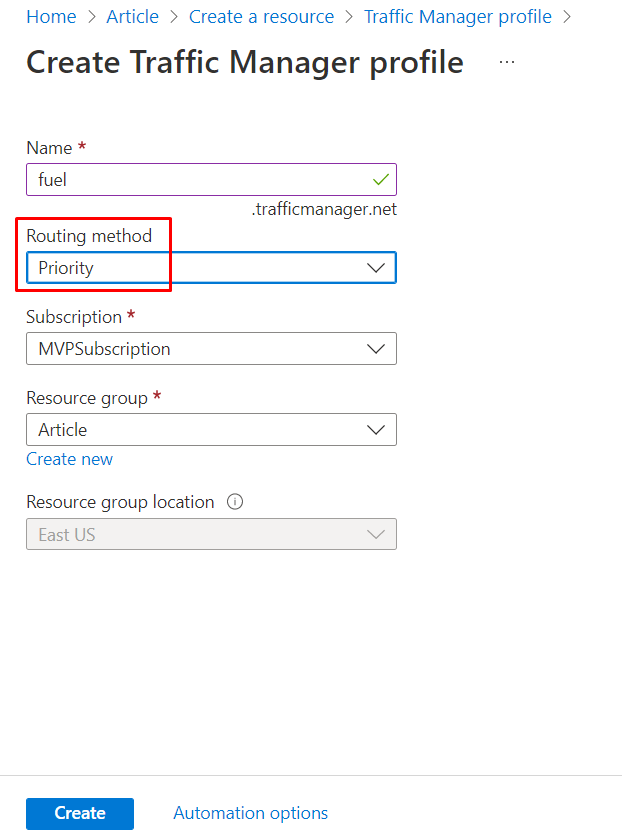
Step 2
Enter the identify for Site visitors Supervisor, choose the routing methodology as Precedence, after which click on Create.
Routing Strategies
Precedence routing: Our main endpoints prioritize site visitors, and the secondary endpoints will route site visitors in case of failover.
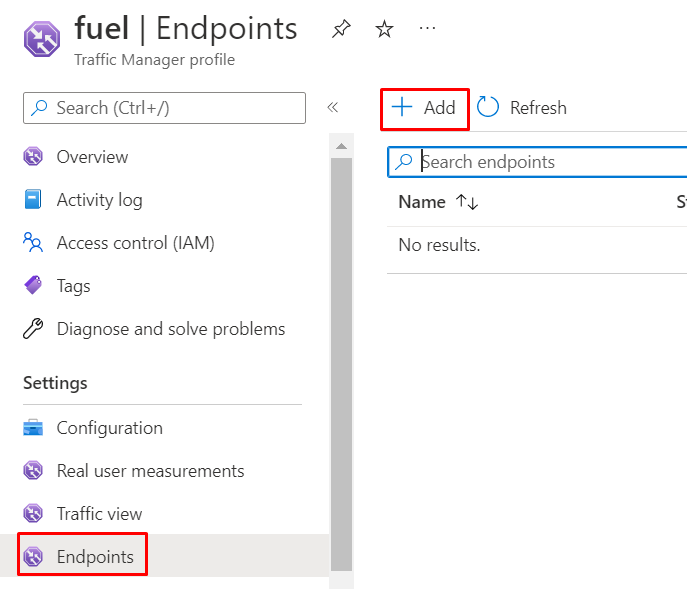
Step 3
Choose Endpoints underneath Settings, after which click on + Add.
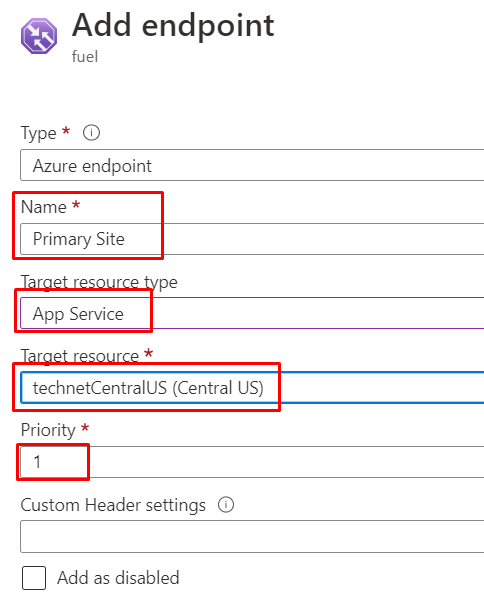
Step 4
Enter the identify for the endpoint as “Main Website” within the Goal useful resource group. Choose App Service, Goal useful resource, then choose our main web site (technetCentralUS) and set the precedence as 1. Then, click on Add.
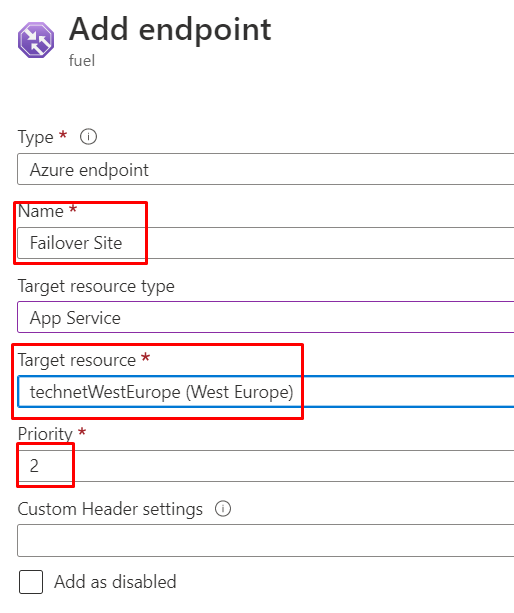
Step 5
Enter the identify for the endpoint as “Failover Website” within the Goal useful resource group, choose App Service, Goal useful resource Then, choose our Secondary web site (technetWestEurope), set the precedence as 2, after which click on Add.
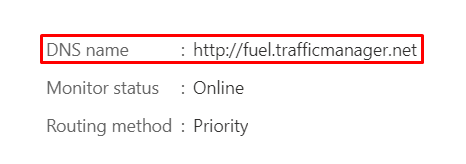
Step 6
Within the Site visitors Supervisor profile, copy the DNS identify.
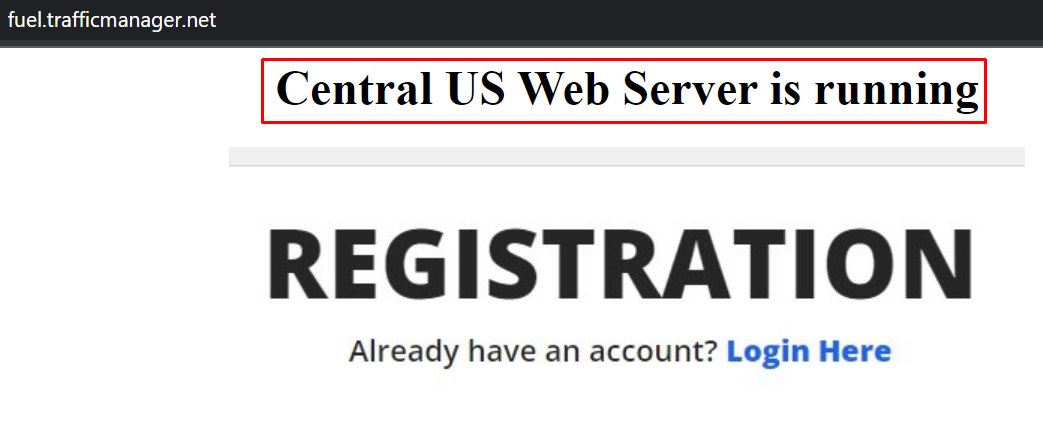
Step 7
Once we paste the DNS identify into the net browser, we’ll see our Main web site is working.
Step 8
Let’s verify how our Failover is working. Choose the Endpoints underneath the settings, after which choose Main Website.

Step 9
Change to the Disabled Standing and click on Save.
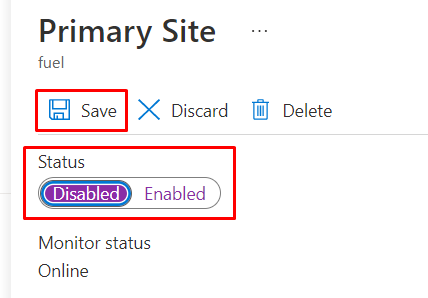
The Main Website is Disabled.

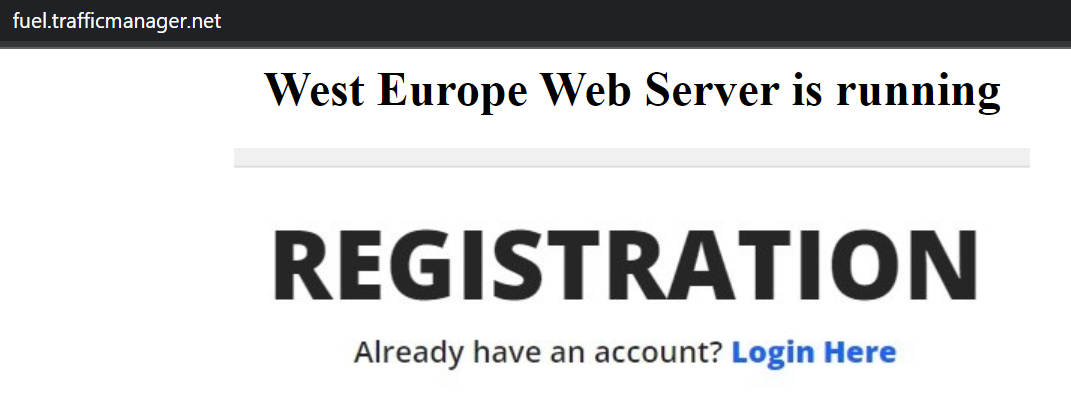
Step 10
Once we refresh the net browser, the Secondary web site (Failover web site) will probably be routinely activated, and we’ll see that the secondary web site is on-line. The first endpoint was unavailable, however the site visitors was routed to the failover endpoint to permit the web site to stay reside.
Abstract
On this article, we realized about deploying and managing Azure Site visitors Supervisor. If in case you have any questions, be happy to remark underneath my article.


