Introduction
Welcome to this article where we will delve into the topic of Service Bus Queue Trigger.
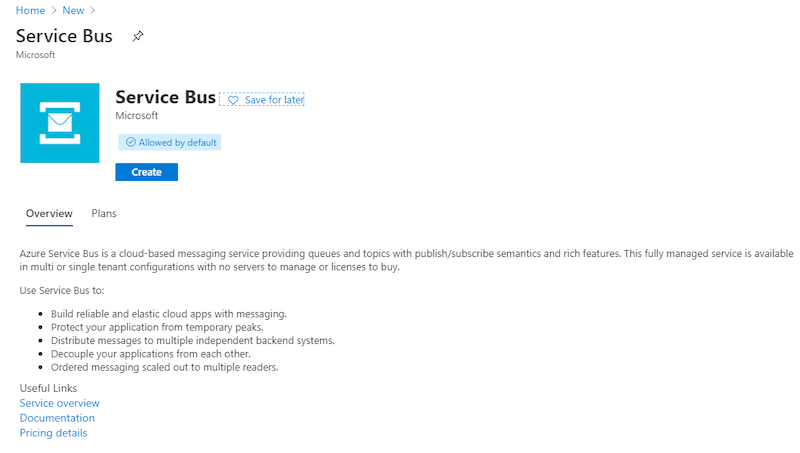
What is Azure Service Bus?
Azure Service Bus is a message broker service provided by the Azure platform. It allows you to publish messages to different applications and decouple them for better scalability and flexibility. There are two types of Azure Service Bus: queues and topics. Azure Service Bus Queues follow the First-In-First-Out (FIFO) pattern, where messages are added to the queue by the sender and taken by the recipient. Queues enable one-way communication and have a 1:1 relationship between the sender and receiver. Messages remain in the queue until they are processed and completed by the receiver.
Creating an Azure Service Bus Queue using Azure Portal
To create an Azure Service Bus and Queue in Azure, follow these steps:
- Sign in to Azure and select the “Create a resource” option.
- Search for “service bus” in the search box and click on it.
- Choose the “Create” option. This will take you to the “Create Namespace” page.
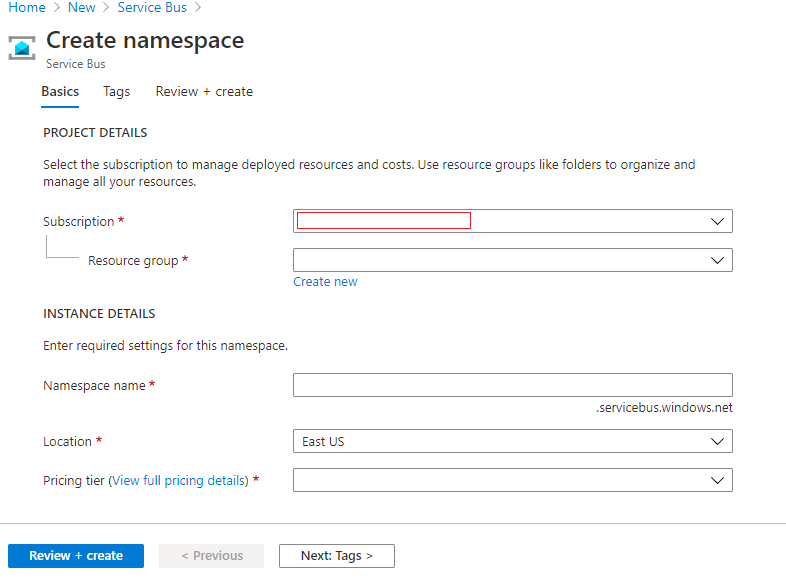
- If you already have a Resource Group, select it. Otherwise, click the “Create” button and give it a name. Resource Groups act as containers for your Azure resources, and Service Bus is one of those resources.
- The Service Bus namespace can contain multiple queues or topics. Ensure that the namespace has a unique name.
- Fill in all the required information and click the “Review + Create” button.
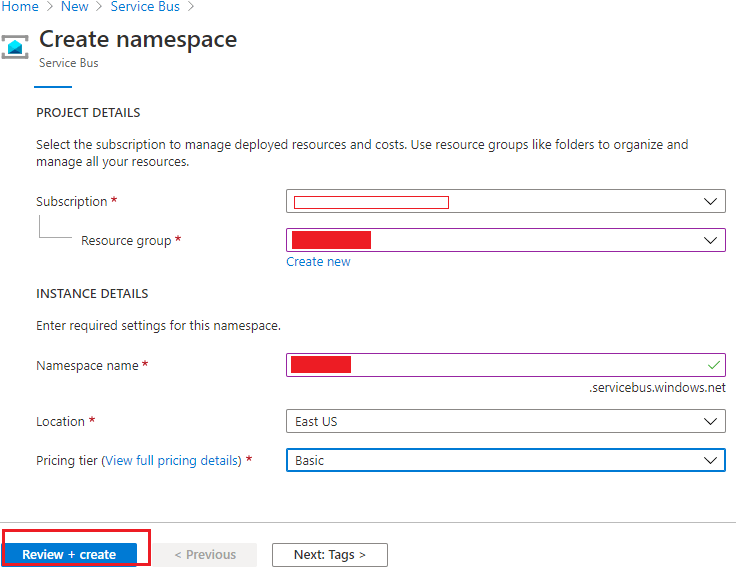
- Double-check everything before clicking the “Create” button.
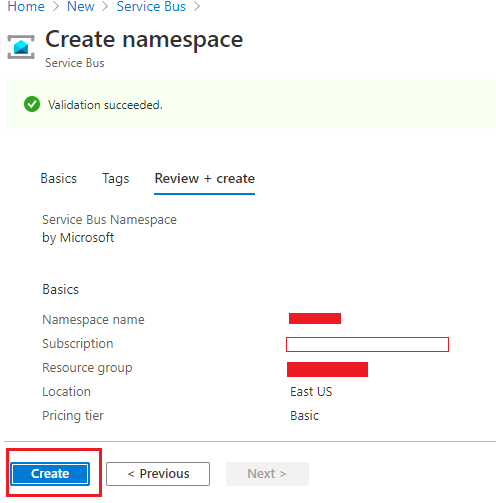
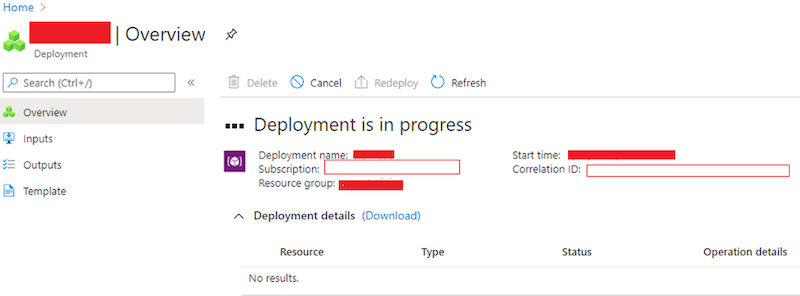
- Creating the resources will take some time. Please be patient while the deployment completes.
- Once the deployment is finished, you will see the “Go to resource” button.
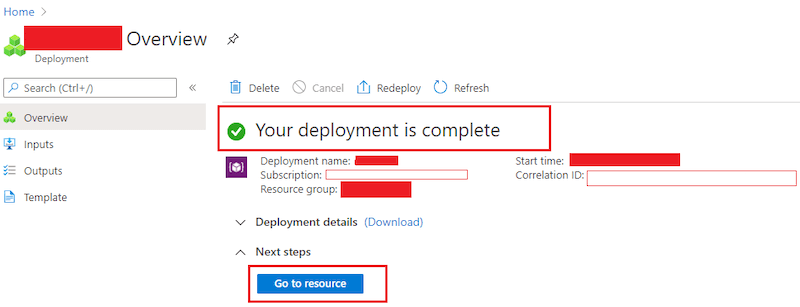
- Clicking on the “Go to resource” button will take you to the created resource.
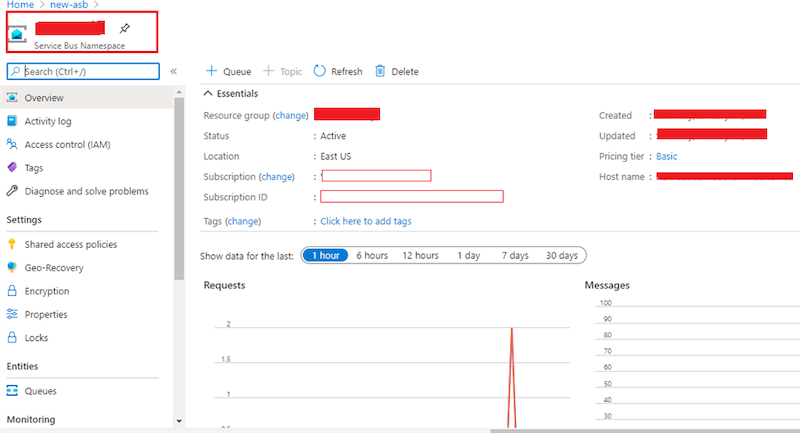
- Now that we have successfully created a new Service Bus, the next step is to create a Queue. In the left panel, go to the “Queues” section, click on “Queue,” give the Queue a unique name, and click the “Create” button.
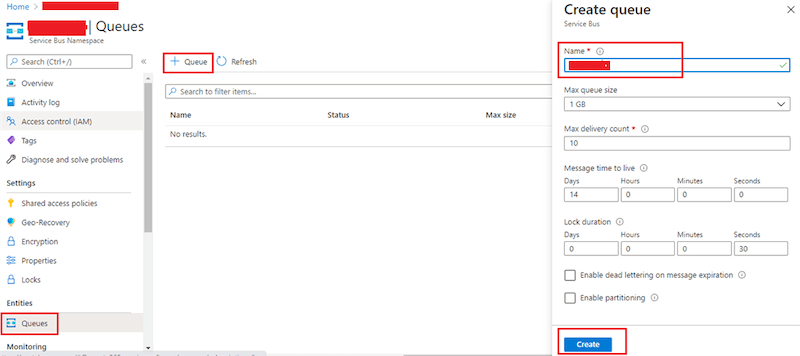
- And there you have it! We have created our first Queue.

To learn more about how Skrots can help you with Azure Service Bus Queues and other services, visit our website Skrots. You can also check out all our services at Skrots Services. Don’t forget to explore more informative articles on our Blog at Skrots. Thank you!


