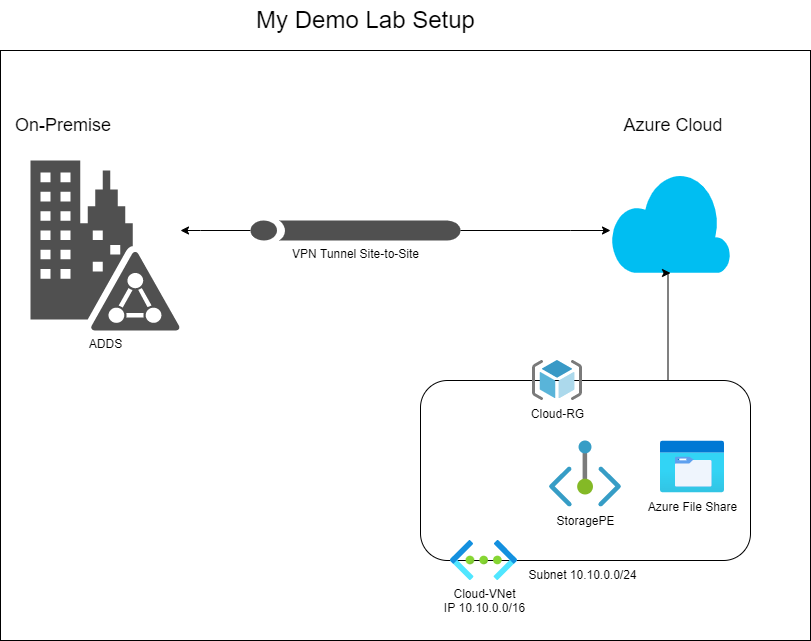
Introduction
Azure information share SMB Entry with on-premises Home windows AD authentication lets you entry file shares in Azure with NTFS entry management. By default, that entry gained’t lengthen to an on-prem community over VPN or Specific Route. On this article, I train easy methods to lengthen entry to Azure Information share with Home windows AD to an on-premises community utilizing Personal Endpoints.
Stipulations
- Lively Listing Area Companies in On-prem
- On-prem to Azure connectivity through VPN S2S
- Azure storage account
- Azure Personal Endpoint
Step 1
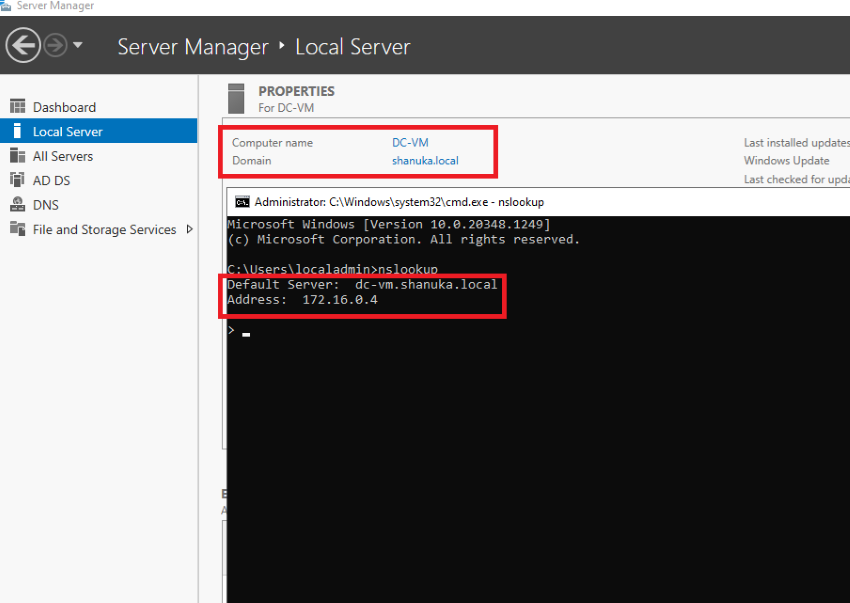
That is my area controller from On-prem
Step 2
Click on right here Create An Storage Account In Azure (c-sharpcorner.com) to create the storage account
Step 3
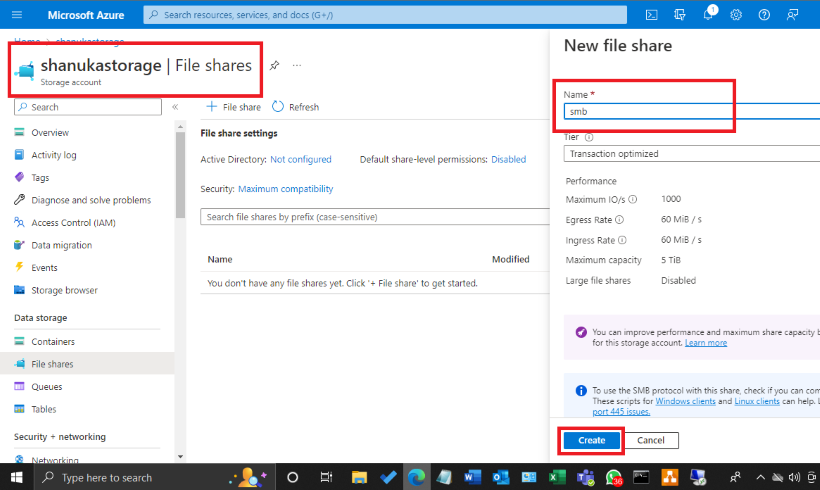
In your storage account create on a file share and make it SMB elevated contributor
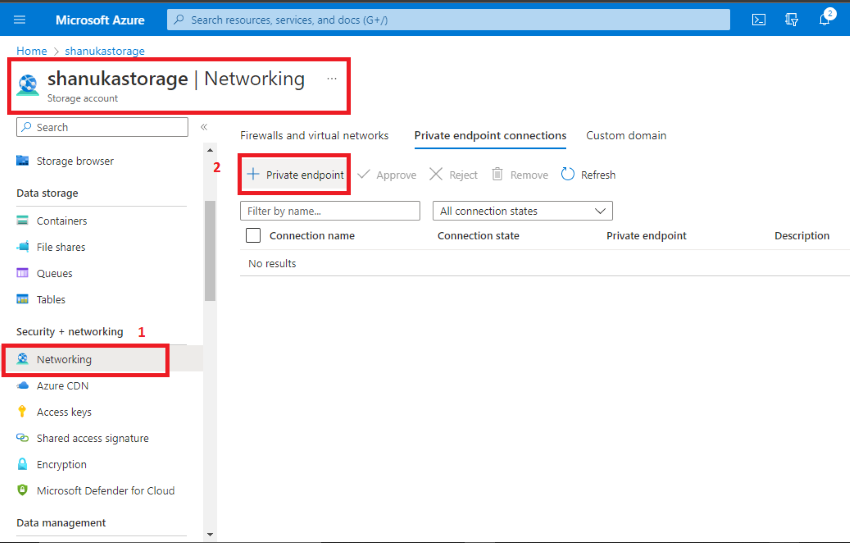
Implement a Personal Endpoint for the azure storage account
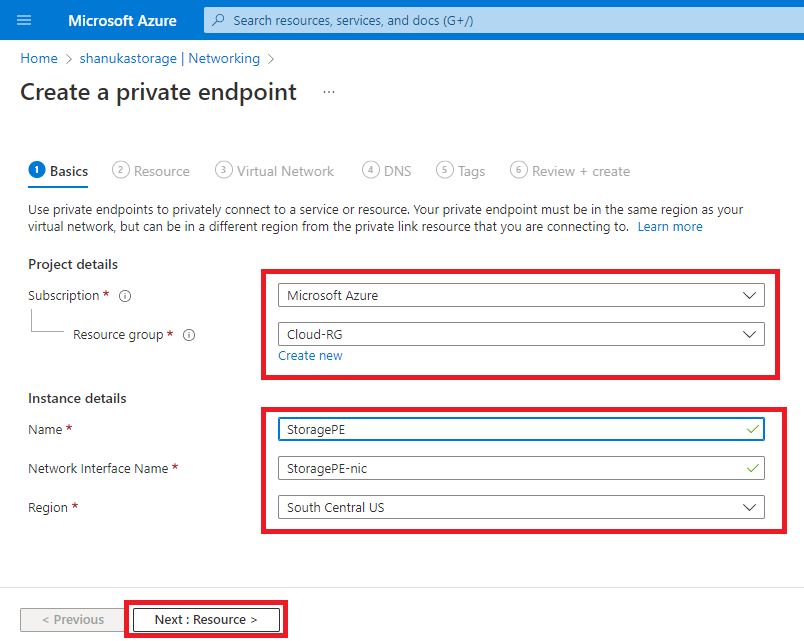
Step 1
Choose storage your account and create Personal Endpoint Networking>Personal endpoint connection
Step 2
Following the suitable steps.
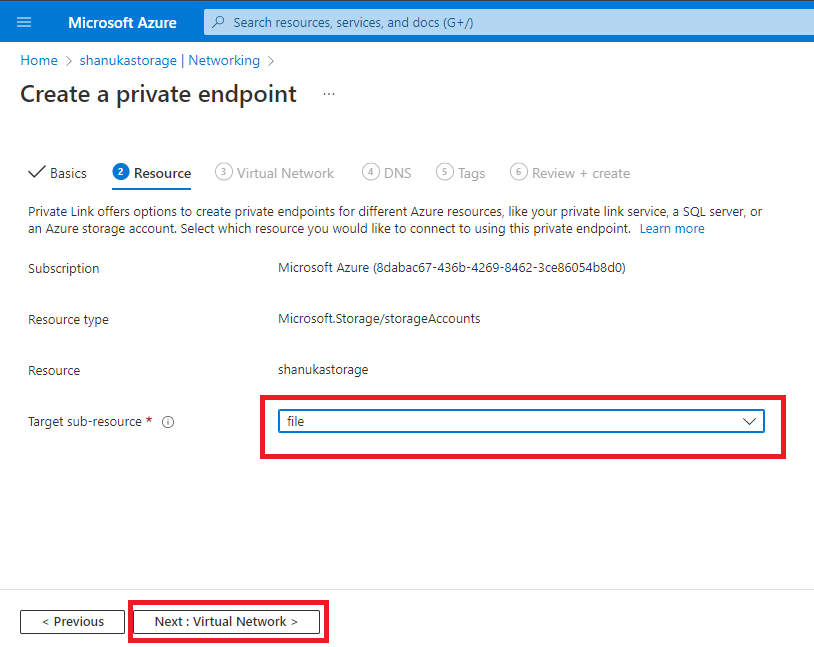
Step 3
Within the useful resource tab Choose file and Subsequent.
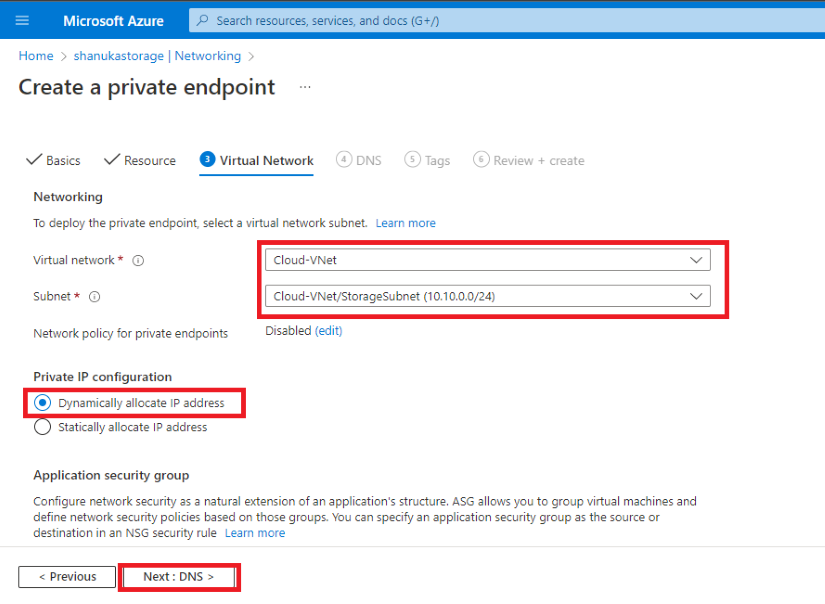
Step 4
Following the steps for the demo function, I’ve stored the non-public IP dynamic. If you need you’ll be able to change it.
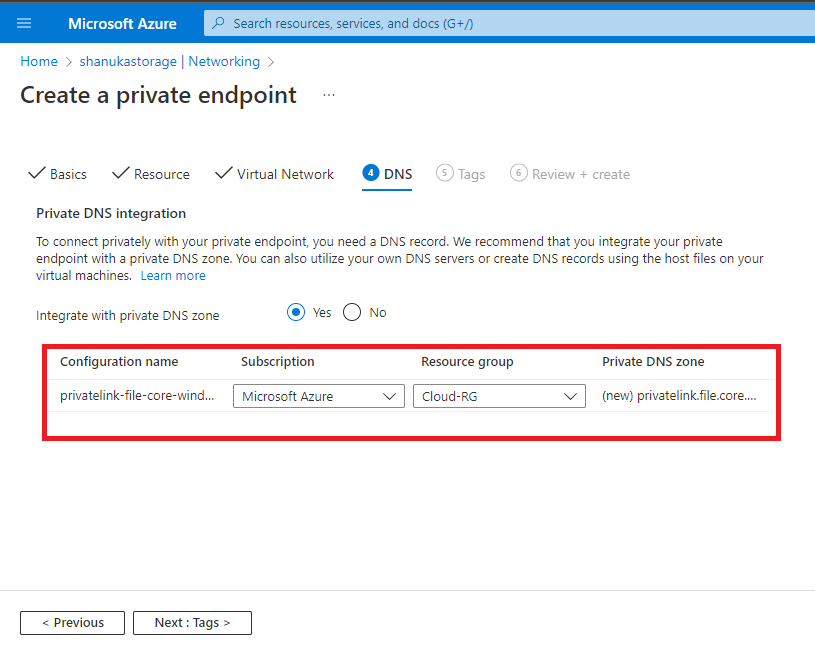
Step 5
I will use the default DNS identify for the demo function.
Step 6
Simply evaluation + create
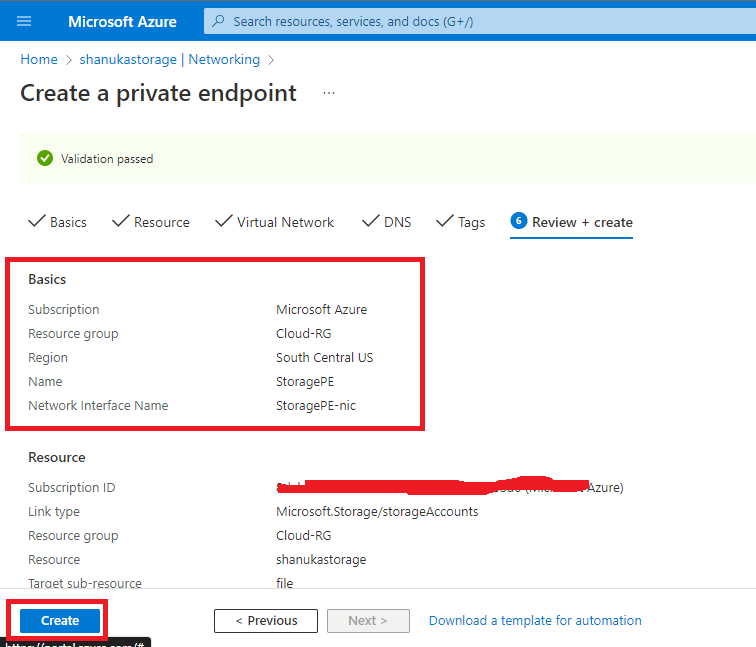
Step 7
Lastly created my non-public endpoint efficiently
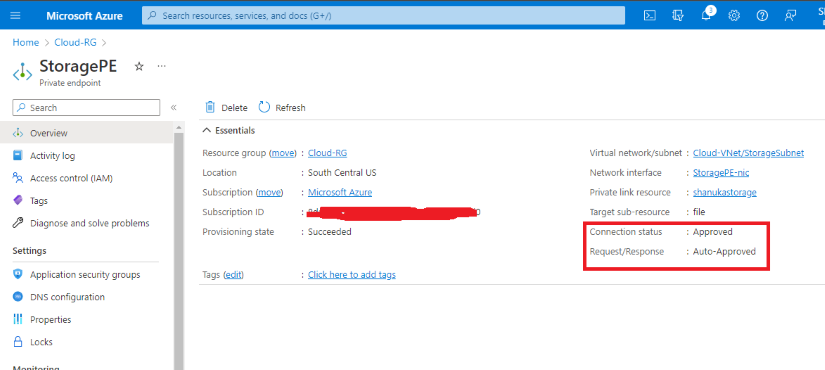
Be aware: When I attempt to resolve through identify however nonetheless resolved by Public IP
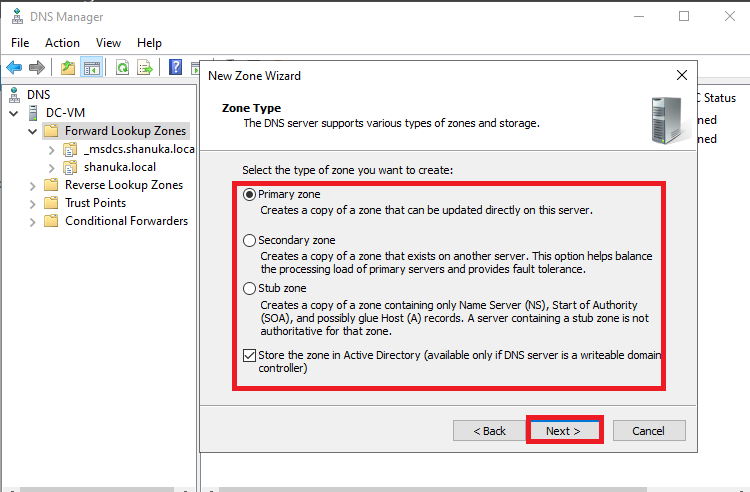
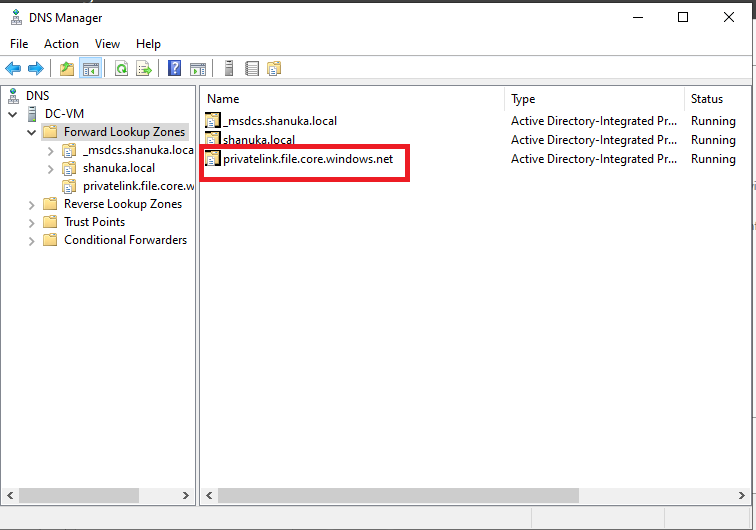
Implement DNS host document for storage account in DNS server
Step 1
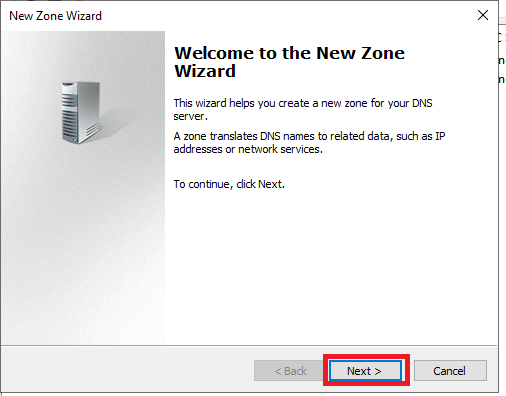
Open the DNS server and Choose Ahead Lookup Zones

Step 2
Click on Subsequent to create
Step 3
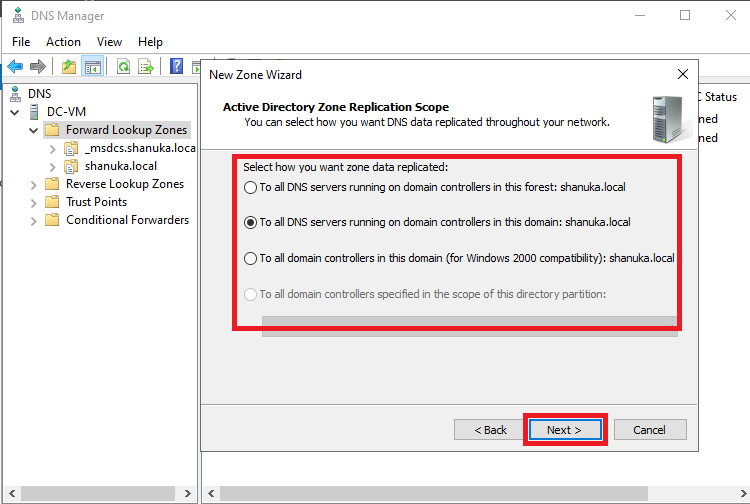
Choose zone and Subsequent
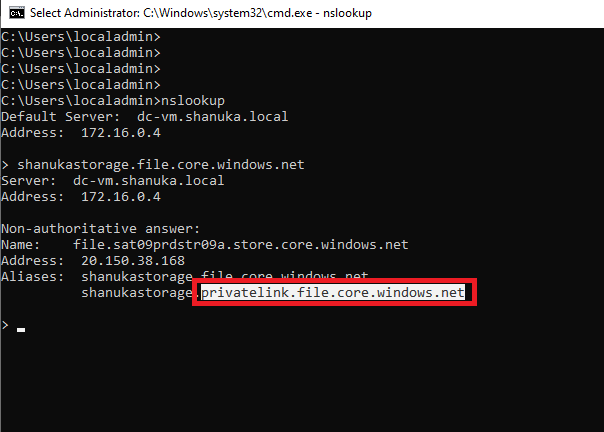
Step 4
Copy the privatelink.file.core.home windows.web
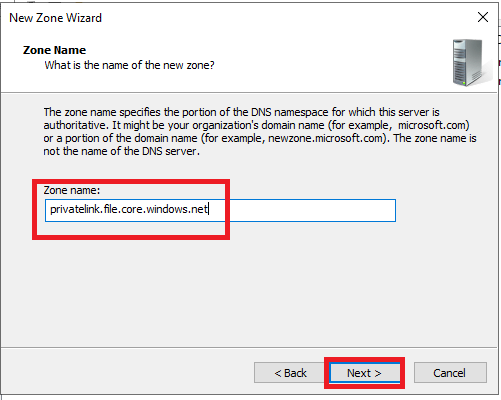
Step 5
Previous on the Zone Identify
Step 6
Efficiently created my Ahead lookup zone
Step 7
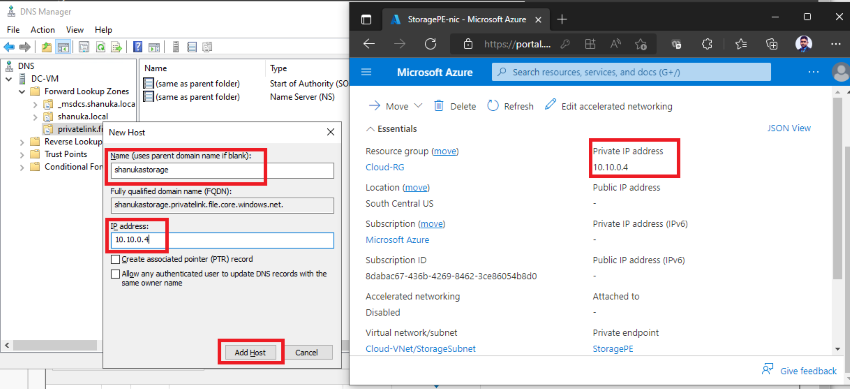
Create a New Host document in your non-public hyperlink zone
Step 7
The host document identify must be your storage account identify in my case I shanukastorage and IP tackle which you created a personal endpoint for storage. and Add Host
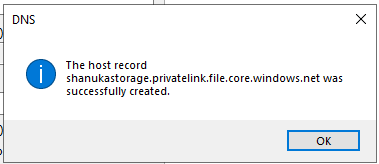
Step 8
Efficiently created my Host document.
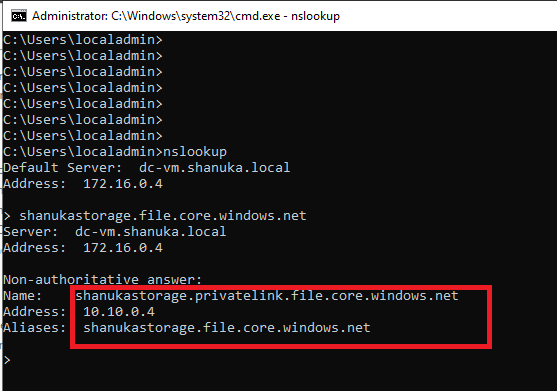
Step 9
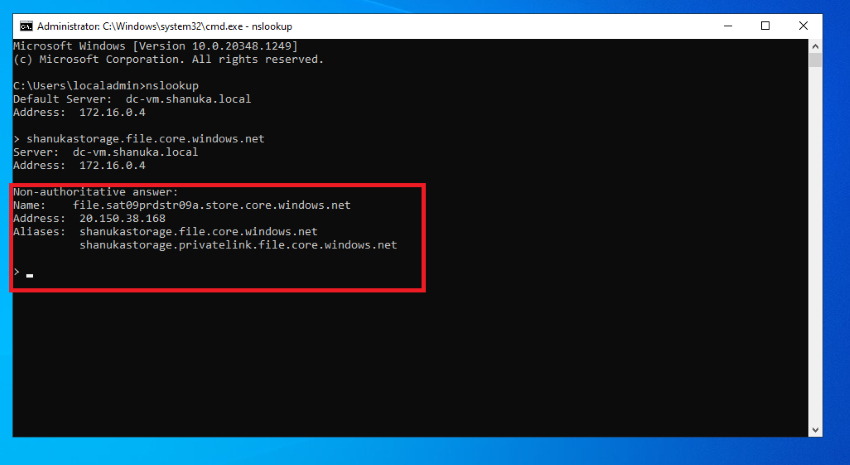
Lastly, my DNS Identify decision is working nice, and You possibly can take a look at through nslookup cmdlet
Efficiently identify resolved by non-public IP
Vital
If you wish to mount the azure file share drive to your domain-joined laptop utilizing AD credentials you are able to do it.
Conclusion
This text taught us easy methods to Implement Azure file share with built-in on-prem AD authentication. And if in case you have any questions do not hesitate to get in contact with me.
Thanks.