Introduction
On this article, we are going to focus on the best way to setup Azure Synapse Analytics with Non-public endpoint. Azure Synapse Analytics permits information analysts, information engineers, information scientists and BI analysts to create information merchandise beneath one instrument. Knowledge and community securities are essential for this PaaS service, and we have to guarantee all the info site visitors are stored in personal networking and away from publish web.
Earlier than we dive into the setup, let’s evaluation the three foremost capabilities of Synapse Analytics:
-
Serverless SQL Pool: This part is created by default. It means that you can question the info within the information lake utilizing SQL. This part supplies a simple method to question information with out the necessity of programming in Spark. This pool is paused robotically when not in used.
-
Devoted SQL Pool: This SQL pool is for the enterprise information warehouse. This part permits information to be processed and saved instantly within the database. Typically, this pool is stored operating on a regular basis however might be paused manually, if required.
-
Apache Spark Pool: This part makes use of Apache Spark to offer analysts learn and remodel information within the information lake. This service can be utilized for information engineering and Machine Studying duties.
Challenges
A typical request the info group acquired is the power to entry to the info within the information platform. In consequence, many information engineers concentrate on creating information pipeline to maneuver information from the info lake right into a SQL service to offer entry.
Azure Synapse analytics simplifies this course of by offering an all-in-one service for each enterprise and technical groups to work collectively. To supply a secure and safe setting for all of the groups, we have to setup Non-public endpoint to maintain information traffics personal and defend towards information exfiltration. The Professionals and Cons are:
Professionals
-
Non-public endpoint forces all networking site visitors between the swimming pools and the storage account to undergo the personal networking. This limits the site visitors from the general public web.
-
A managed Useful resource group is used to shops all of the Digital machine and networking sources for the serverless swimming pools. This permits the Knowledge Platform admin group to setup monitoring or value administration. The sources on this useful resource group might be managed by Azure Synapse Analytics so no upkeep is required.
Cons
-
There’s an added value of utilizing Non-public endpoint. Each ingress and egress site visitors might be charged.
-
Synapse Analytics requires “Storage Blob Knowledge Contributor” entry to an information lake. This entry grants Synapse each Learn and Write entry to the entire information lake. For information safety, we created a separate information lake devoted to this service.
Tutorial
On this tutorial, we are going to create a brand new Azure Synapse Analytics workspace. A brand new useful resource group is created to retailer the Synapse workspace and the devoted information lake.
-
Setup Knowledge Lake
- We’ll skip the info lake creation as we now have an in-depth tutorial in our earlier article.
-
Create Synapse workspace – Fundamentals
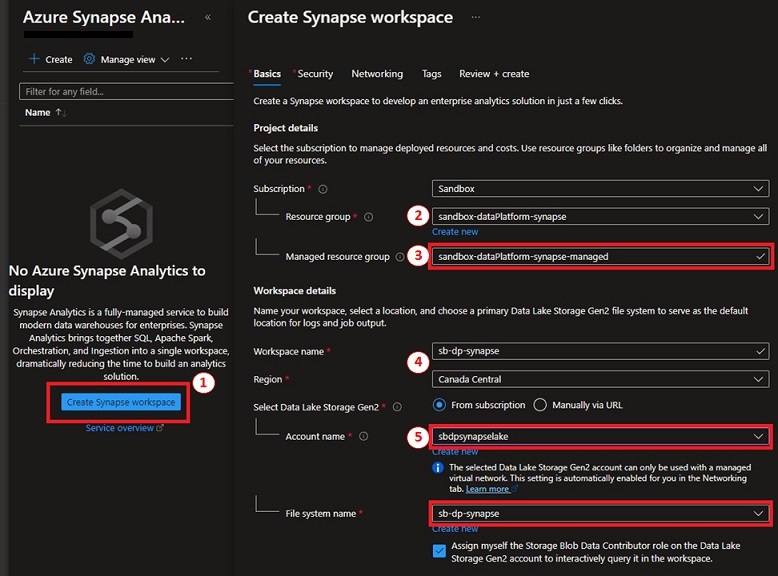
- Below Azure Synapse Analytics, click on on “Create Synapse workspace”.
- Choose the useful resource group we created upfront.
- We wish to use the Managed useful resource group choice. If not supplied, Azure will create a useful resource group for this.
- Present the workspace a reputation and choose the area.
- Choose the devoted information lake (sbdpsynapselake) for this Synapse workspace. A container is created utilizing the workspace identify. This container ought to solely be use by the Synapse workspace solely. We’ll create a brand new container to retailer our information.
-
Click on “Subsequent: Safety” to proceed.
- Create Synapse workspace – Safety
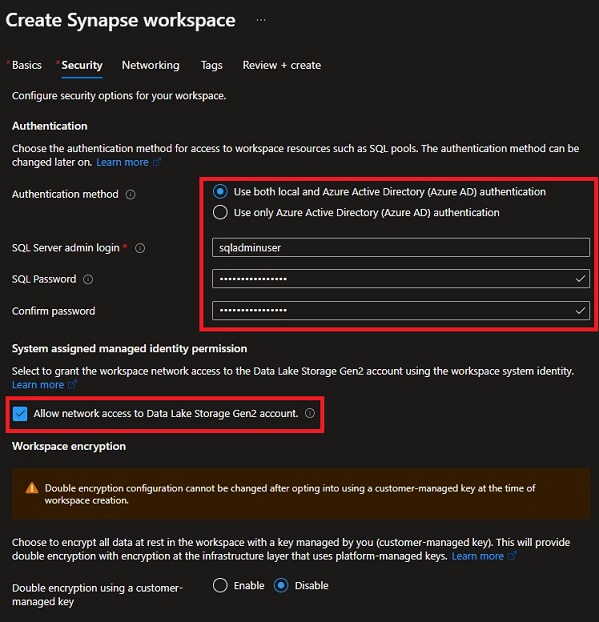
- Choose each native and Azure AD authentication. We’re utilizing this feature as a result of we wish to have an area database consumer in case Azure AD turns into unavailable.
- Enable community entry to Knowledge lake is checked. This can grant this Synapse workspace entry to the Knowledge lake for Serverless and Devoted SQL Pool.
-
Click on “Subsequent: Networking” to proceed.
-
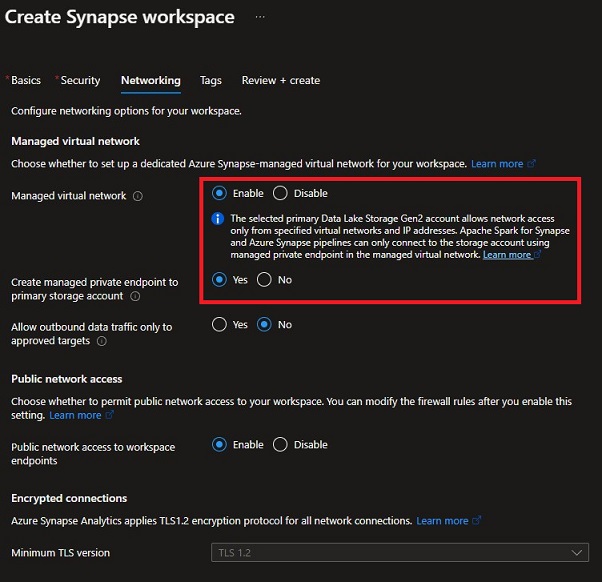
Create Synapse workspace – Networking
- Allow “Managed digital community” and “Create managed personal endpoint to major storage account”. This feature permits Synapse workspace entry to the Knowledge lake for Spark pool and integration pipelines. This requires the storage account proprietor to approve the personal endpoint request.
- Disable “Enable outbound information site visitors solely to permitted targets”. If this feature is enabled, it’s going to forestall information exfiltration however it is not going to enable Synapse to connect with exterior information sources or widespread Python public repositories like Python Bundle Index (PyPI).
- Allow “Public community entry to workspace endpoints”. This feature permits customers to connect with Synapse workspace by way of public web. If a personal connection is accessible by way of VPN or Expressroute, this feature ought to be diabled.
-
Click on “Subsequent: Tags” to proceed.
-
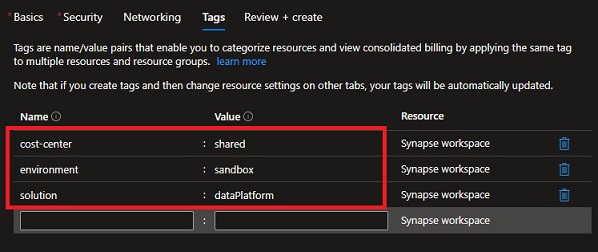
Create Synapse workspace – Tags
- Create the tags for value monitoring.
-
Click on “Subsequent: Overview + create” and proceed to create the Synapse workspace.
-
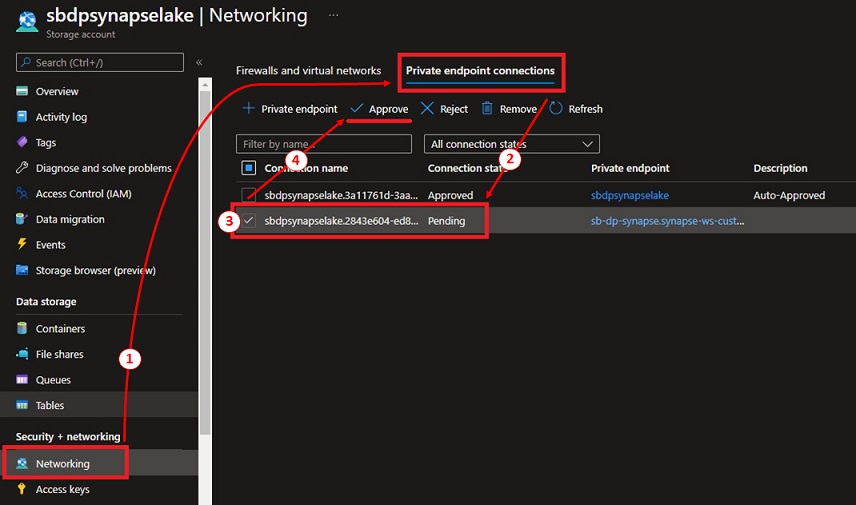
Approve Synpase Non-public endpoint
- Now with Synapse deployment accomplished, we have to approve the Non-public endpoint for the first storage account.
- Navigate to the storage account, click on on “Networking” beneath “Safety + networking”.
- Choose the “Non-public endpoint connections” tab.
-
Choose the checkbox for the Pending connection from synapse and click on Approve.
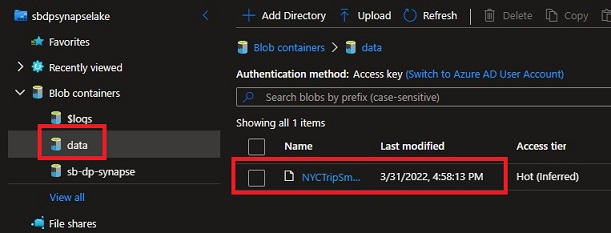
- Earlier than we go into the Synapse workspace, let’s add our pattern file.
- Obtain the NYCTripSmall.parquet file (hyperlink).
- Navigate to the Storage browser.
- Create our new container “information”
-
Add the pattern NYCTripSmall.parquet file from our desktop to the “information” container.
-
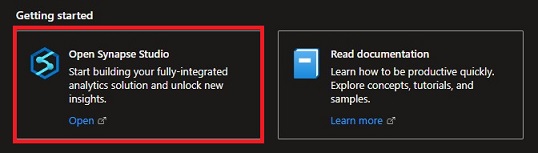
Navigate to Synapse workspace and click on on “Open Synapse Studio”.
-
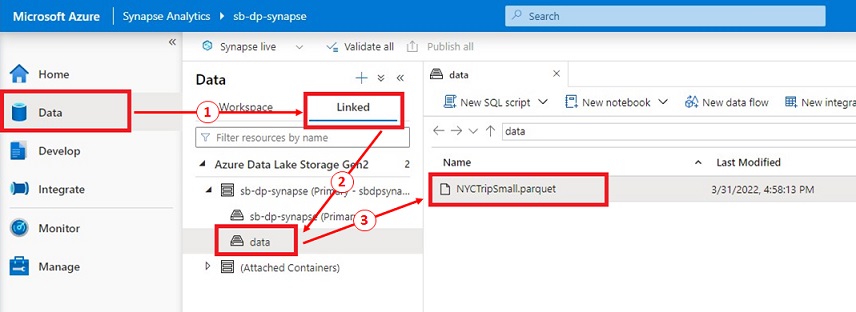
Within the Synapse Studio, we are going to click on on ‘Knowledge’ menu. This menu exhibits all the info we now have linked to. We are able to see our major information lake.
- Click on on “Knowledge” menu.
- Choose the “Linked” tab then choose the “information” container.
-
We are able to see our NYCTripSmall.parquet file.
-
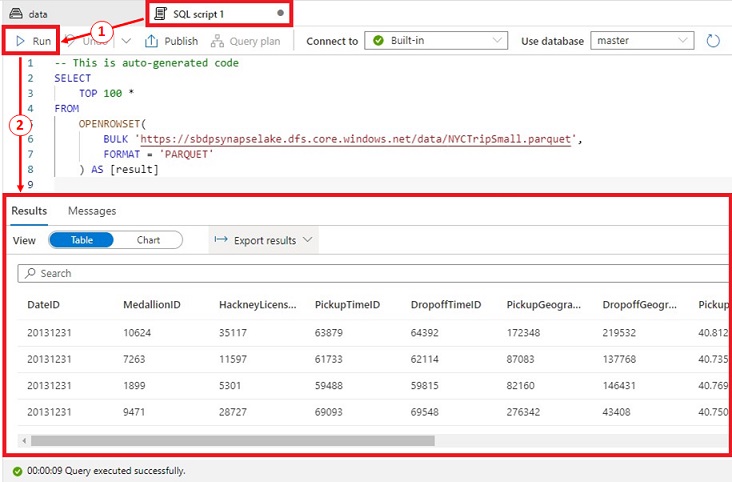
A Serverless SQL Pool is robotically created after we create the Synapse workspace. Let’s take a look at this out to validate every thing is working.
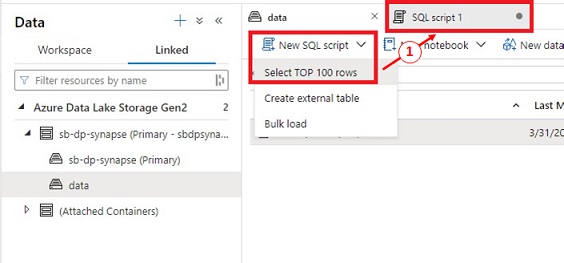
- Choose “NYCTripSmall.parquet”.
- Click on on “New SQL script” then “Choose TOP 100 rows”.
-
A brand new tab is created with “SQL script 1”.
-
Click on on “SQL script 1” tab and we are able to see the auto-generated code. Lets click on “Run”. We are able to see the results of our question. It took 9 seconds to finish.
References
Abstract
Azure Synapse Analytics supplies a safe setting for various groups to work collectively. With personal endpoint, we are able to safe our information site visitors within the personal community. If further safe measures are required, we are able to disable entry from public web all collectively by having a VPN tunnel or Expressroute.
Along with having SQL and Spark collectively beneath one service, we are able to additionally add new information by way of using the ‘Knowledge’ menu. All these parts are working collectively to offer a single workspace for all of the groups to work collectively effectively.
Glad Studying!