How To Combine Database Server With AppService By The Non-public Digital Community
Introduction
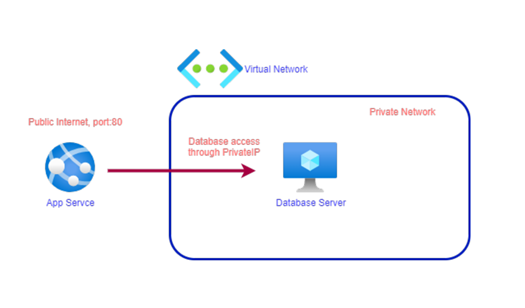
On this article, I wish to undergo the mixing of SQL Server 2019 digital machine(database server) with AppService through the digital community, as a result of as AppService is a public service that’s accessible in public, and anybody on the Web can really entry it.
Therefore in regular eventualities, you may need a Net server that’s hosted on a digital machine in a digital community and that could be uncovered over the Web after which the webserver internally communicates with the database server.
For example that you really want the AppService to work together with a database that’s hosted on a digital machine in a digital community, however because the digital community is an remoted community in a shell and usually when your database server is hosted on the digital machine, that does not have a public IP handle.
So let’s suppose you wish to alter this conduct to work together with that database server with AppService, so a method to do this is to truly expose the general public IP handle of this database so that you just then expose it over to the Web.
However it is a safety danger. As an alternative, what you are able to do which you could really go and join the AppService onto your digital community and combine the database server additionally in the identical community.
So let’s go and see how we are able to accomplish this as per the beneath structure diagram,
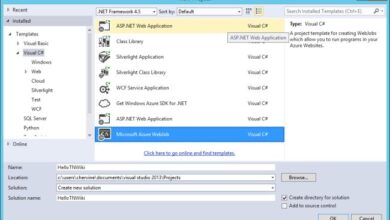
- Create an AppService and combine it with a digital Community.
- Create a database server with PublicIP and Combine the database server with a digital community
- Confirm the database server connectivity through PublicIP.
- Deploy an online utility to AppService that may connect with the database server.
- Take away the PublicIP of the database server.
- Verified knowledge is being retrieved through PrivateIP by the online utility.
Since it is a prolonged course of therefore, I’ve already created Steps 1 and a pair of in my different articles as beneath,
Let’s give attention to step Three now,
Confirm the database server connectivity through publicIP
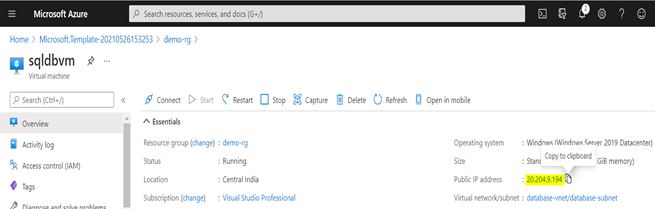
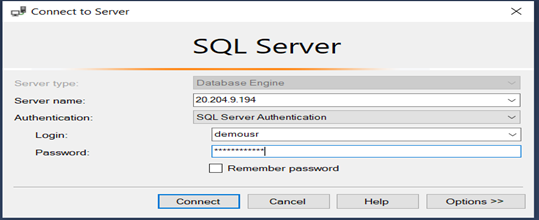
- As I’ve already created a database server digital machine “SqlDbVM”, go to the digital machine and duplicate the PublicIP of it.
- Hook up with SQL Server Administration Studio of your native machine,
-
Hook up with SQLVM with the assistance of PublicIP and SQL server credentials. we have now already performed this train in Half 2.
-
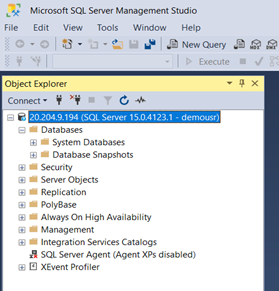
Connectivity is established with our SQL Server VM.
-
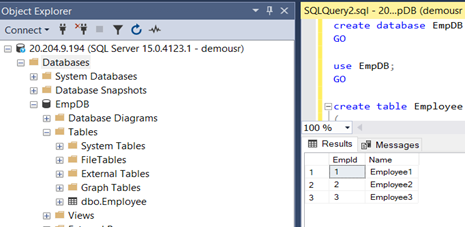
To substantiate the connectivity, use the beneath queries to create a database, desk, and insert some information.
- create database EmpDB
- GO
- use EmpDB;
- GO
- create desk Worker
- (
- EmpId int identification (1,1) not null,
- [Name] nvarchar(50) null
- )
- GO
- insert into Worker([Name]) values(‘Employee1’);
- insert into Worker([Name]) values(‘Employee2’);
- insert into Worker([Name]) values(‘Employee3’);
- GO
- choose * from Worker;
- GO
Observe
This connectivity is through public web which isn’t really useful, therefore we are going to dissociate the PublicIP of the digital machine as soon as we’re performed and use the VM through digital community as personal. Now transfer to Step 4.
Deploy an online utility to AppService that may connect with the database server
-
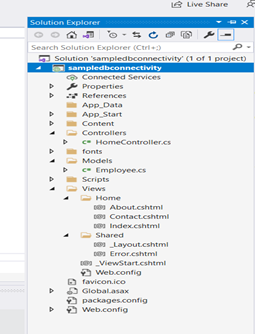
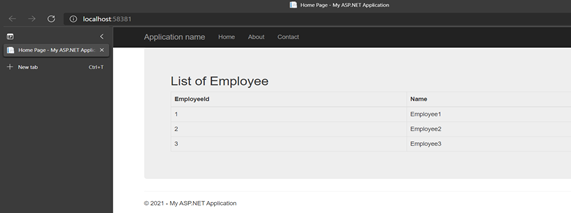
I’ve created a easy MVC utility to connect with the database and retrieve the worker information from Worker Desk.
-
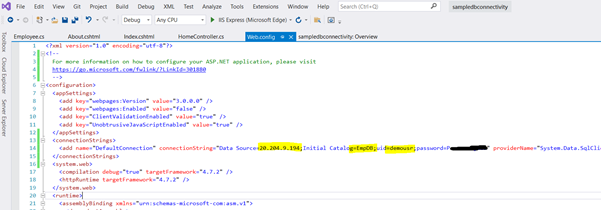
Replace the connection string as beneath, use connection particulars of “SqlDbVM”.
-
After updating the connection particulars, merely run the applying and we are able to see the worker particulars are displayed. These particulars are coming from our database server “SqlDbVM” now.
-
Now publish the online utility utilizing Visual Studio, to the already created AppService in Step 1.
-
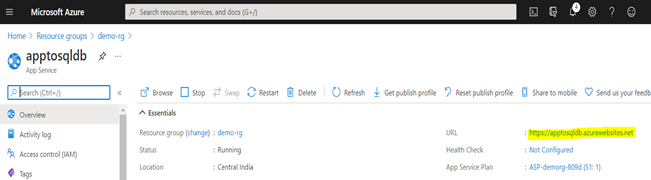
Confirm the printed utility utilizing the AppService URL, as soon as deployed.
Copy the URL from the overview Tab of AppService “apptosqldb”
-
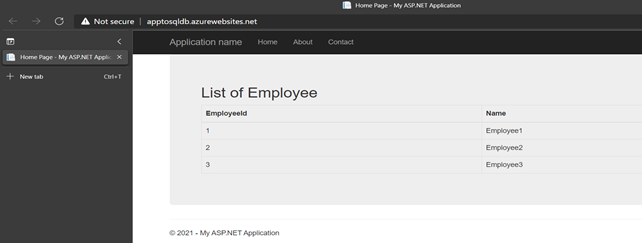
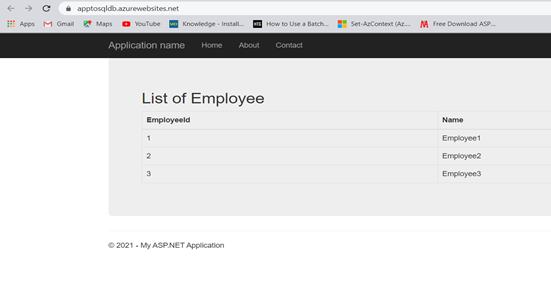
Browse the copied URL in chrome, we are able to see the identical outcomes as we noticed within the native setting. Nice! connectivity is working high quality within the Azure setting as nicely.
So we have now accomplished step Three and step Four and every thing is working nicely until now however nonetheless, database connectivity is public through PublicIP of the database server, which is a safety danger. Therefore, we are going to take away the PublicIP of the database server at times will confirm the connectivity in subsequent step 5.
Take away the PublicIP of the Database server
-
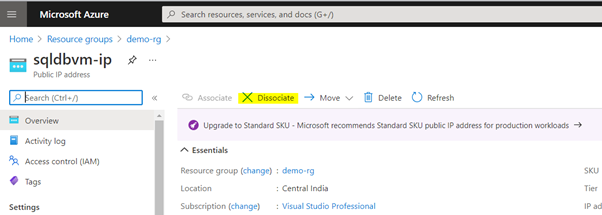
Go to useful resource group “demo_rg” and click on on “sqldbvm-ip” useful resource.

-
Click on on “Dissociate”
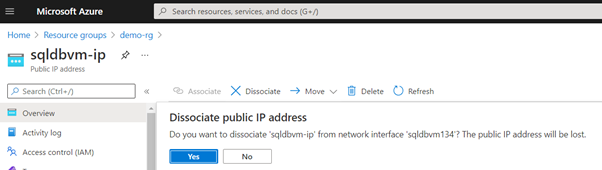
-
Click on on “sure”, It can verify the motion to dissociate the general public IP from the community interface and public IP handle will probably be misplaced.
-
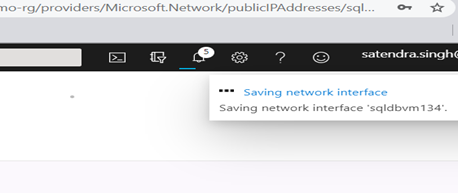
Watch for 2-Three min till settings are saved.
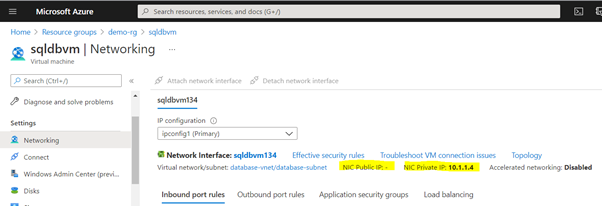
Go to the “Networking” part of “sqldbvm” and we are able to see that there is no such thing as a public IP related to the machine now, solely personal IP is exhibiting.
Confirm knowledge is being retrieved through personal IP by the online utility
-
Now once more strive the browse the applying, it ought to nonetheless work which means the connectivity between AppService and database is personal and safe now.
The database server can’t be accessed through its public IP from anyplace.
Conclusion
We’ve efficiently carried out the structure that how we are able to safe the connectivity between internet utility and database through the use of digital community service integration between AppService and database server. We’ve additionally explored the implementation of a database server at minimal price.