Introduction
On this article, we are going to focus on safe Azure knowledge lake storage utilizing Personal endpoint. The primary good thing about utilizing Personal Endpoint is to allow on-prem and Azure providers to connect with the information lake utilizing Microsoft spine community. This eliminates the necessity to ship knowledge throughout the general public web. This leads to bettering networking safety in addition to lowering knowledge exfiltration.
Challenges
Within the final article, we arrange a Digital community integration to permit providers inside the Digital Community’s Subnet to connect with our knowledge lake. This resolution is working nice however our scope has been expanded. We have to allow on-prem purposes and different Azure providers to connect with our knowledge lake via personal networking. This visitors wants to remain inside the Microsoft spine community and prohibit the visitors to the personal digital community.
Personal Endpoint is designed for this use case and it may be applied on varied Azure providers, like the information lake. Earlier than we dive into the tutorial, it is very important perceive the brand new ideas and providers required to attain this:
- Personal DNS zone
Personal DNS zone service is accountable for translating a non-public area title into an IP handle. A DNS document is created to supply a novel personal URL for the information lake and the associated personal IP handle.
- Community interface (NIC)
When you’ve got created a Digital Machine (VM), a community interface needs to be acquainted to you. If not, a community interface is used to acquire an IP handle from the Digital community. On this use case, this shall be a non-public IP handle.
- Personal Endpoint
For simplicity, a Personal Endpoint associates the distinctive area document within the Personal DNS zone with the Community interface.
It is very important perceive the added price of implementing this resolution. Azure will cost for each ingress and egress visitors via the personal community, the Personal DNS zone, and Personal Endpoint. For element price estimate, please make the most of the Azure Value Calcuator.
Tutorial
-
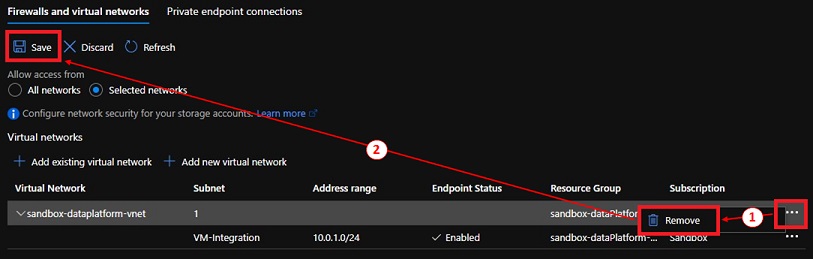
In our earlier tutorial, we’ve got arrange a Digital community integration with our knowledge lake. The very first thing we have to do is to take away this integration:
- Navigate to Networking tab of our knowledge lake.
- Underneath Firewalls and digital networks click on on the ‘…’ and ‘Take away’ underneath the Digital Community.
- Click on ‘Save’.
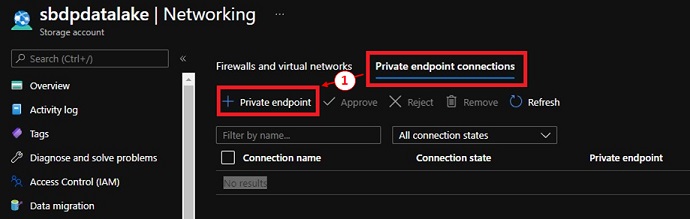
- After the Digital community integration is efficiently eliminated, click on on the ‘Personal endpoint connections’ tab, then click on ‘+ Personal endpoint’. This may carry up the Personal endpoint creation wizard.
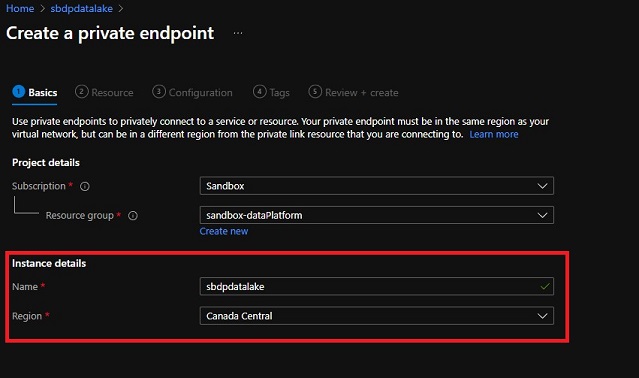
- Create a Personal Endpoint – Fundamentals
Present the Useful resource group and the Occasion particulars. Click on ‘Subsequent: Useful resource >’ to proceed the wizard.
-
Create a Personal Endpoint – Useful resource
Personal endpoint is obtainable for varied forms of storage providers. For the information lake, we have to create a Personal Endpoint for ‘blob’ and ‘dfs’. Since we are able to solely choose 1 sub-type, we are going to choose ‘blob’ first. Click on ‘Subsequent: Configuration>’ to proceed the wizard.
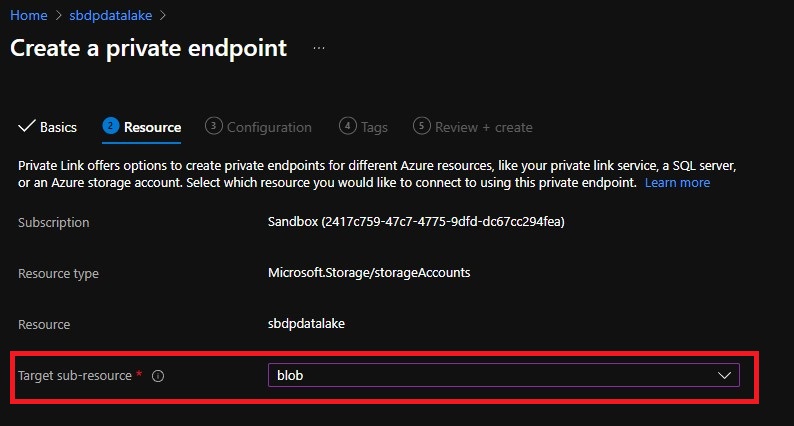
After reaching the tip of this tutorial, bear in mind to repeat the step for ‘dfs’ as nicely.
** It is essential to notice that we create the ‘blob’ Personal Endpoint as a result of Azure Storage Explorer makes use of the Blob API to retrieve the containers data. With out it, we are going to obtain an error.
-
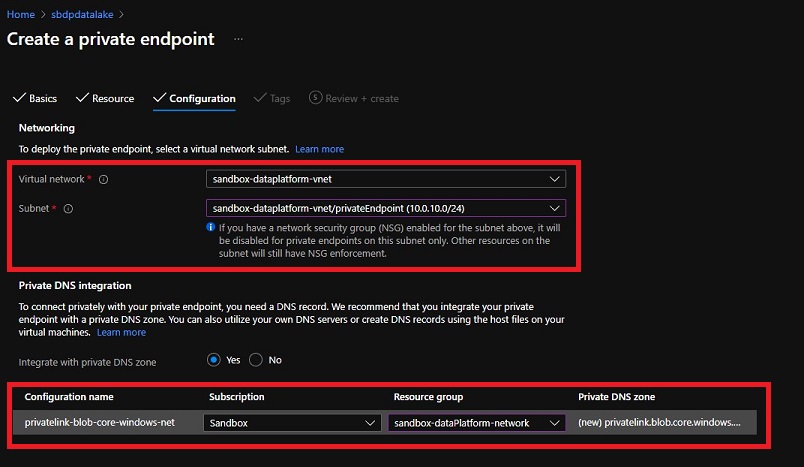
Create a Personal Endpoint – Config
To be able to preserve the providers organized, I created a devoted useful resource group for all networking parts (sandbox-dataPlatform-network). I created a subnet referred to as ‘privateEndpoint’ for all of the Personal Endpoints. Alternatively, you may create completely different subnet for every Personal Endpoint sort. Click on ‘Subsequent: Tags >’ to proceed the wizard.
-
Create a Personal Endpoint – Tags
Lastly, we are going to create the tags required for price administration. For the reason that knowledge lake shall be utilized by many tasks, the brand new providers are assigned to the ‘shared’ price middle. Click on ‘Subsequent: Evaluation + create >’ to proceed the wizard.

-
Testing
After establishing the Personal Endpoint, we must always see the next sources in Azure portal. We see the Personal Endpoint, the community interface, and the Personal DNS zone.

To check the Personal Endpoint, we are going to connect with our digital machine on the identical community as our knowledge lake. Within the VM, we have to carry up the Command Immediate by typing ‘cmd’ by way of the Run window and make the most of the
nslookupcommand.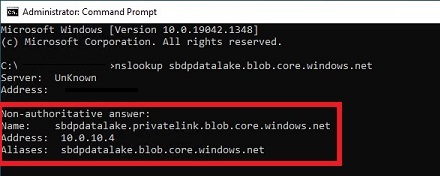
Within the screenshot, we are able to see the general public endpoint is mapped to the Personal Endpoint and reveals the personal IP.
References
Abstract
Personal endpoint is one of the best ways to connect with our knowledge lake securely. By holding the visitors personal, the community safety staff can have higher management over who and the place folks can entry our knowledge lake.
The setup is way more complicated and has added price. For an in depth comparability between Digital Community integration and Personal endpoint, I’ve supplied a hyperlink within the References part above.
In case you are establishing Personal Endpoint on your knowledge lake, don’t forget to create the Personal Endpoint for ‘dfs’!
Glad Studying!


