The Digital machine snapshots are the easiest way to clone the Digital machine with none interruption; on the similar time, we will use the snapshot to create a number of VM’s. We are able to additionally think about {that a} VM snapshot is the copy of the disk file of our Digital machine. The VM snapshots are very useful to get well our digital machine from a catastrophe. On this article, we’re going to learn to create a Digital machine utilizing the snapshot.
Step 1
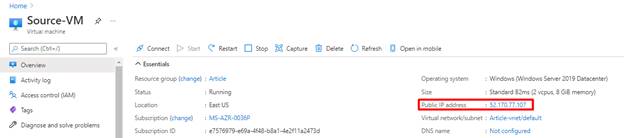
We’ve got one Digital machine referred to as “Supply-VM,” and that VM has already put in the IIS server. We’re going to take the snapshot from this operating VM.
Step 2
To confirm that IIS companies are operating, copy the Supply-VMs IP deal with and previous it to the web browser. Now we will see that the IIS server is operating within the Supply-VM.

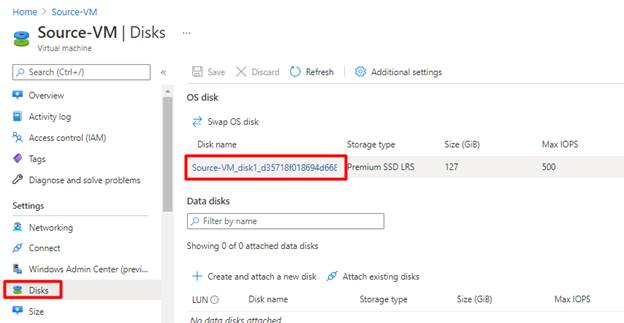
Step 3
Choose Disks underneath the Settings, after which choose OS disk (Supply-VM_disk1).
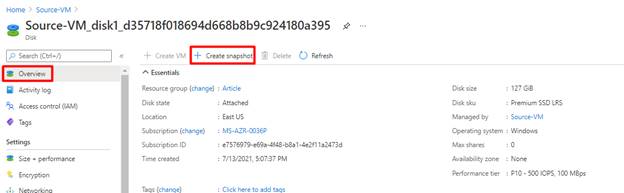
Step 4
Within the Overview, click on the + Create snapshot to begin the snapshot creation.
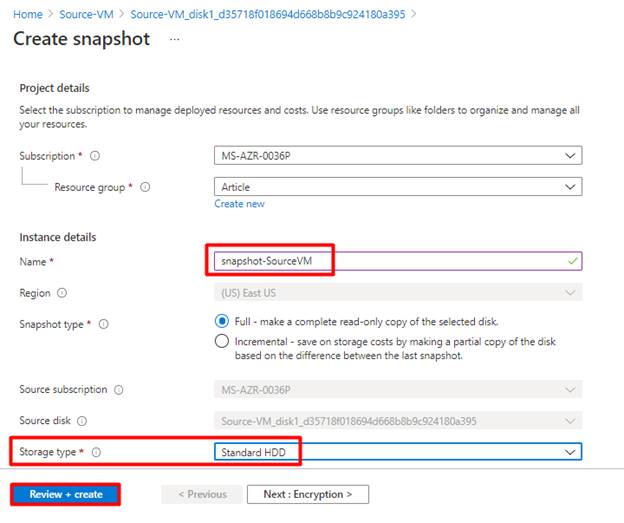
Step 5
Within the Create snapshot web page, enter the snapshot identify, then choose the Storage sort as Normal HDD due to the associated fee, after which click on Overview+ create.
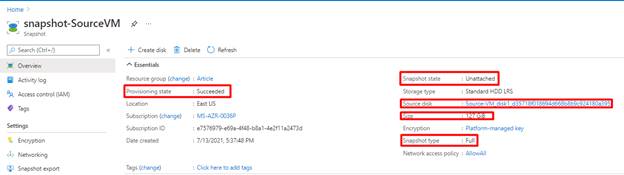
Step 6
Now the snapshot has been created, and we will confirm the standing.
Step 7
After efficiently created the snapshot, we’ve to create the managed disk, so click on + Create.
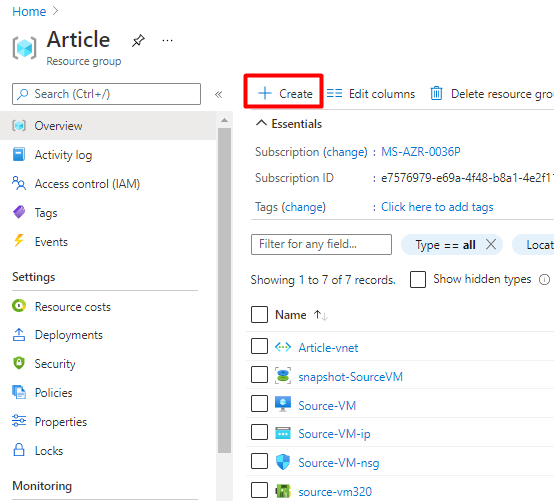
Step 8
Within the Create a useful resource search field, sort Managed Disk after which choose it.
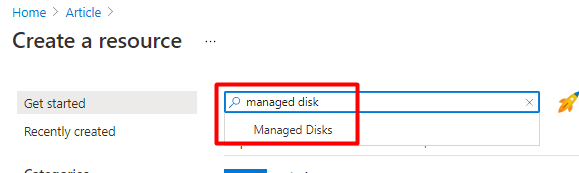
Step 9
Click on Create to begin the Managed disk deployment course of.
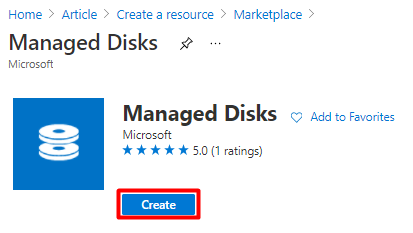
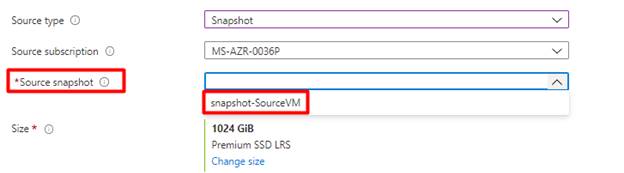
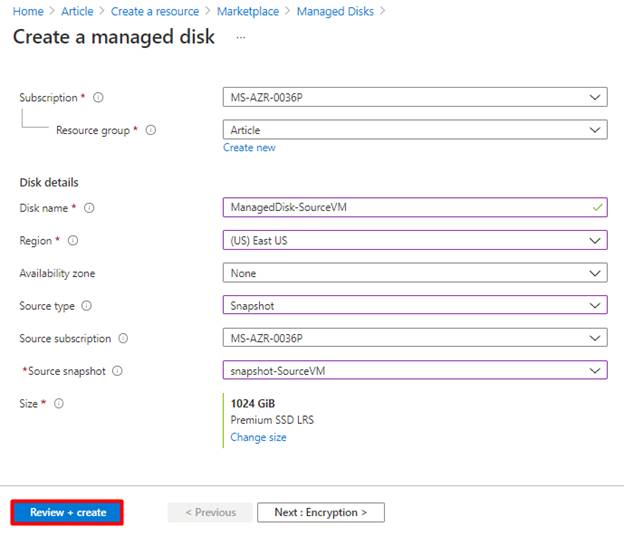
Step 10
Enter the identify for the managed disk after which choose the Supply sort as Snapshot.
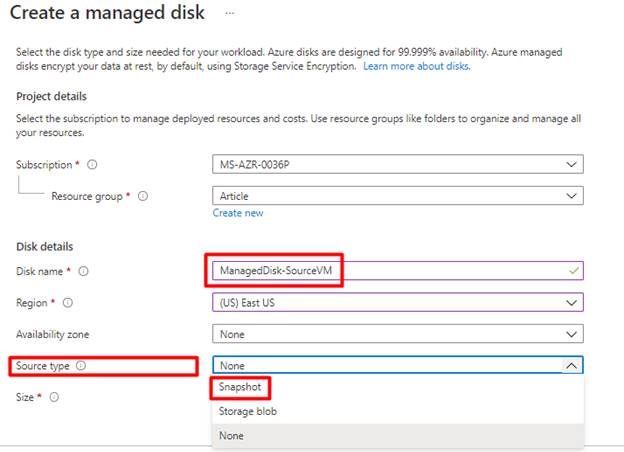
Step 11
Within the Supply snapshot, choose the snapshot that we had created (snapshot-SourceVM).
Step 12
After efficiently choose the Supply disk, click on Overview + create.
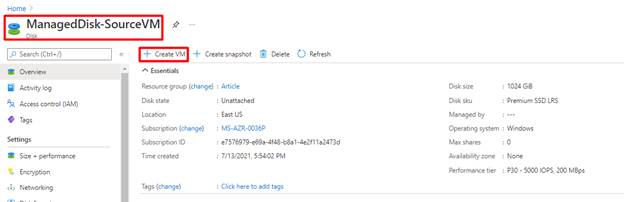
Step 13
After efficiently deploying the Managed disk, choose the managed disk (ManagedDisk-SourceVM); within the Overview, click on + Create VM.
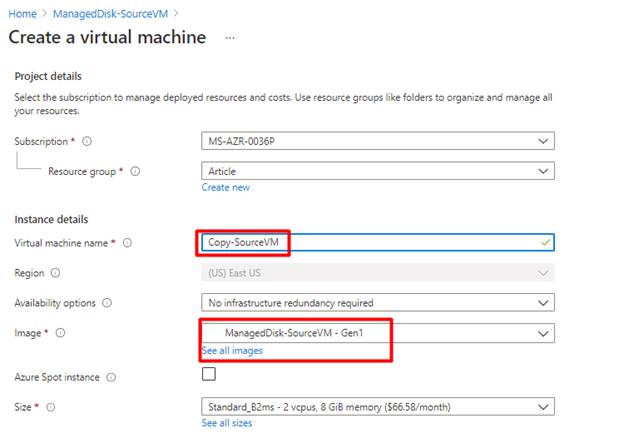
Step 14
Within the Create a digital machine web page, enter the digital machine’s identify, after which you could find that our Managed disk is robotically chosen within the Picture possibility.
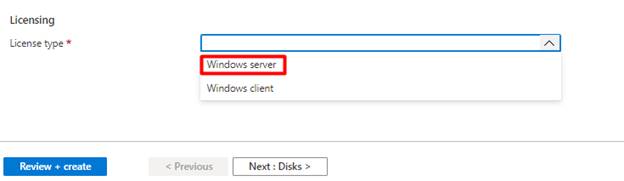
Step 15
We have to choose the License sort; on this state of affairs, our supply VMs Working system is a Home windows server, so choose the Home windows server.
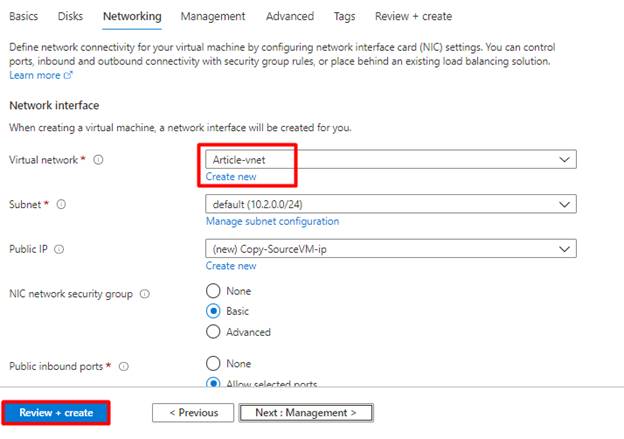
Step 16
On the Networking web page, we will choose the prevailing Digital Community or create the brand new Digital community and hyperlink it to the brand new or current community. After that, we will instantly click on Create + Overview.
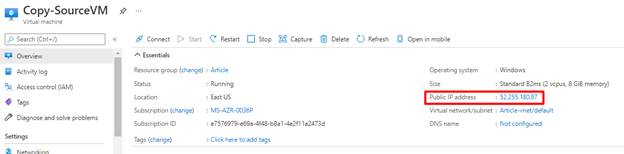
Step 17
We’ve got efficiently deployed the brand new Digital machine utilizing our Snapshot, and now we will take a look at our Digital machine, so copy the Public IP deal with.
Step 18
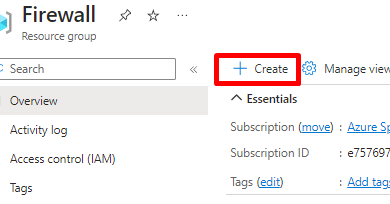
We’ve got so as to add port 80 and port 443 to the Community safety group.

Step 19
We’ve got efficiently deployed the copy of the supply VM utilizing the snapshot.

Abstract
On this article, we’ve realized how you can deploy the Digital machine utilizing the snapshot in the identical area; in our subsequent article, we’ll learn to use our snapshot in a distinct area.