Introduction
Within the Azure portal, the default dashboard is used as a place to begin for customers. Customers may also edit or modify it in keeping with their wants. Customers may also create and modify the extra dashboards based mostly on the initiatives, and varied duties and in addition make it obtainable to others by publishing in sharing mode.
Azure Portal gives a centered and structured view of assorted cloud sources. Dashboards present a workspace to carry out day by day duties and monitor the sources.
This tutorial will present you varied steps on, how you can create, edit, and use a shared dashboard within the Azure portal.
Create a New Dashboard
If you wish to create a brand new customized dashboard, then observe the directions beneath to proceed.
Step 1
Initially, you’ll want to sign up to the Azure Portal.
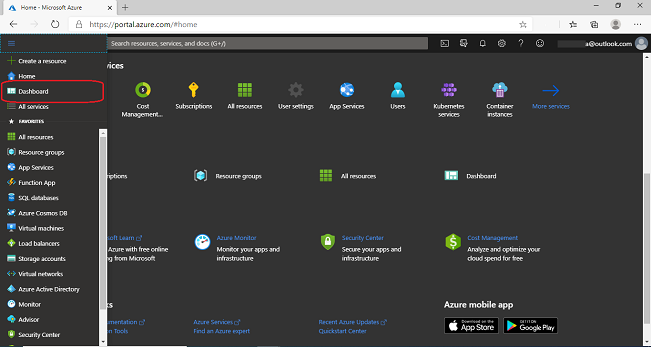
Step 2
Azure Portal will seem on the display, then click on on the menu icon and choose the “Dashboard” possibility.
Step 3
Now, click on on the “New Dashboard” button.

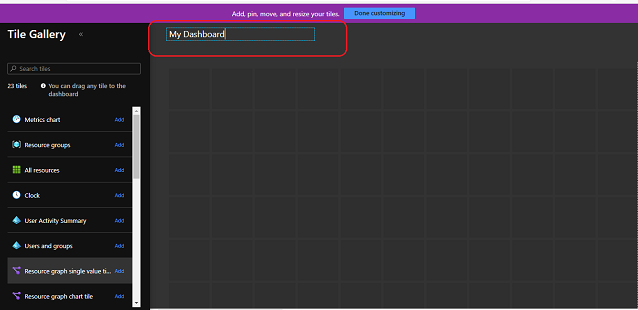
Step 4
To determine your new customized dashboard, enter the distinctive “Dashboard” identify, by clicking on the “My Dashboard” textual content.
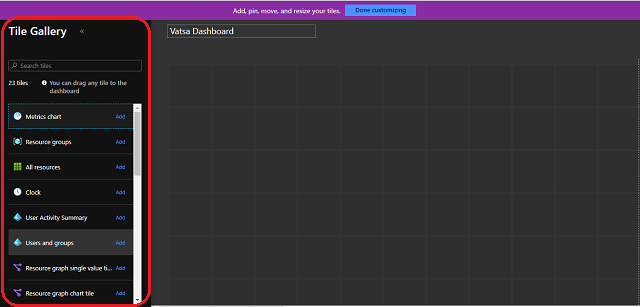
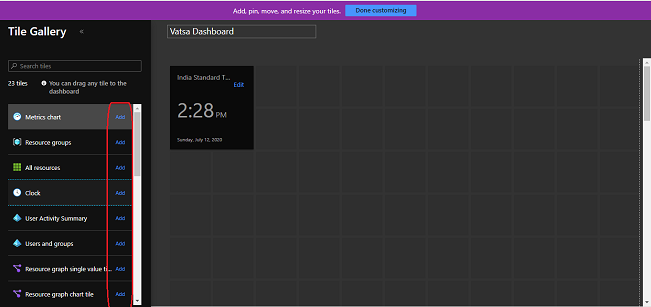
Step 5
From the “Tile Gallery”, you’ll be able to choose any tile by both clicking on the “Add” button or by the drag and drop possibility.

Step 6
Click on on the “Finished customizing” button to avoid wasting your customized dashboard.
Edit a dashboard
After getting created your individual new customized dashboard and wish to edit the dashboard so as to add, resize, and organize the tiles, observe the beneath directions to proceed.
A) Add tiles to the Dashboard
Comply with the beneath directions so as to add new tiles to your customized dashboard.
Step 1
From the dashboard web page header, click on on the “Edit” button to proceed.

Step 2
From the “Tile Gallery”, search your tile that you just wish to add.
Step 3
You could have two choices so as to add your chosen tile,
1) Click on on the “Add” button so as to add the tile to the dashboard. This can add to the default location together with its default measurement.
2) By dragging the chosen tile, you’ll be able to place it the place you need.
B) Resize or Re-arrange the tiles
To alter the scale of the tile or wish to organize it on the dashboard. Comply with the beneath directions.
Step 1
From the dashboard web page header, click on on the “Edit” button.
Step 2
Within the top-right nook of the tile, click on on the “Context Menu” to resize the tile. Then, you’ll be able to see that totally different tile sizes can be found within the checklist. Now, select any tile measurement you need.
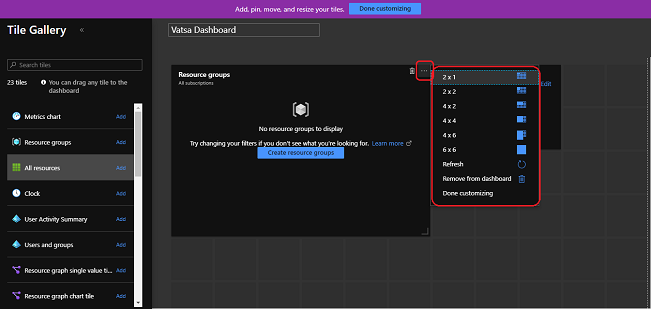
Notice
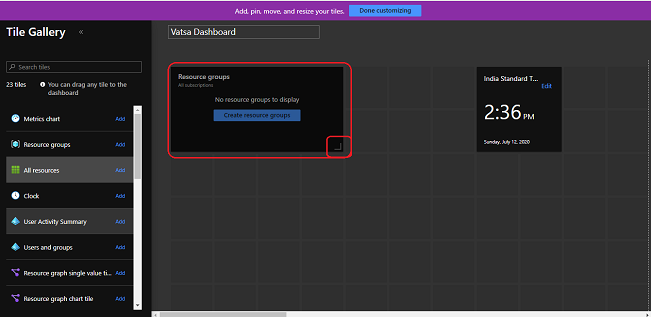
Tiles that help any measurement typically have a “deal with” within the bottom-right nook that allows you to drag the tile as much as the scale you need.
Step 3
To rearrange the tile, merely drag and drop to a brand new location on the grid to customise your dashboard.
C) Delete a tile
If you wish to take away any tile from the dashboard, then observe the beneath directions to proceed.
Step 1
From the dashboard web page header, click on on the “Edit” button to proceed.
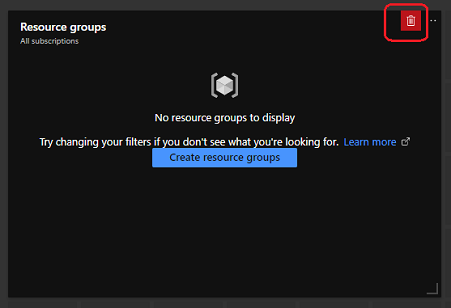
Step 2
Hover to the top-right nook of the tile to take away the tile. Then, click on on the “Delete” button to take away the tile from the dashboard.
Clone a dashboard
To make use of any current dashboard as a template for the brand new dashboard, observe the directions beneath to proceed.
Step 1
Open the dashboard that you just wish to clone or use it as a template.
Step 2
Within the dashboard web page header, click on on the “Clone” button.

A duplicate of the dashboard will likely be created that will likely be named “Clone of <dashboard identify>” which can open in edit mode by default.

Delete a dashboard
If you wish to completely delete a dashboard, then observe the beneath directions to proceed.
Step 1
Initially, choose the dashboard that you just wish to delete.
Step 2
From the dashboard web page header, click on on the “Delete” button.

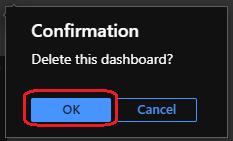
Step 3
A affirmation dialog field will seem on the display, then click on on the “OK” button.
Publish a Dashboard
Whenever you create a brand new dashboard, solely you’ll be able to see and entry it, which implies it’s personal by default. If you wish to share it with others, then you need to publish and share it. I’ll focus on this in my subsequent article on the subject, “How To Share Azure Dashboard”. However, now I describe to you how you can open a shared dashboard in Azure Portal. Comply with the beneath directions to proceed,
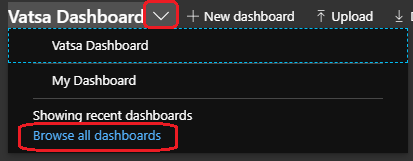
Step 1
Click on on the drop-down button subsequent to the dashboard identify after which, click on on the “Browse all dashboards” possibility.
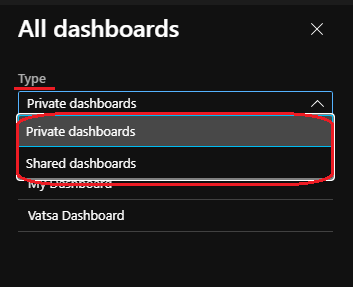
Step 2
Within the “Sort” drop-down menu, choose the “Shared Dashboards” possibility.
Now, you’ll be able to choose and use your shared dashboard.
Reference
https://docs.microsoft.com/en-us/azure/azure-portal/
Conclusion
On this article, we’ve got mentioned varied steps to create, customise, and use a shared dashboard within the Azure portal. Now I’m concluding however your studying ought to proceed on this attention-grabbing Microsoft Know-how.
I hope you loved this text. Comply with C# Nook to study extra new and superb issues about Microsoft Azure.
Thanks for studying!


