Azure
How To Add A Storage Account In An Azure Useful resource Group (Default Strategy) – Half One
Introduction
In my earlier article, we discovered how you can create an Azure useful resource group. Now we’ve got to make the most of the useful resource group by including a useful resource. There are 3 ways you can add a useful resource into the useful resource group, I’ll clarify you all of the three approaches one after the other, On this first strategy, we are going to cowl all the mandatory steps by including the Azure Storage account. However word that the outline of the process applies additionally to all different useful resource varieties in the identical or barely modified kind.
So as to add a storage account to your Azure useful resource group, carry out the next steps:
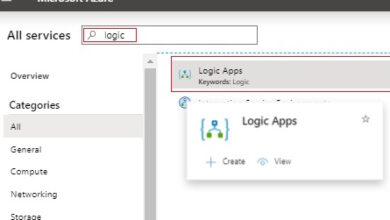
- Open your Azure administration portal right here.
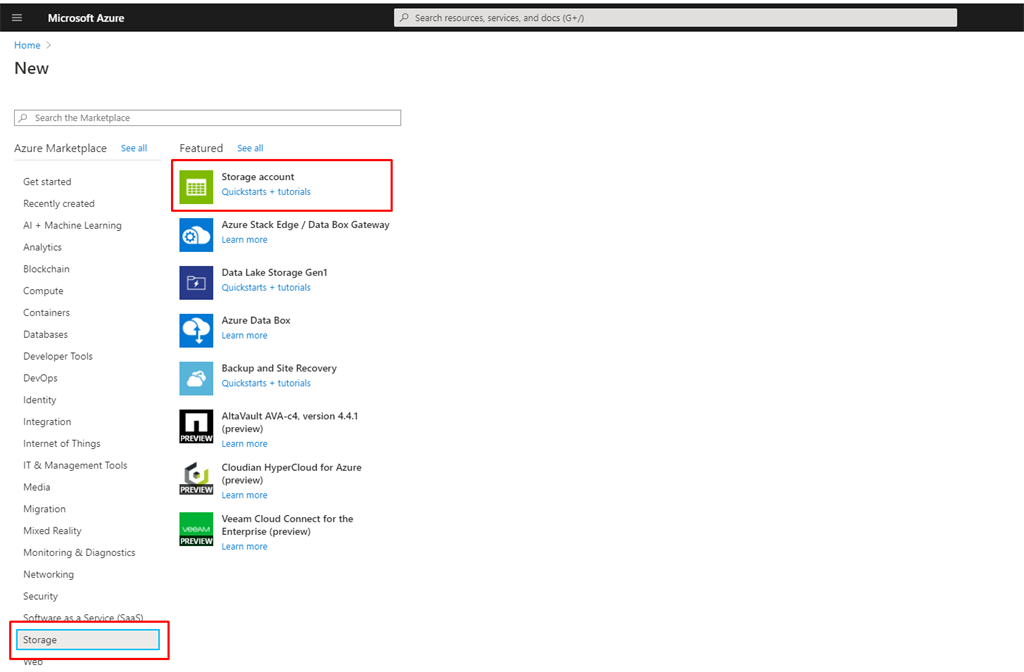
- Within the portal, click on on the aspect blade, then click on on create a useful resource. You too can do that from the Residence Part Azure Companies tab after which click on Create a useful resource:

- On the blade click on on Storage, then click on on Storage Account:
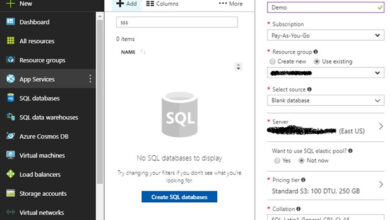
- When you click on the Create storage account blade, there are some fields that should be stuffed after which click on the button Evaluation + Create.
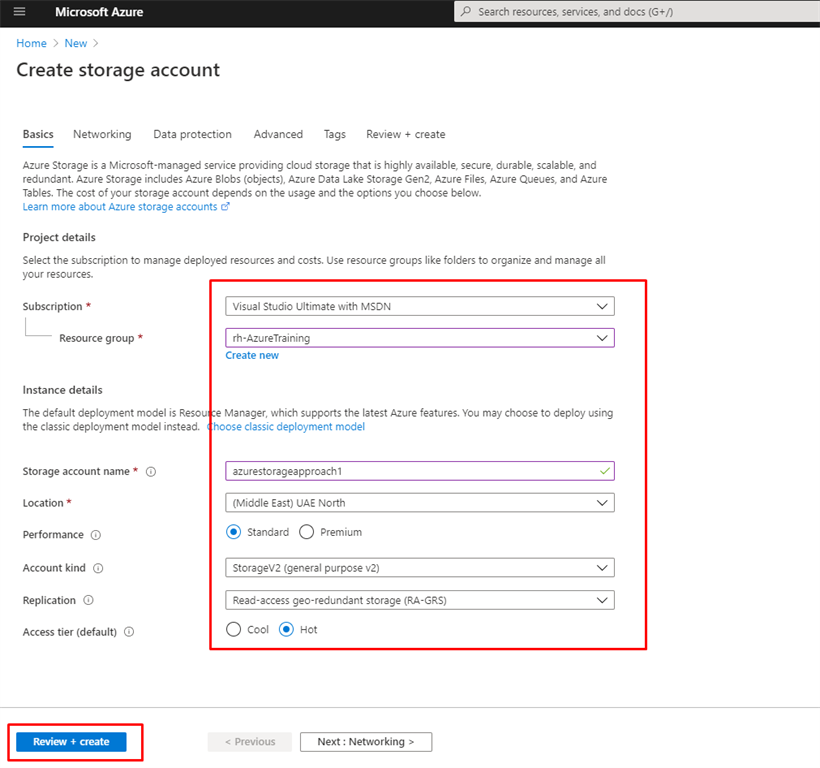
- Subscription
Choose your Microsoft subscription from the drop-down
- Useful resource Group
Choose the prevailing useful resource group that we’ve got created in our earlier article or you may create a brand new useful resource group by clicking on Create new hyperlink. If you’re creating a brand new useful resource group word enter a novel title in your new useful resource group. A useful resource group title can embrace alphanumeric characters, durations (.), underscores (_), hyphens (-), and parenthesis (), however the title can not finish with a interval.
- Storage Account Title
Sort a novel title for the storage account you might be creating within the Title textbox. If the title is exclusive, you will notice a inexperienced tick.
- Location
Within the Location listing, choose the identical location you’ve gotten been utilizing for the Azure useful resource group.
- Efficiency
Relying on the kind of storage account you create; you may select between normal and premium efficiency tiers.
- Customary
A normal efficiency tier for storing blobs, recordsdata, tables, queues, and Azure digital machine disks. - Premium
A premium efficiency tier for storing unmanaged digital machine disks. Microsoft recommends utilizing managed disks with Azure digital machines as a substitute of unmanaged disks.
- Account sort
Choose the account sort in my case I’ve to decide on Normal-purpose v2 accounts:
- Normal-purpose v2 accounts
Primary storage account sort for blobs, recordsdata, queues, and tables. Advisable for many eventualities utilizing Azure Storage. - Normal-purpose v1 accounts
Legacy account sort for blobs, recordsdata, queues, and tables. Use general-purpose v2 accounts as a substitute when attainable. - BlobStorage accounts
Legacy Blob-only storage accounts. Use general-purpose v2 accounts as a substitute when attainable.
- Replication
Replication determines what number of copies of your information are maintained at one time, and in what places.
- Entry Tier (Default)
Azure Storage supplies totally different choices for accessing block blob information based mostly on utilization patterns. Every entry tier in Azure Storage is optimized for a selected sample of knowledge utilization. By choosing the fitting entry tier in your wants, you may retailer your block blob information in probably the most cost-effective method. I select default Sizzling entry tier. - The accessible entry tiers are,
- Sizzling entry tier
This tier is optimized for frequent entry of objects within the storage account. Accessing information within the sizzling tier is most cost-effective, whereas storage prices are larger. New storage accounts are created within the sizzling tier by default. - Cool entry tier
This tier is optimized for storing giant quantities of knowledge that’s sometimes accessed and saved for not less than 30 days. Storing information within the cool tier is cheaper, however accessing that information could also be costlier than accessing information within the sizzling tier.
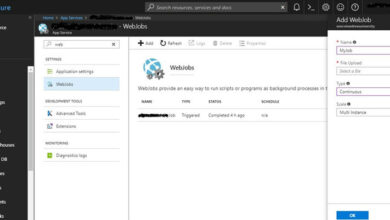
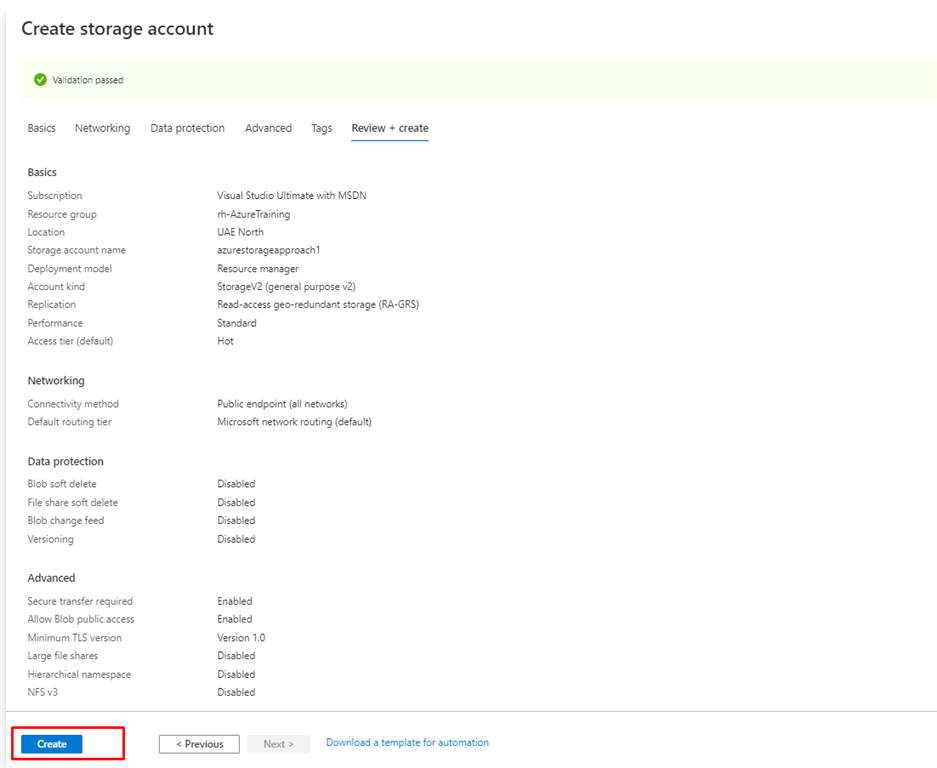
- When you click on the Evaluation + Create it’s going to pop up the brand new display which exhibits the validation handed message with a inexperienced tick, then click on the Create button.
- It would take A while Seconds or Minutes then click on on the Notification icon and you will notice the Storage account deployment succeeded.
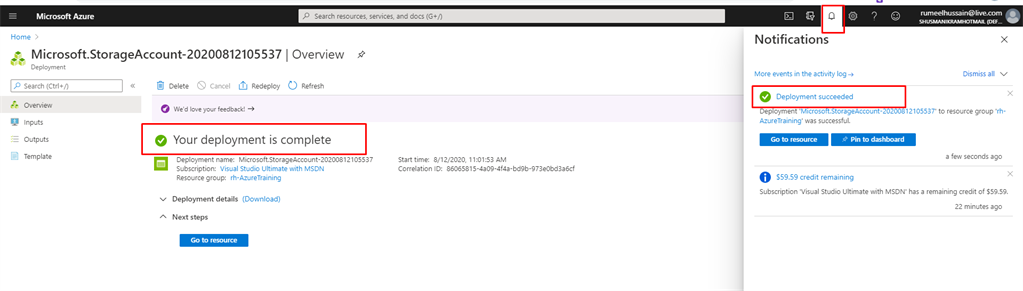
Lastly, our Storage account has been created.