Introduction
Welcome to this article where we will explore the process of creating an API management service and an Azure resource group. This article is part of a series, and its main focus is on generating a token from the Azure active directory and validating it with the Azure management service. Throughout this article, we will uncover the purpose and usage of APIM and Resource groups and walk through the steps to configure them. It is important to note that Azure provides these services as a Platform as a Service (PAAS) solution.
Note: Every free Azure account comes with a $200 subscription.
API Management Services (APIM)
APIM allows you to deploy API gateways alongside APIs hosted in Azure, other cloud platforms, and even on-premises. This enables you to optimize the flow of API traffic and meet security and compliance requirements. APIM also offers a unified management experience and provides full observability across all internal and external APIs.
Azure Resource Group
Azure Resource Group acts as a container that holds related resources for an Azure solution. You can include all the resources for your solution in a resource group or choose to manage only specific resources as a group. Organizing resources into resource groups based on their lifecycle allows for easy deployment, updating, and deletion as a cohesive unit.
Topics Covered
This article will cover the following topics:
- Configuring Azure Resource Group
- Setting up API Management Service
- Cleaning up resources
Pre-requisites
- An active Azure Account
- A user with sufficient access to create Azure Resource Group
- A user with sufficient access to create APIM
Task 1. Create and configure a resource group
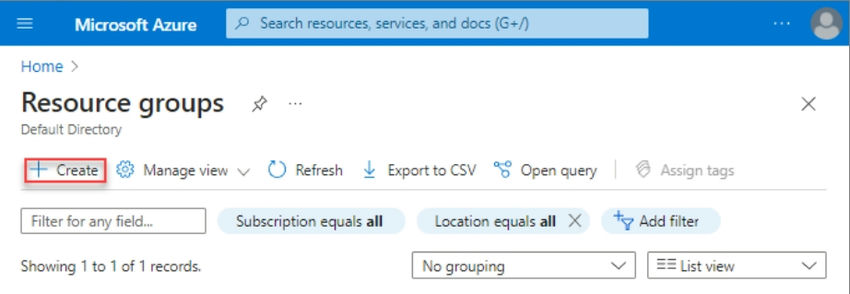
- Sign in to the Azure portal.
- Select Resource groups.
- Select Create.
- Select Create.
- Enter the following values:
- Subscription: Select your Azure subscription.
- Resource group: Enter a new resource group name.
- Region: Select an Azure location, such as Central US.

- Select Review + Create
- Select Create. It takes a few seconds to create a resource group.
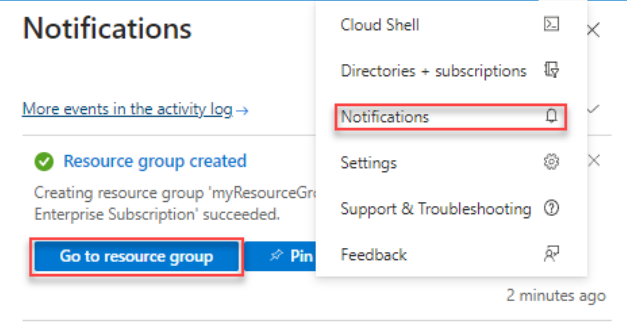
- Select Refresh from the top menu to refresh the resource group list, and then select the newly created resource group to open it. Alternatively, select Notification (the bell icon) from the top and then select Go to resource group to open the newly created resource group.
Task 2. Create and configure API management service
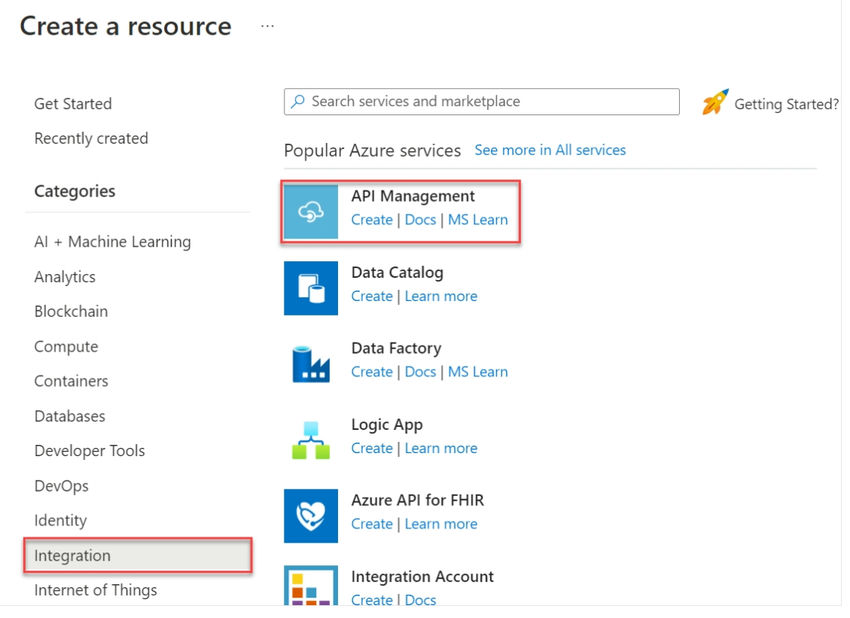
- From the Azure portal menu, select Create a resource. You can also select Create a Resource on the Azure Home page.

- On the Create a Resource page, select Integration > API Management.
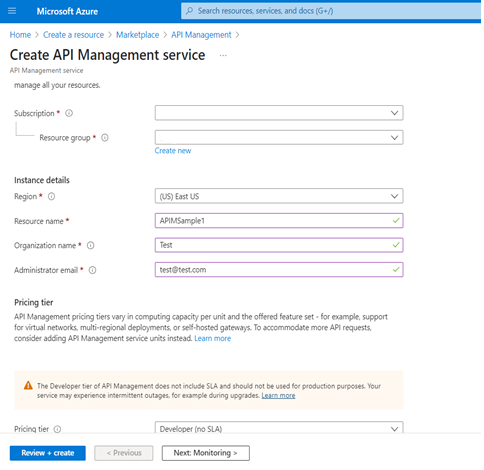
- In the Create API Management page, enter the required settings.
- Select Review + Create.
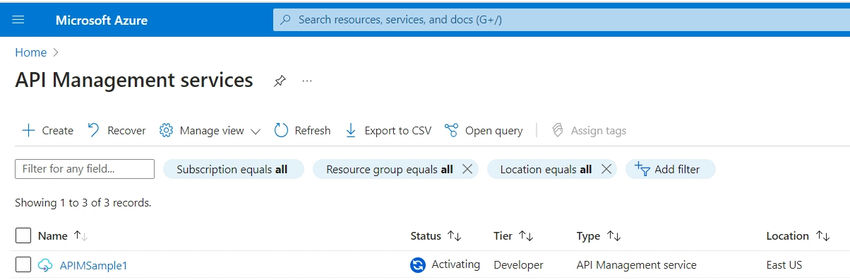
- Wait for the resource to be created. This may take some time.
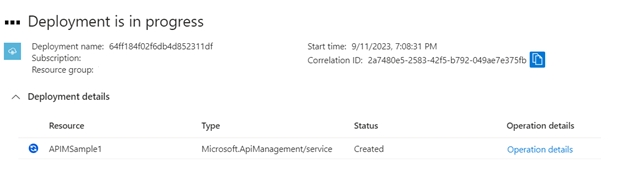
- Once the resource is created, it will be displayed in the APIM list.
Task 3. Clean up resources
To avoid unnecessary charges, make sure to delete any unused resources.
To learn more about our company and the services we offer, visit Skrots. You can also explore our wide range of services at Skrots Services. Don’t forget to check out our blog at Blog at Skrots. Thank you for reading!


