Filter Realtime Error Rows From CSV To SQL Database Desk In Azure Knowledge Manufacturing facility – Half One
Azure Knowledge Manufacturing facility is a software with super capabilities in relation to ETL operations. It has many options that might assist the customers to treatment and remodel the information that we load into it. The builders or the customers face many real-time points when performing their ETL operations one such widespread but unavoidable state of affairs largely confronted is dealing with the error or incomplete knowledge. We can not pre-filter the error rows contained in the ocean of knowledge that we load into the ETL, therefore we search for a way to select these error or truncated rows from the uncooked knowledge and retailer them in a separate database desk or file on high of which a separate course of will probably be carried out to resolve on whether or not to treatment and settle for or just delete these rows.
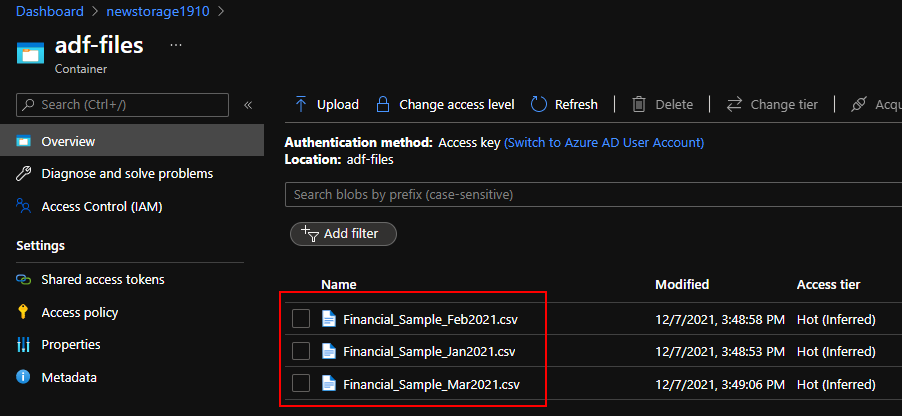
On this article, we’re going to see how we may save the error rows right into a separate SQL database desk to assessment later. I’ve loaded my demo knowledge information into blob storage which accommodates the gross sales determine of a pattern firm from Jan-Mar 2021.
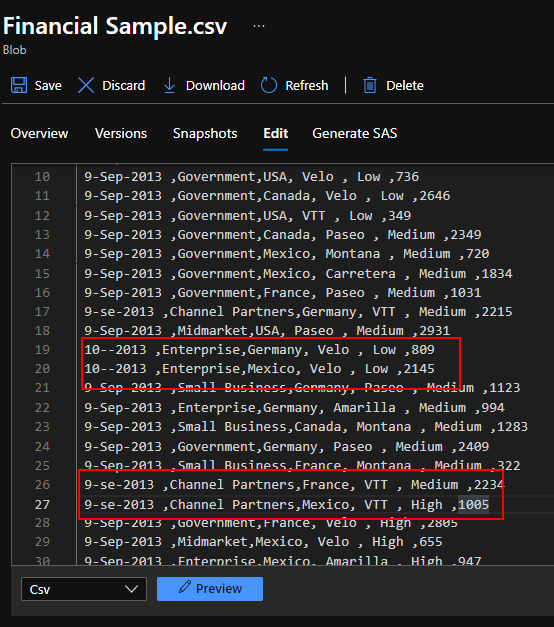
We may see that my knowledge has numerous error rows in-between which we’re going to segregate into separate SQL database tables.
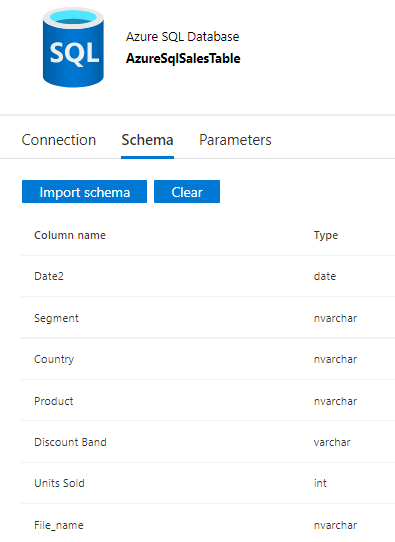
I’ve created two similar SQL tables which might retailer the proper rows and error rows respectively.
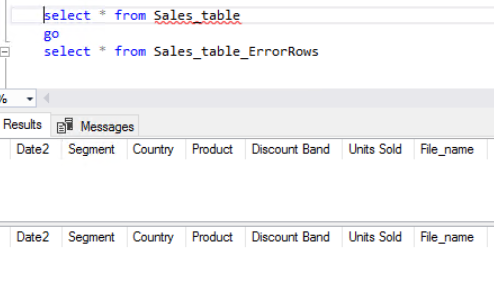
One factor to notice when creating the desk is although each of them accommodates similar construction and column title, I’ve made the ‘Date2’ column in ‘Sales_table_ErrorRows’ desk as varchar as a substitute of date sort. It is because we’re routing solely the error fields into that column so if you happen to create the construction with datetype, it received’t settle for the incoming ambiguous knowledge.

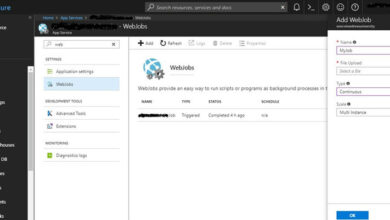
Open azure knowledge manufacturing facility studio and as a primary step, I’m going to create a brand new knowledge move as under. We’ve got so as to add the supply file
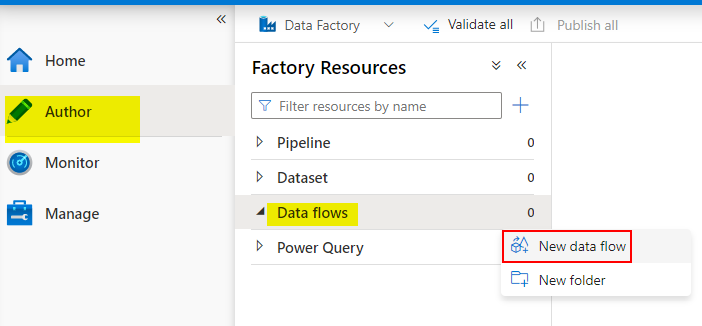

As soon as after I chosen the brand new dataset choice following are the steps I carried out to hyperlink the information supply into the dataflow.
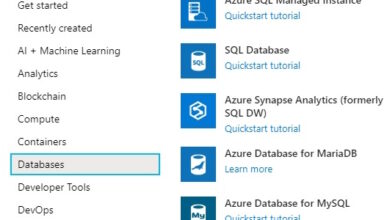
Dataset – New – Azureblob Storage – Delimited textual content(CSV) – Hook up with your linked server or create new if not accessible already.
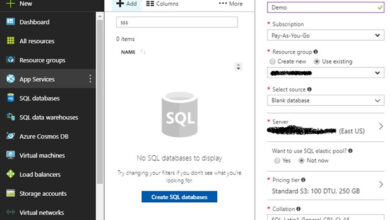
Now that knowledge supply has been created, we have to create vacation spot dataset on which the information goes to get saved. Right here in our demo, it’s the SQL database tables. Hyperlink to the SQL database and the primary desk that you really want the best knowledge to be saved into. I’ve created a brand new azure SQL database for this function, you should use the present one or the one you have already got.

Checking the schema of the desk we simply mapped to ensure that we now have the ‘Sales_table’ first.

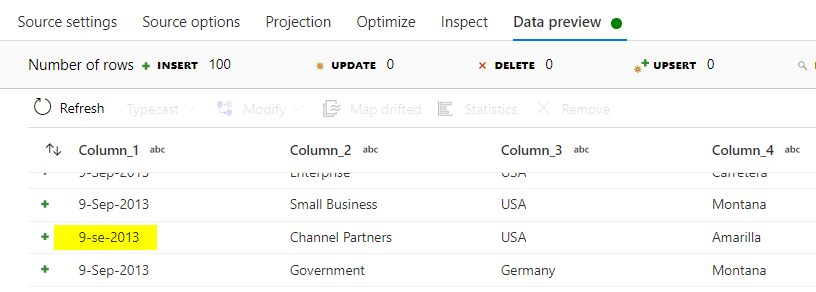
Let’s leap to the information move to get began as we now have all of the pre-requisites met. The following step is so as to add hyperlink to our present knowledge move however earlier than that we now have to carry out the validation and choose the error rows out which is the target of this demo. As a primary step, I’ll click on on the ‘SalesData’ dataflow and use the ‘Knowledge Preview’ tab to view the rows. One factor to notice right here is we will need to have ‘Knowledge move debug’ enabled to ensure that the information preview to work.
The highlighted subject within the knowledge preview under is likely one of the error rows which we’re going to segregate right into a separate desk.
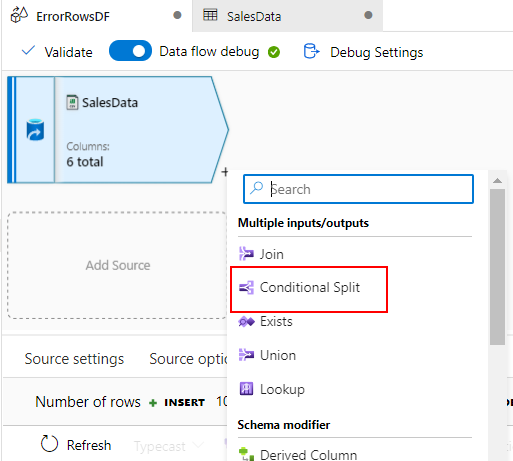
Now again to knowledge move the place we are able to add transformation move to filter out the information and divert the legitimate rows into ‘Sale_tables’ and the error rows into ‘Sales_table_ErrorRows’.
Click on the ‘+’ button so as to add a ‘Conditional Break up’ transformation into the information move. As soon as opened the under pane would record out the fields the place you may hold the default choices for the primary three fields. The break up situation is the crucial subject which we’re going to concentrate on.
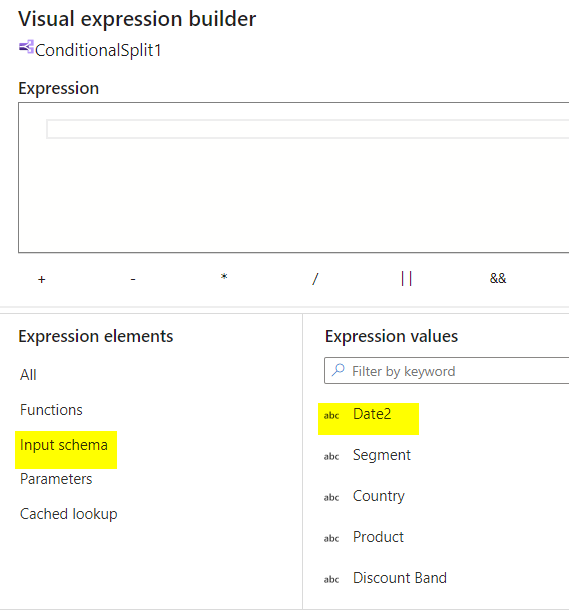
The primary row of the break up situation is the place we are going to determine the error rows primarily based on the situation we’re going to specify and the highlighted visible expression builder will probably be helpful in build up our situation to examine the Date worth in our knowledge is legitimate or junk row.
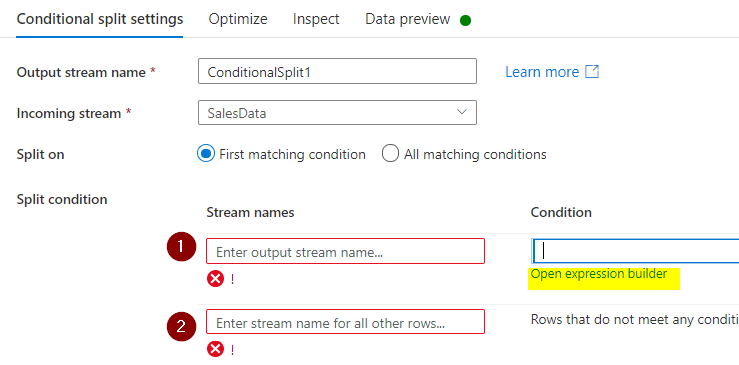
There are two circumstances supplied with the break up situation, let’s have a look at the primary situation. Click on on the enter schema to record out the columns out of your supply and the Date2 is our date column which we have to validate and break up out the error rows.
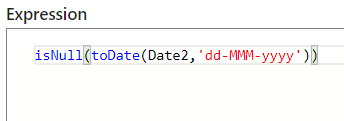
We are able to simple convert our date worth utilizing “toDate” expression however since our column knowledge would possibly comprise error or incomplete rows, it’s higher to incorporate “isNull” so that it’s going to return True if it resolves Null and False for another values. Now save and end.
Continued with Half Two….