Introduction
On this weblog, we are going to discover an superior function offered by Microsoft Azure for its Storage providing, i.e. Microsoft Azure Storage – Static Web site.
On the finish of this weblog, you’ll discover ways to allow, host, and handle static web site options utilizing the Azure Administration Portal.
Stipulations
As part of the stipulations, we have to have:
- A sound Azure Subscription – Free, Pay as you go, and many others.
- The zeal to study Microsoft Azure.
Overview
Microsoft Azure gives completely different choices for internet hosting your .internet utility on public Cloud. Azure App Service, Azure VMs, Containers are essentially the most used methods to host any utility with expertise stack variants.
This all although comes of-course with a value affiliate to it, and that too with a flat month-to-month value, generally often known as App service Plan. Contemplate a state of affairs the place you might be internet hosting a meetup, or convention, and have a static utility, an HTML, JavaScript, utility. And now you need to host this utility for every week’s time solely. On this case, going with Internet App, or Azure VM shall be to value consuming.
Microsoft Azure Storage comes with a brilliant cool function – Static Web site, whereby you may host any static utility to a public cloud, utilizing Azure Blob storage. Right here you may with few easy steps can allow a blob storage account to host static content material, with having a public URL. Webpages might embody static content material, like HTML, CSS, JavaScript, picture recordsdata, and client-side scripts. Server-side scripting will not be supported. And all this does include the identical availability, safety as of Azure storage. Additionally, having a storage account offers the most cost effective approach to host your utility on the cloud, as in comparison with all different choices accessible.
Additionally, internet hosting your content material in Azure Storage lets you use Serverless architectures that embody Azure Capabilities and different Platform as a service, companies.
Pricing
Create an Azure Storage Account
Utilizing Azure Portal – Now let’s create a Microsoft Azure Storage account, the very first step to start out with.
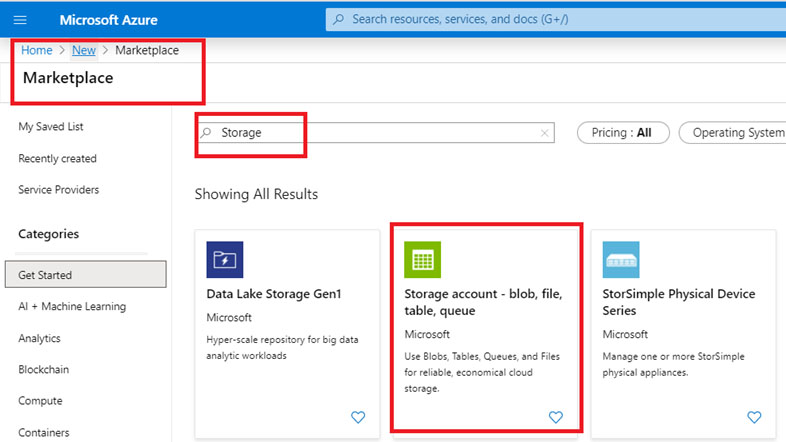
Go to Microsoft Azure Portal => Create a useful resource => kind ‘Storage’ and choose the one highlighted as proven in under picture, and hit on ‘Create’
It will provide you with the window so as to add configuration particulars for storage accounts:
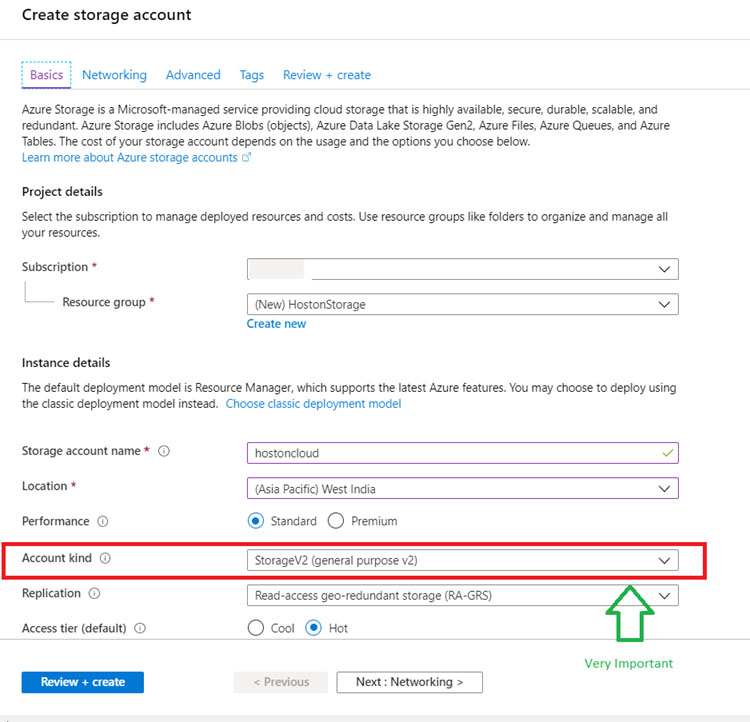
Fundamental Particulars
- Choose the legitimate Subscription
- Enter Useful resource Group title from current or create new. On this article, have created a brand new RG title HostonStorage.
- Enter the storage title. Have some indicative title, as this title could be the a part of your web site public URL. On this article, have given it’s as HostonCloud.
- A very powerful element is ‘Account Form’. It ought to choose as StorageV2 (normal purposeV2) solely. It is because, on the time of writing this text, the one account variety which helps Web site internet hosting is Storage V2 (normal purposeV2). So, guarantee you choose this feature as you wouldn’t be capable of leverage the Static Web site function.
- Different choices like Location, efficiency, Replication will be chosen as required.
Check with the under picture with primary configuration particulars:
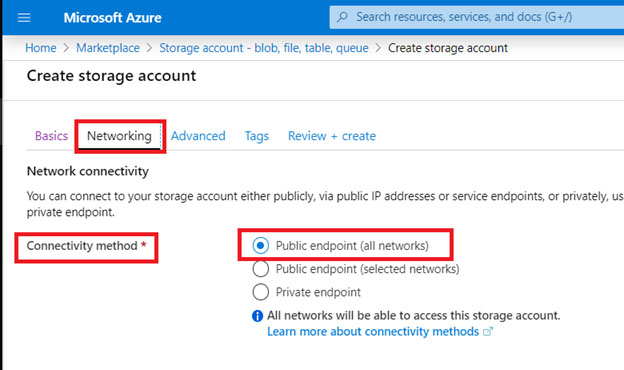
Click on on, Subsequent: Networking part.
Ensure that the connectivity methodology is opted as Public endpoint (all networks), as our purpose is to have this storage as a public internet hosting choice for an online web page.
Click on on Subsequent: Superior choice. Have all of the choices as chosen by default. Once more it will depend on the requirement, however on this article, I’m maintaining the configuration as default.
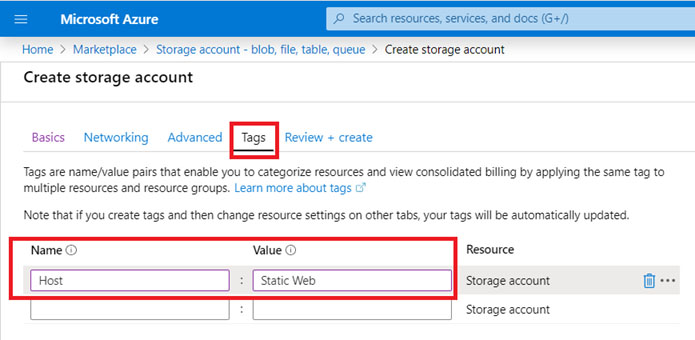
Click on on the subsequent choices, Tags, not obligatory to have one, however strongly advisable. It helps within the segregation of sources for billing, and different administration functions.
As soon as performed with the above particulars, Hit on Subsequent: Assessment + Create. You may hit on this at any given blade.
It will evaluate and validate all crucial requisites based mostly on the main points offered. And as soon as the validation is handed, the Create button is enabled to deploy the useful resource.
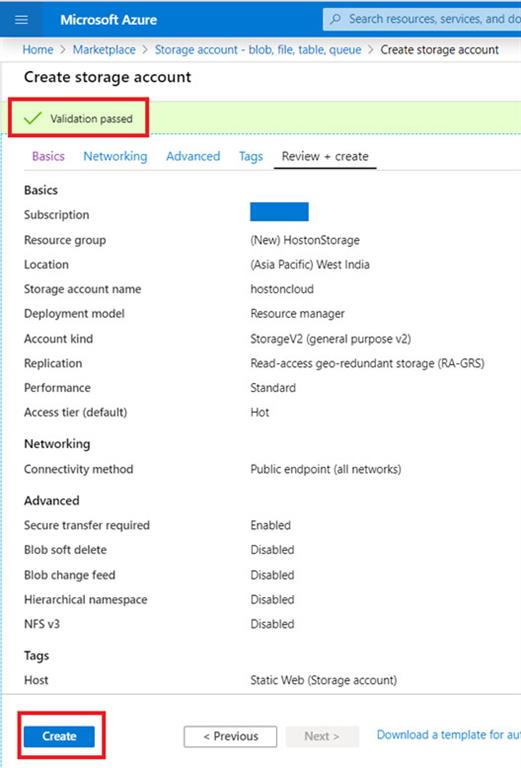
Hit Create, to provoke the deployment of sources.
As soon as the useful resource is created, you may be notified within the Notification window with the hyperlink ‘Go to Useful resource’ to navigate to newly created Storage sources.
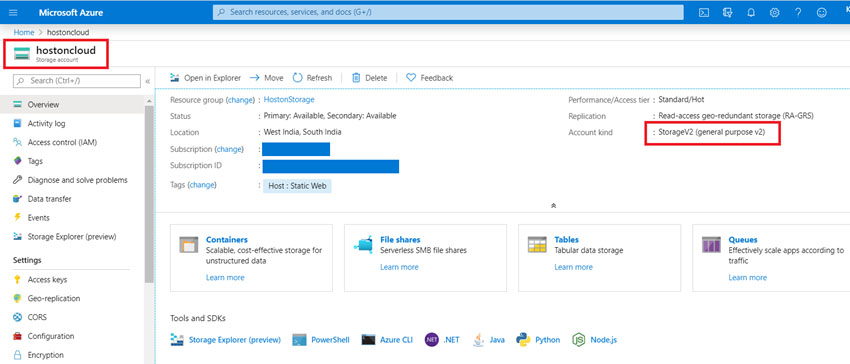
Allow Static Web site Characteristic
Now, as soon as we’re performed with having our storage account created, its time to configure it to have it as a Internet hosting choice for static net content material.
To take action, comply with the under steps:
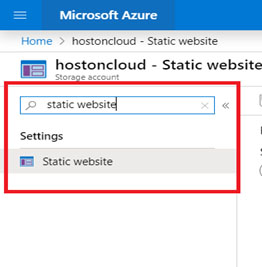
- Within the storage useful resource web page as seen above, on the left-hand nook blade, on the prime we’ve a search field. Enter, ‘Static Web site’ within the textual content field, and click on on the resulted choice.
Alternatively, you may simply scroll down in the identical blade and search underneath Settings => ‘Static Web site’ and Hit the choice.
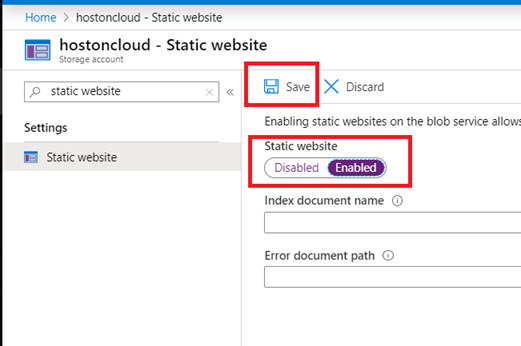
- As soon as deciding on the ‘Static Web site’ choice, it’s going to present a display with a toggle choice to Allow/Disable, the mentioned function.
By default, it will likely be disabled. Choose the toggle button to make it allow and click on on Save.
As soon as its saved, the display will give you two public endpoints, major and secondary. These are your public URLs:
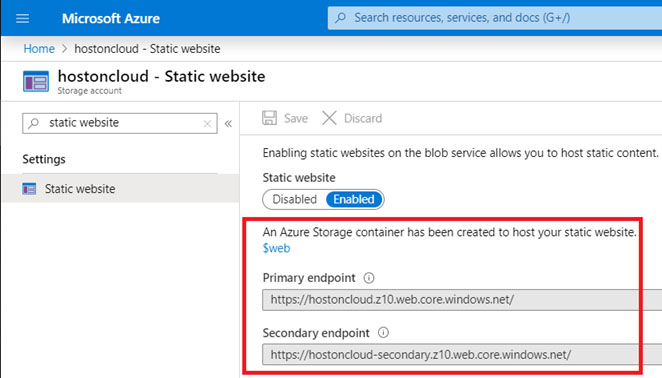
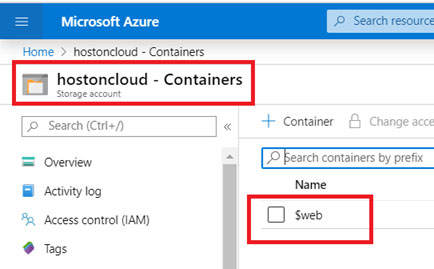
Should you discover the above picture fastidiously, together with the endpoints, it additionally says, {that a} container title ‘$net’ is created within the storage account.
That is essential to notice, as the online content material artifacts should be uploaded to this newly created container.
Importing Internet File to Storage
Now, if we browse the first endpoint or secondary endpoint, by copying the URL from portal to the browser’s tackle bar.
It will likely be proven as under:
It is because we haven’t uploaded any content material to the $Internet container created.
When you add the recordsdata with static content material to the container, it’s going to begin displaying the web page.
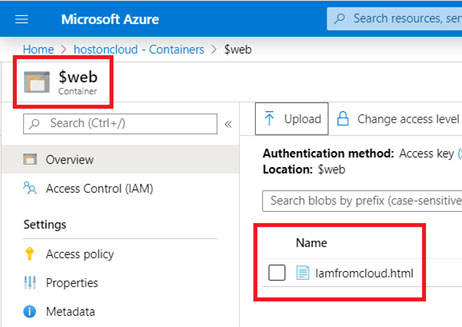
So now let’s add some recordsdata with static content material to the container and examine.
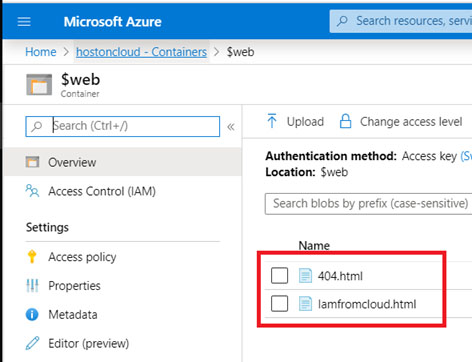
For this text, will add a easy HTML file title Iamfromcloud.html
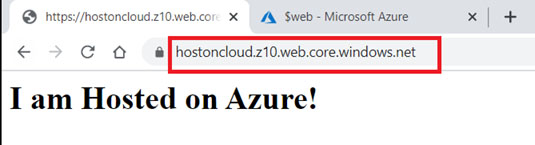
And now let browse this web page by the first endpoint we tried earlier:
Cool, it’s working. So we’ve hosted recordsdata with static content material to public cloud Azure utilizing Azure Storage.
Once more, simply discover the above picture, and the URL is highlighted.
It does comprise the title of an HTML file and never simply the URL. And for those who once more browse with simply URL, it’s going to present No content material message.
To keep away from this, we are able to additionally set the default web page title to get show.
Set Default Internet Web page
Go to the identical Static Web site web page in Azure Portal.
Right here, underneath ‘Index doc title’, simply enter the file title you need to get displayed by default and click on on Save.
Equally, you too can set a Customized Error web page or 404 pages for any incorrect request being made.
I’ve additionally uploaded an HTML file title 404.html
I discussed the identical underneath, Error doc path discipline, then click on Save.
And now, let’s browse the first endpoint with out mentioning any file title.
It shows our web page set as default on public URLs,
Additionally, strive with some incorrect file title request.

And it now masses the error file set, 404.html.
Conclusion
So, on this article, we realized, how seamlessly we are able to allow, host & handle static recordsdata on Azure cloud utilizing Microsoft Azure Storage.
Would advocate you do this at your finish and tell us in case you have any queries or considerations.
Thanks!


