Introduction
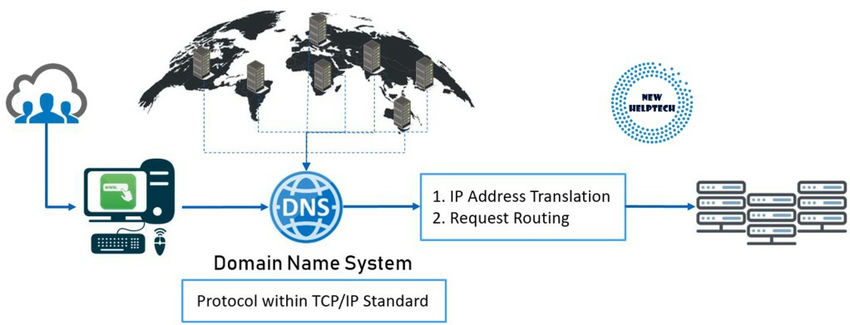
Area Title System (DNS) is the web’s phonebook, translating human-readable domains into IP addresses that computer systems use to establish one another on the community. DNS zones host a site’s DNS information, and altering your title servers to Azure DNS permits you to handle your area’s DNS information out of your Azure account.
People usually flip to area title registrars, approved entities liable for reserving and managing domains for a price to safe a site title. These registrars provide numerous providers needed for sustaining a site. Standard registrars embrace GoDaddy, WordPress, and OnlyDomains, with quite a few choices accessible out there.
Azure DNS Zones are a significant service provided inside the Microsoft Azure Portal. They facilitate mapping your public domains to Azure DNS Zones and net servers, permitting for the seamless publication of net apps through DNS Zones.
Inside Azure, there are two major kinds of DNS Zones providers.
- DNS Zone: This service operates over the web and resolves names globally. It is important for internet hosting domains in Azure, and we are going to delve into its specifics shortly.
- Non-public DNS Zones: This service operates with out requiring web connectivity. Sometimes utilized inside intranets over Digital Networks, it would not necessitate a public area.
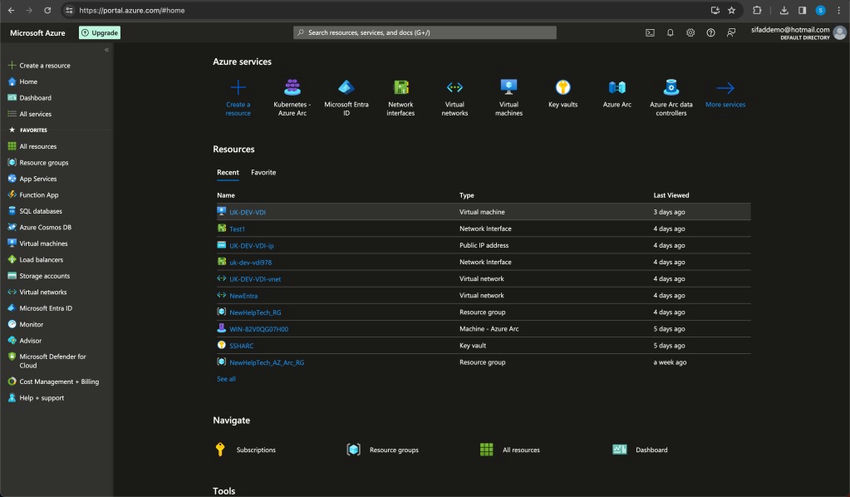
Step 1. Go to the Azure Portal at (https://portal.azure.com/).
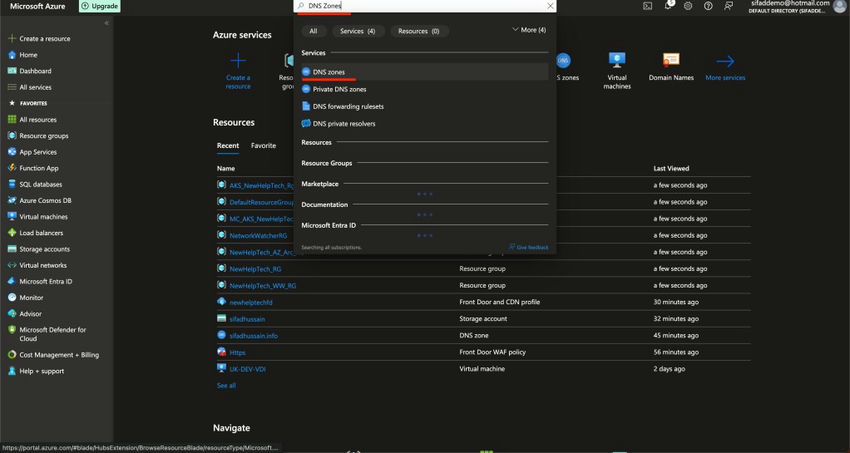
Step 2. To seek out DNS Zones, simply kind “DNS Zones” into the search bar situated on the prime of the Azure portal interface.
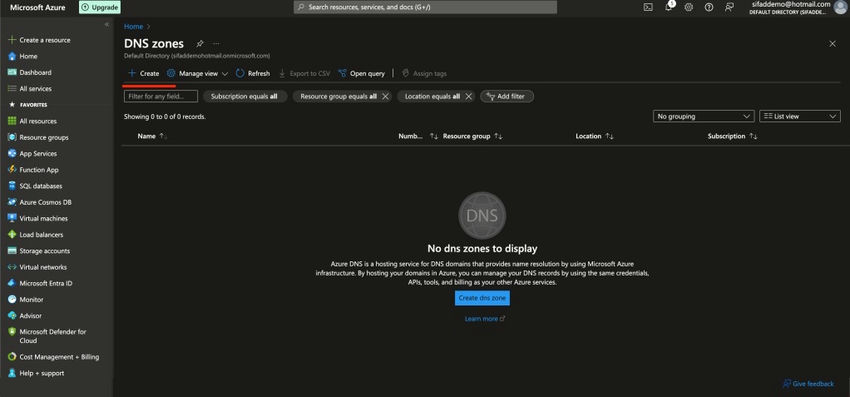
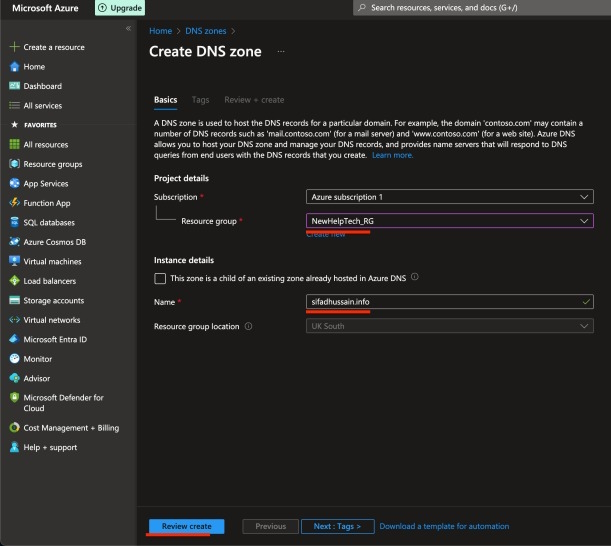
Step 3. As soon as open the DNS zones part, Click on on Create.
Step 4. Fill within the Title along with your area (e.g., sifadhussain.data) and choose your subscription and useful resource group, then click on on Assessment Create.
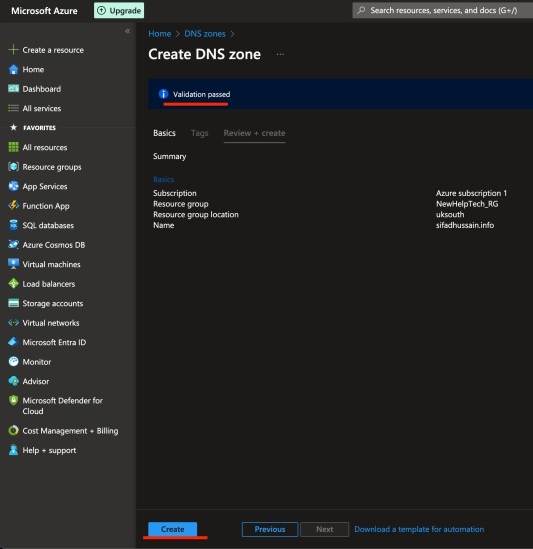
Validation handed; then click on on Create.
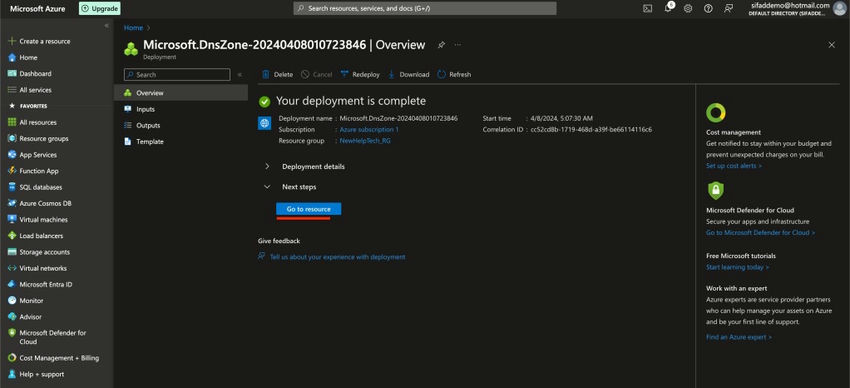
Step 5. As soon as the DNS zone is created, click on on Go to the useful resource.
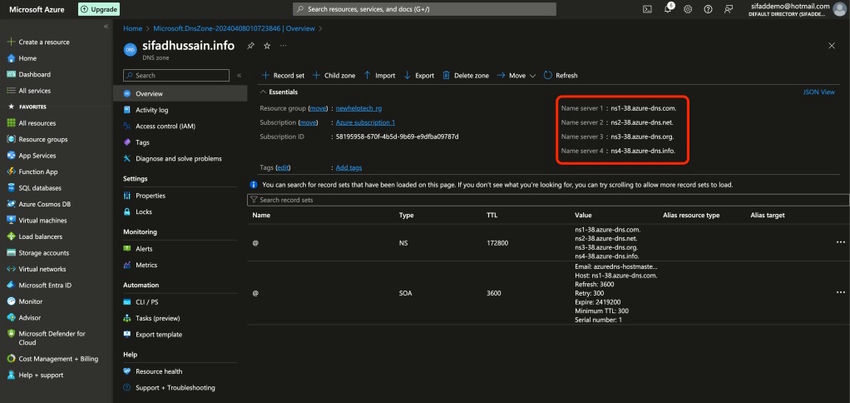
After creating the zone, be aware of the Title Servers liable for internet hosting the information inside your zone. You’ll need to replace the Title Servers along with your area registrar. These servers normally have names like.
Step 6. I utilized GoDaddy to register my area, which is the display screen I utilized to switch the Title Server information. Different registrars provide related capabilities.
Entry the Nameservers part and proceed to vary the nameservers to Azure DNS.
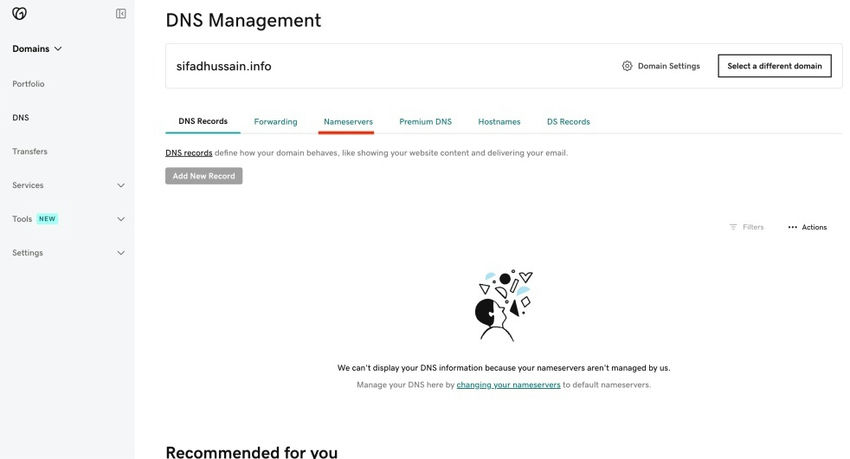
Select your nameserver and enter all of the title servers recognized throughout the DNS zone creation step. Then, save the adjustments.

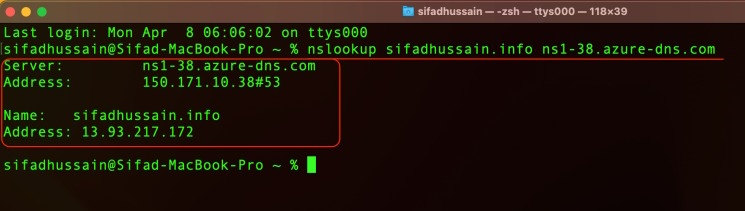
It could take as much as 48 hours for the adjustments to propagate worldwide. You need to use instruments like nslookup or dig to confirm that your area’s DNS information resolve to the values laid out in Azure DNS.
Launch PowerShell and execute the next command.
nslookup sifadhussain.data ns1-38.azure-dns.com
You need to obtain a response containing your title and the general public IP deal with of your net app.
Step 7. To check the net server, I’ve arrange a fundamental web page on Azure displaying Azure DNS Zones. Nonetheless, accessing it through the general public IP deal with would not replicate the specified setup. We intention to entry it utilizing the area title sifadhussain.data we created. To realize this, we should add a file set within the DNS Zone.

Step 8. Throughout the Azure DNS Zone interface, proceed to create a brand new Recordset, specifying the Kind A file kind, and enter the IP deal with of your net server to allow area decision, then click on on Okay.
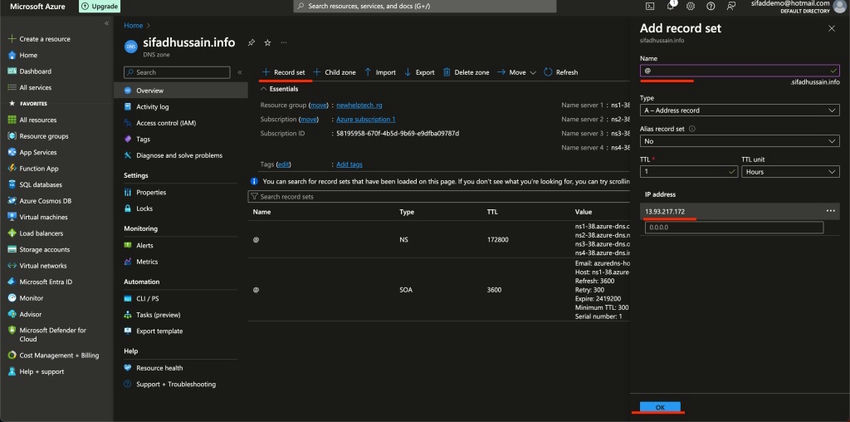
After confirming the main points and clicking OK, the file set will probably be created, and you’ll observe the entry within the DNS Zone interface as highlighted beneath.

Step 9. Subsequent, let’s proceed to check with the area title sifadhussain.data that now we have arrange. The anticipated consequence ought to match what we noticed with the IP deal with.

Conclusion
Managing DNS zones and title servers is essential for sustaining an environment friendly on-line presence. Azure DNS Zones, built-in inside the Microsoft Azure Portal, provide a seamless resolution for mapping domains and net servers, streamlining the publication of net apps.
All through this text, now we have explored the basics of DNS zones, creating and configuring them inside Azure, and the important steps for linking them with area registrars like GoDaddy. Following the outlined steps, customers can successfully leverage Azure DNS to optimize their area administration and guarantee clean DNS decision.
I hope this text is a helpful useful resource for these searching for to boost their understanding of DNS administration within the Azure surroundings and facilitate the seamless integration of Azure providers into their on-line infrastructure.
Know extra about our firm at Skrots. Know extra about our providers at Skrots Providers, Additionally checkout all different blogs at Weblog at Skrots


