The ExpressRoute Direct connects on to Microsoft’s world community through strategically situated peering factors. The ExpressRoute Direct offers 10 Gbps or 100 Gbps connectivity, which helps Energetic/Energetic connectivity.
This function shouldn’t be typically out there within the Azure portal, and we should register this service earlier than utilizing this service.
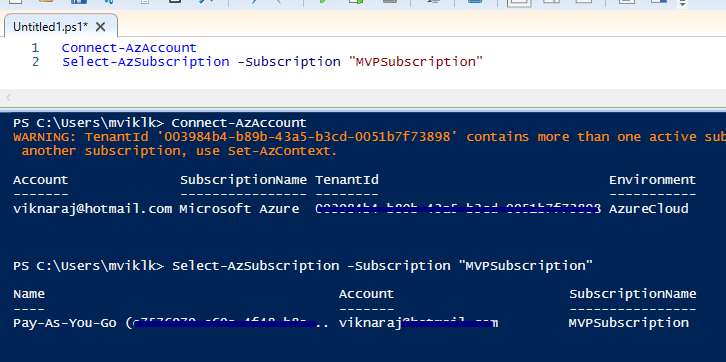
Step 1
In PowerShell, enter the under instructions to enroll in our subscription.
- Join-AzAccount
- Choose-AzSubscription -Subscription “Subscription Title / ID”
Step 2
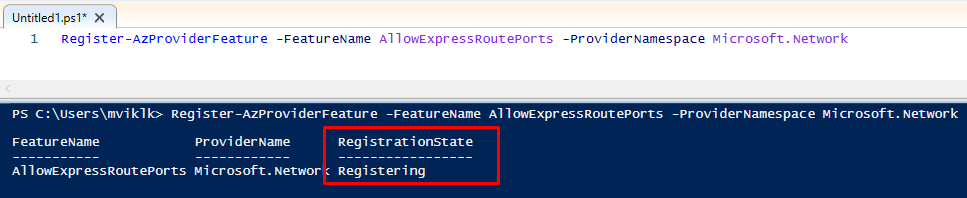
Enter the under command to register our ExpressRoute Ports and Microsoft Community for our subscription.
- Register-AzProviderFeature -FeatureName AllowExpressRoutePorts -ProviderNamespace Microsoft.Community
Step 3
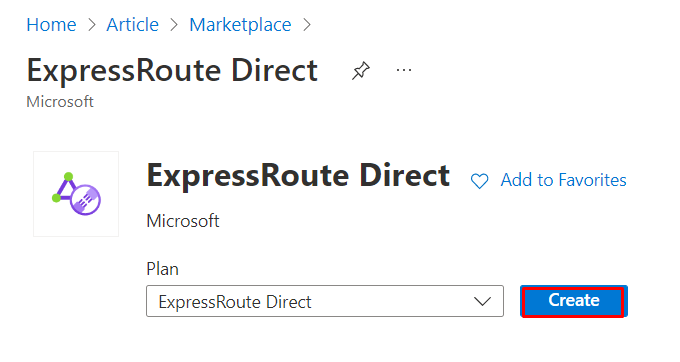
Within the Azure portal, sort ExpressRoute Direct within the world search, choose ExpressRoute Direct. Click on the Create button to open the Create ExpressRoute Direct web page.
Step 4
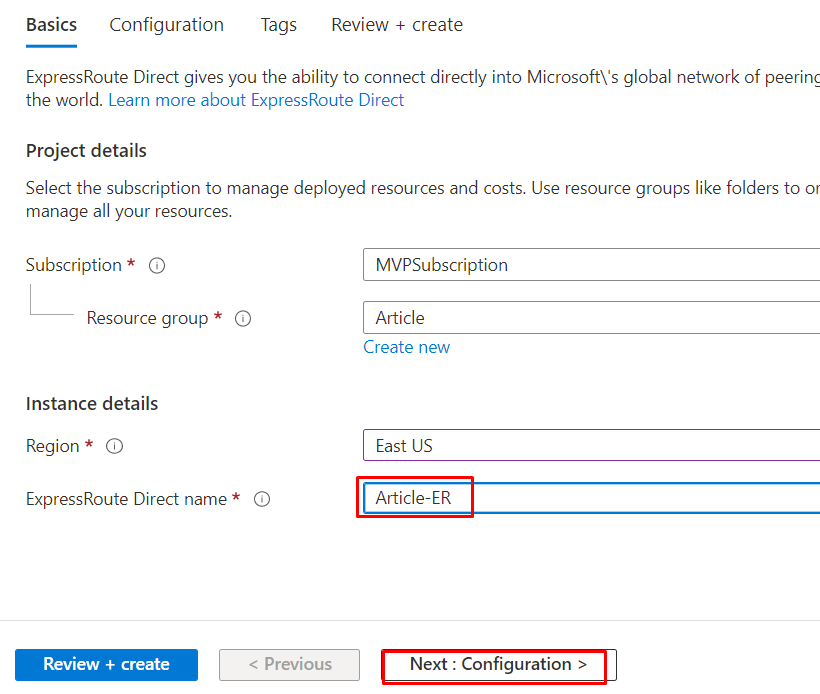
Choose the Subscription, Useful resource group and enter the identify for the ExpressRoute Direct. Then, click on the Subsequent button for Configuration.
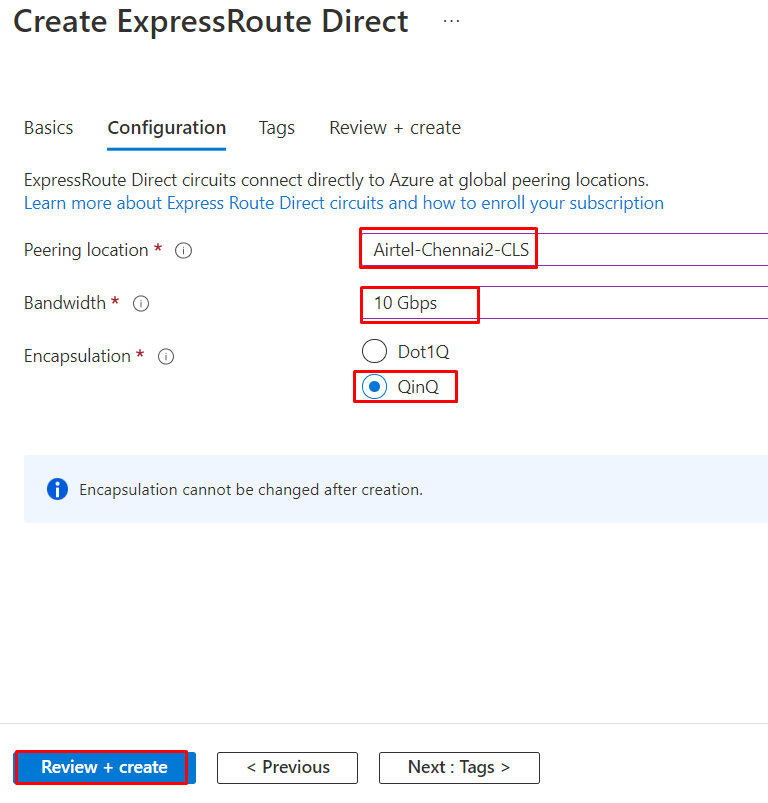
Step 5
Choose the peering location the place we are going to hook up with the ExpressRoute Direct. On this demo, we are going to select Airtel-Chennai2-CLS.
We will choose the Bandwidth we wish; if the Bandwidth shouldn’t be displayed within the Bandwidth part, create a Microsoft Help ticket.
Within the Encapsulation, we are able to select Dot1Q (We should handle the individuality of the C-Tag (VLAN) throughout your complete ExpressRoute Direct useful resource) or QinQ (The ExpressRoute circuit can be dynamically assigned an S-Tag and can be distinctive all through the ExpressRoute Direct useful resource). On this demo, we are going to select QinQ, choose Overview + create, and click on Create.
Step 6
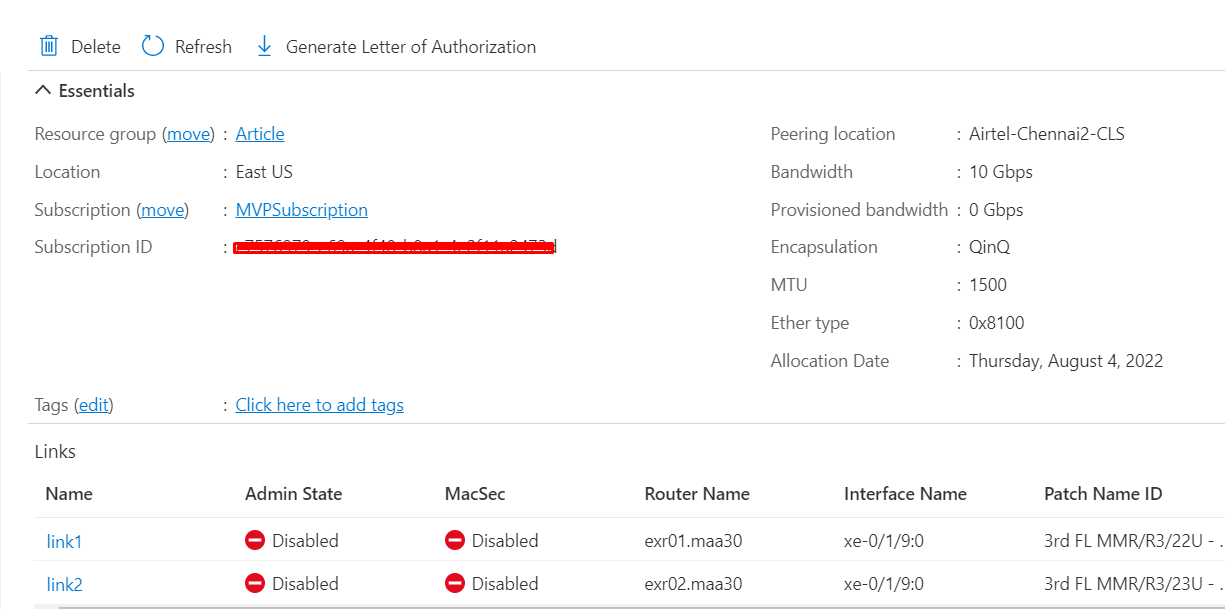
The ExpressRoute Direct deployment is accomplished. Within the ExpressRoute Direct Overview, the Hyperlinks are disabled.
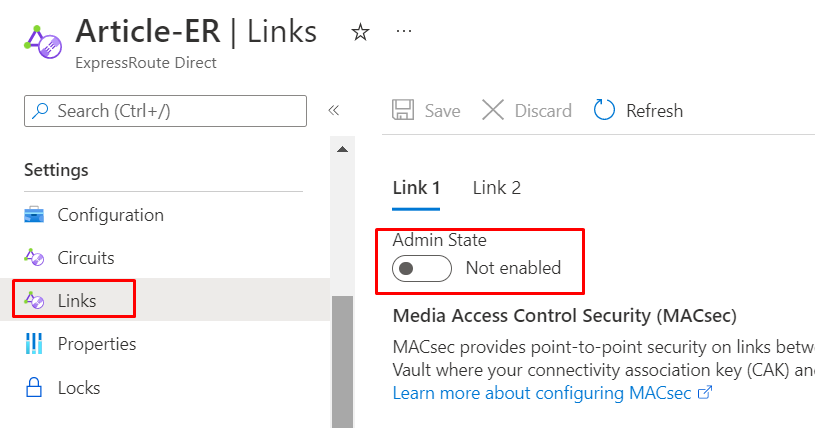
Step 7
To activate the Hyperlinks, go to the Hyperlinks below the Settings and choose the Admin Stage to Allow and Save it. Repeat the identical step to activate Hyperlink 2 as properly.
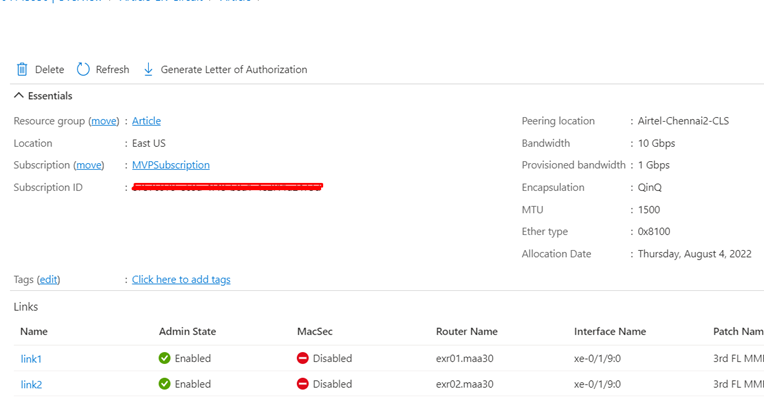
Hyperlink 1 and the Hyperlink 2 are activated.
Abstract
Within the article, we realized how one can deploy the Azure ExpressRoute Direct. In our subsequent article, we are going to learn to create the ExpressRoute connection.


