Introduction
The Azure digital machine is without doubt one of the big selection of companies that azure gives to create your digital occasion.
Every digital machine gives its digital {hardware} together with CPUs, Reminiscence, Arduous Drives, Community interface, and different gadgets.
A Digital Machine gives the flexibleness of virtualization with out shopping for and sustaining the bodily {hardware} that runs it.
On this article, I’ve executed the entire VM creation in azure.
Creating Digital Machine(VM) in Azure
Step 1
Check in to your Azure Portal
Step 2
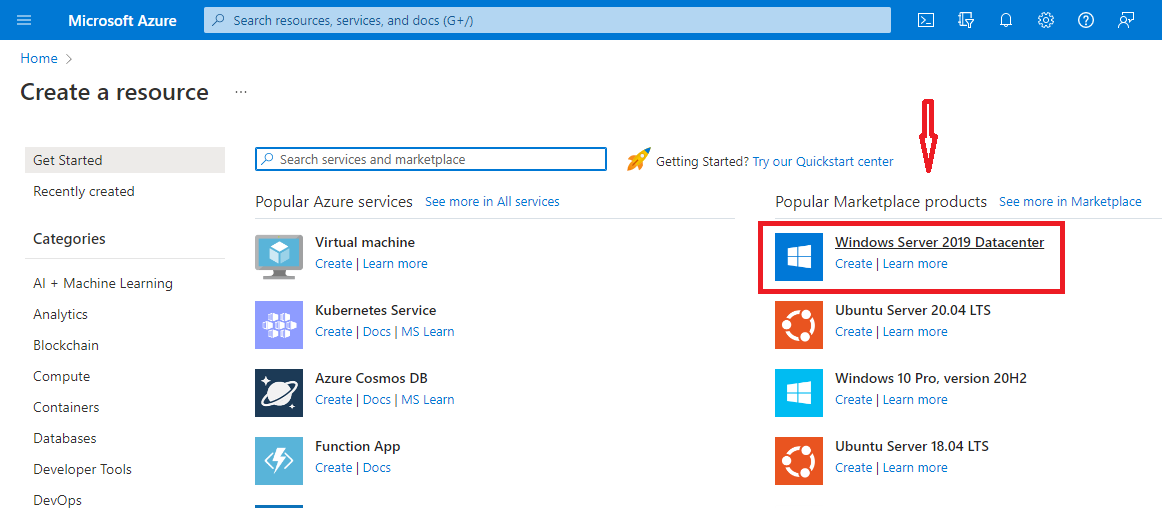
Click on to Create a useful resource

Step 3
On this is ready to see the VMs, then you’ll be able to select VMs as per your necessities. In my case, I’ve chosen Home windows Server 2019 Datacenter.
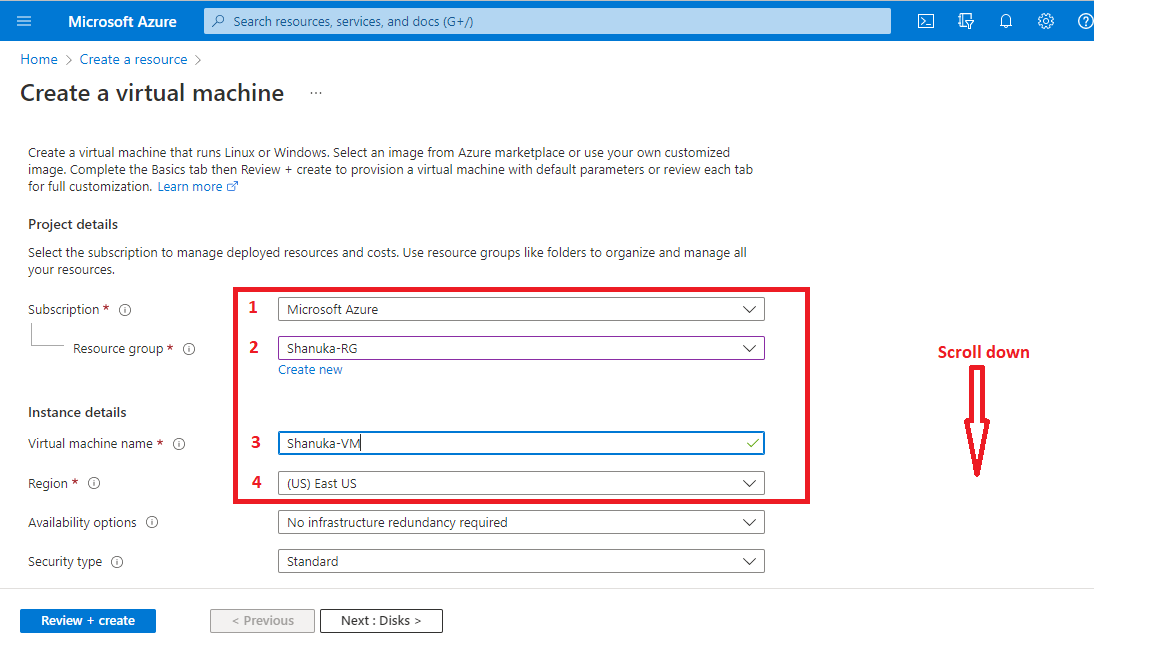
Step 4
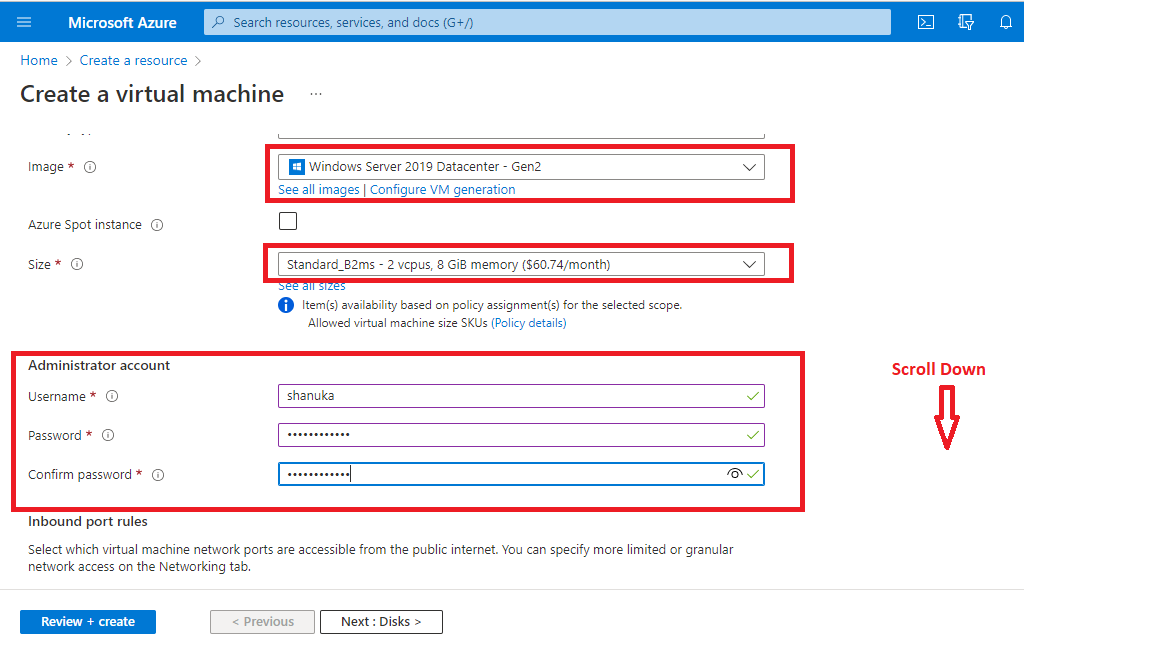
I’ve talked about which key adjustments are to be modified within the under screenshot. Please be certain the small print are as per your state of affairs.
Step 5
IMPORTANT: Please be certain of your VM Measurement, if you choose the improper dimension then it should have an effect on your billing.
And within the meantime would not overlook what entered as your Username and Password.
Step 6
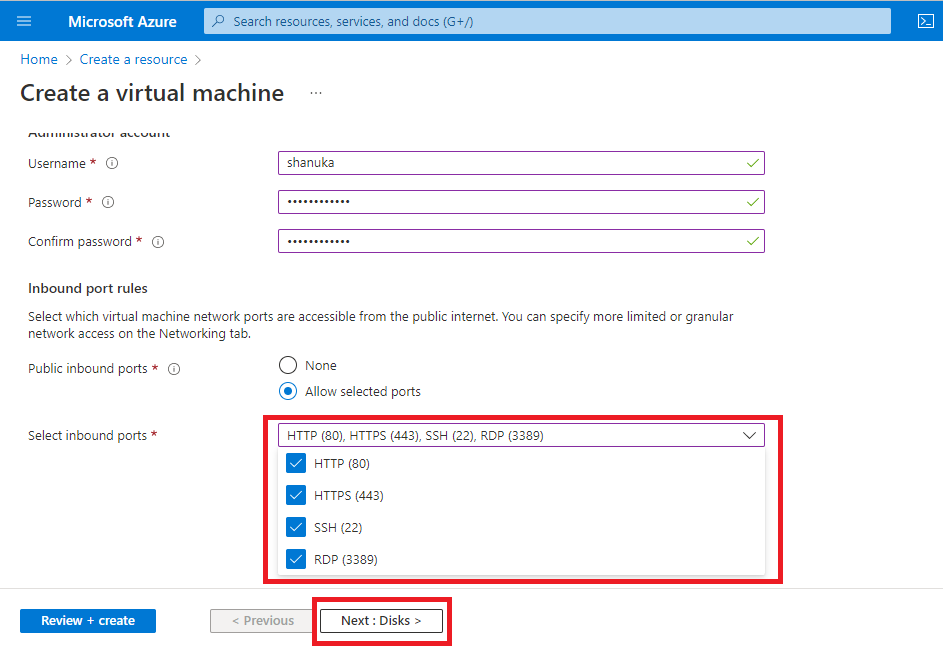
Please be certain the Inbound Ports Must be ticked RDP (3389) if it is unticked youwill not be capable to entry the VM. Different (HTTP, HTTPS, SSH) are optionally available. Click on Subsequent: Disk
Step 7
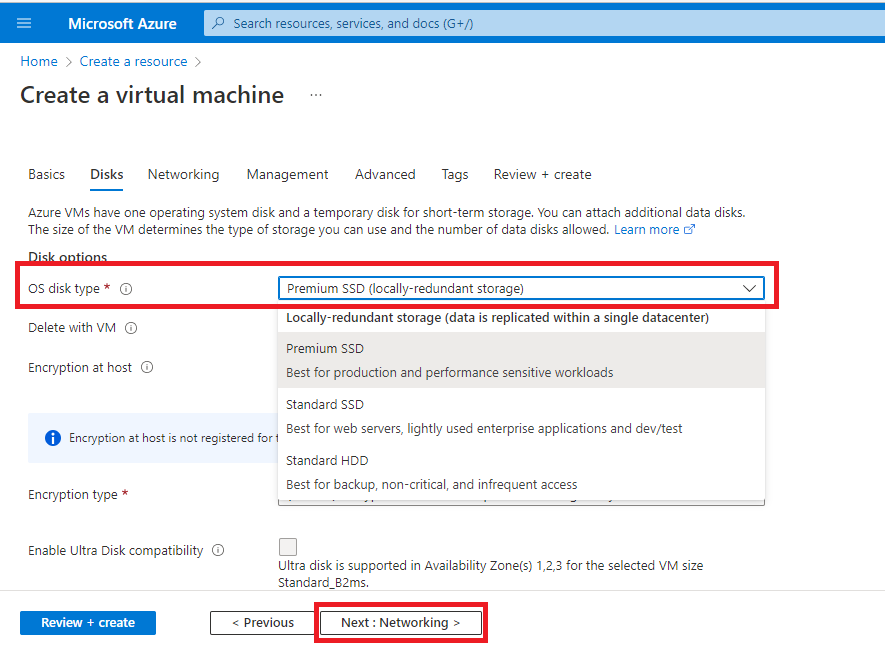
Choose the OS disk sort as per your requirement. In my case, I’ve chosen Premium SSD and Subsequent: Networking
Step 8
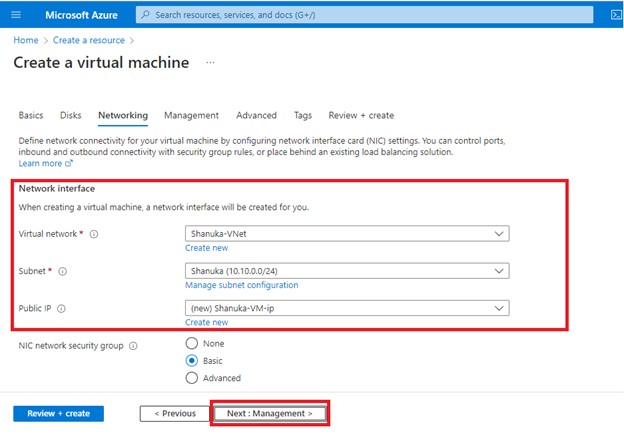
Choose the proper Digital Community (VNet) + Subnet. And the meantime Public IP deal with might be generated routinely. Click on to Subsequent: Administration
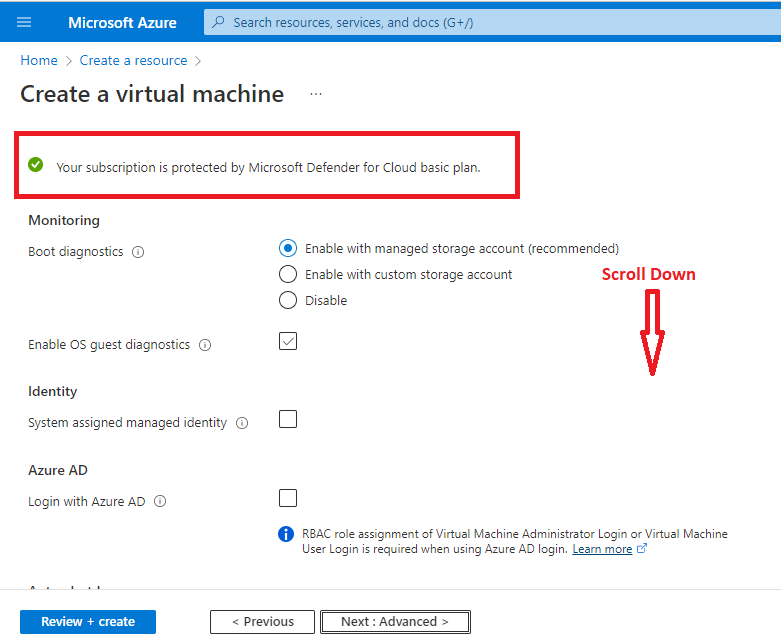
Step 9
Go away it as default and Scroll down
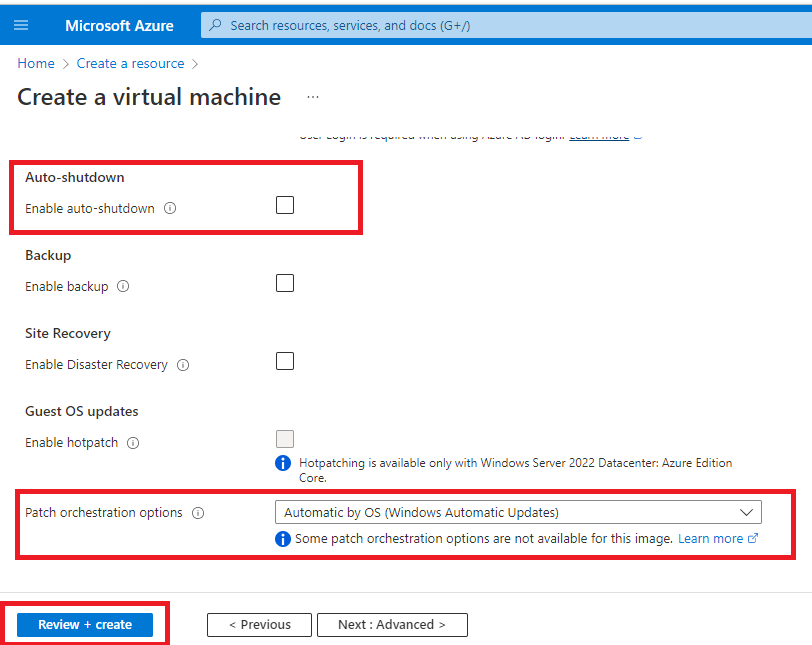
Step 10
Auto Shutdown is by default scheduled. If you need you’ll be able to hold it because the default. In my case I will disable the auto-shutdown possibility and Click on Evaluation + create
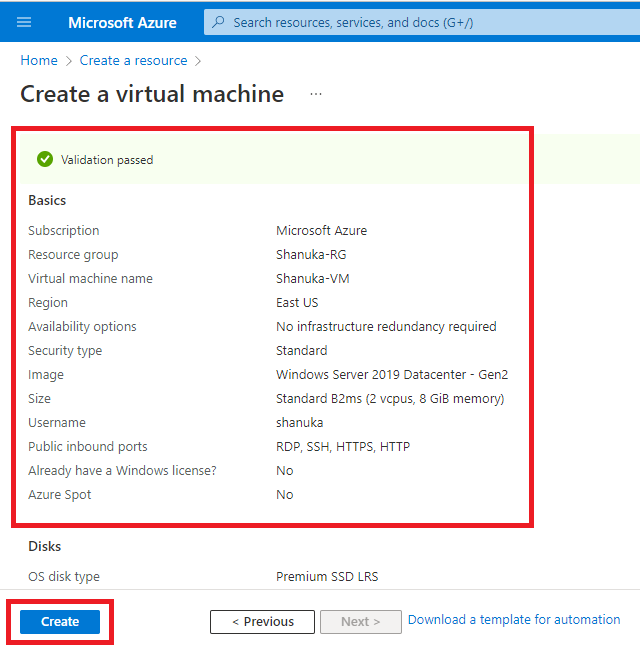
Step 11
As soon as Validation Handed you’ll be able to test the VM Abstract additionally then click on to Create it.
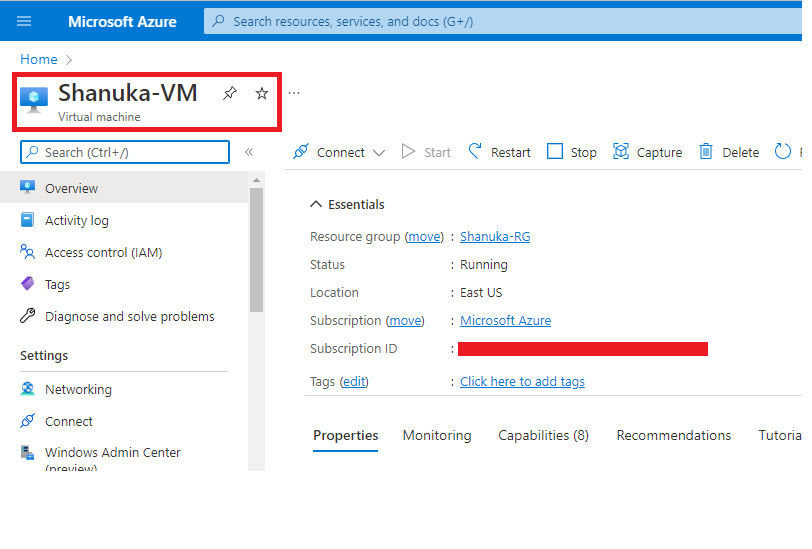
Step 12
Efficiently created my VM.
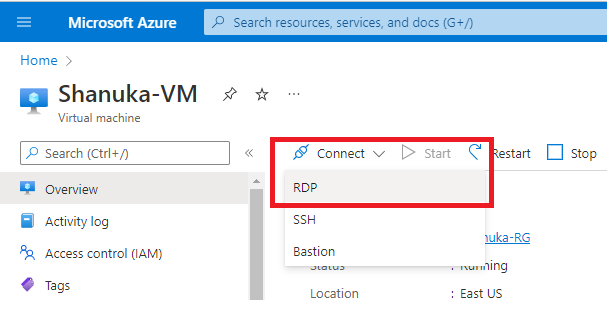
Step 12
I will obtain the RDP file
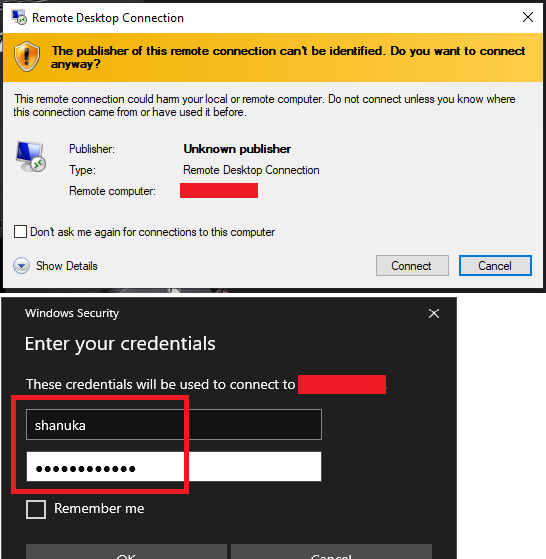
Step 13
When you obtain your RDP file simply open and it’ll ask for the credentials. I’ve talked about my Username and Password
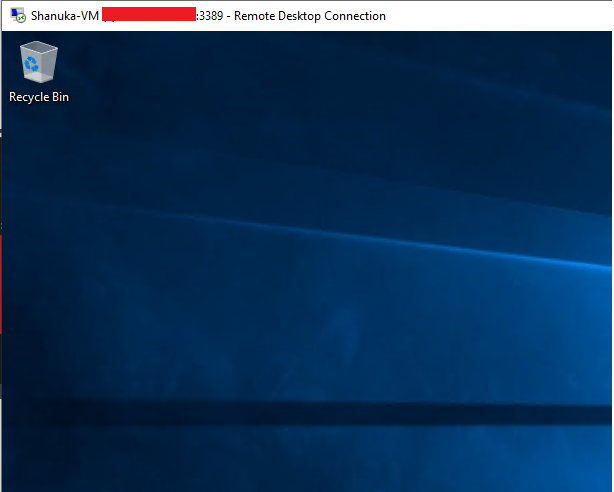
Step 13
I’ve logged into VM efficiently
Conclusion
This text taught us learn how to deploy a Digital Machine (VM) in our azure portal. And if in case you have any questions do not hesitate to get in contact with me.
Thanks.