This article will clarify the way to create Azure SQL Database. We are going to see it step-by-step.
Please confer with my earlier article,
Earlier than we begin, let’s perceive the target of this demonstration which tells what precisely can be lined on this article.
- Create an Azure SQL Database.
- Create a server-level IP firewall rule.
- Hook up with the database.
- Create tables within the database.
Conditions
- Conceptual Understanding of Azure SQL Database.
- You should have Azure Portal Entry.
Azure SQL Database
SQL Database is a high-performance dependable cloud database. It’s a managed cloud databaseas-a-Service (SaaS) that makes use of the SQL Server database engine within the Azure Cloud Platform.
It turns into simpler for the builders/programmers to develop their merchandise as there may be much less involvement within the upkeep a part of the product. It helps relational, JSON, XML, and spatial knowledge buildings. Azure SQL offers numerous superior options to its customers equivalent to Lengthy-term backup retention, Geo-replication, Computerized tuning, Scaling database sources, enterprise continuity, and so on.
Step 1
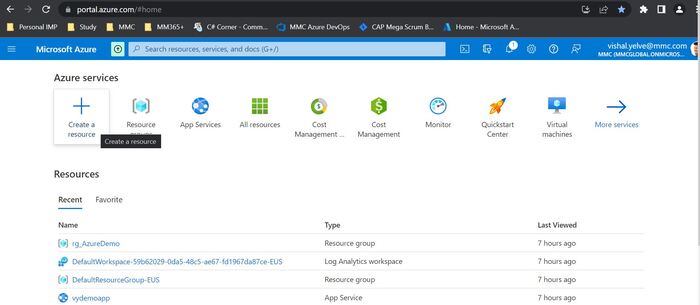
Open the Azure administration portal and log in to https://portal.azure.com
Step 2
Click on on “Create a Useful resource”.
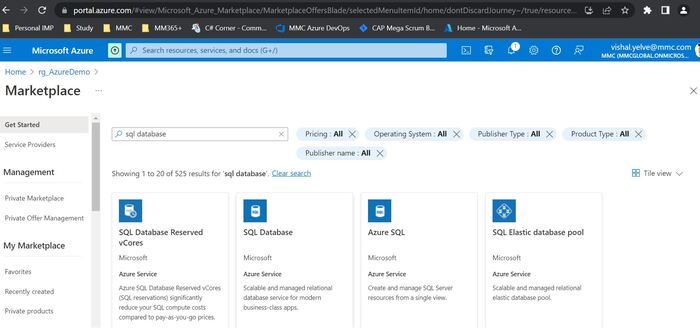
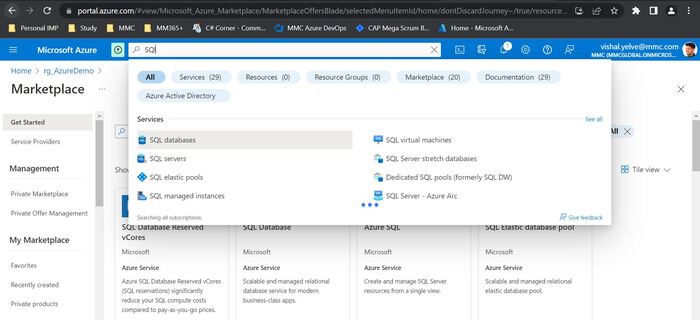
Step 3
Search and Choose “SQL Database“. Then, Click on on “Create”.
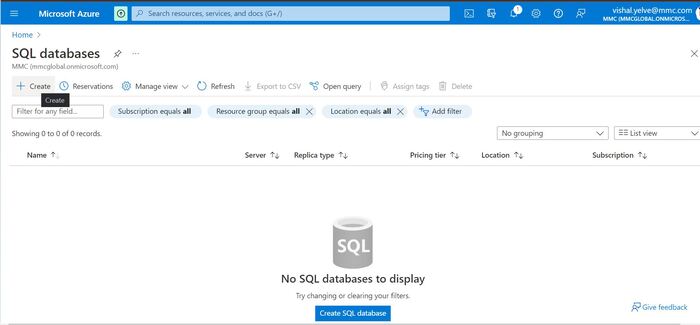
Step 4
Click on on the “+ Create” button.
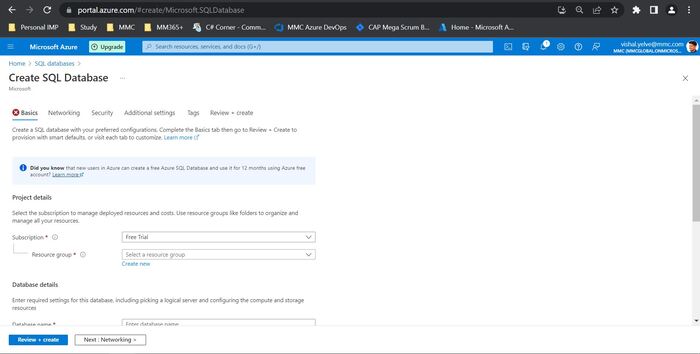
Step 5
After clicking create choice, fill within the required particulars within the Fundamentals tab
- Subscription
Select an appropriate subscription.
- Useful resource group
Useful resource group is a container that holds associated sources for an Azure answer. You possibly can preserve the useful resource group as it’s or you can too create one by clicking “Create New”.
Earlier than particulars are stuffed.
After the small print are stuffed.

Step 6
Fill the small print beneath the “Database Particulars”
- Database Title
Title your database.
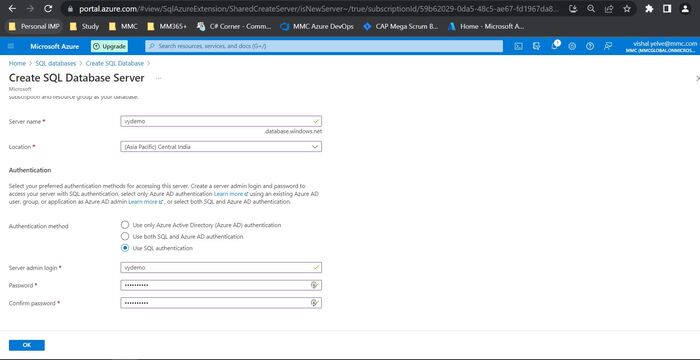
- Server
After naming the database, you’ll have to create a server. Click on on “Create new”, and you’ll be prompted to arrange some particulars.- Server identify: Enters a singular server identify.
- Location: Choose the placement in your server.
- Authentication methodology: Use the SQL authentication methodology
- Server Admin Login: Create a username as per your alternative.
- Password: Enter a robust password containing uppercase alphabets, particular characters, and numbers. Then, affirm your password by re-entering it.
Afterward, Click on on OK button on the backside.
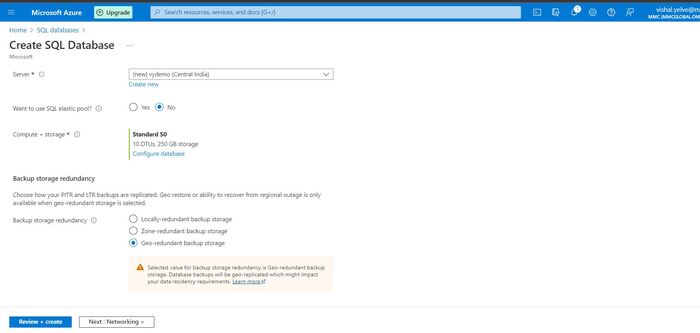
- Elastic Pool
If you happen to had numerous databases and wish to handle the efficiency and the fee collectively, you may put them in an elastic pool. However right here, you’ll want to create a brand new one. Therefore, Choose “No”
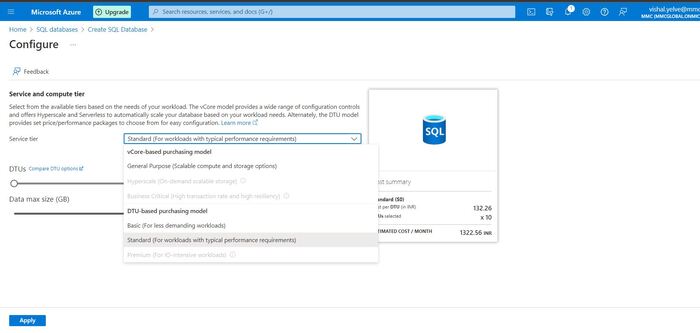
- Compute + Storage
As soon as you’re performed making a server, it is possible for you to to click on on the “Configure Database”, the place you’ll have to choose pricing choices. Right here, you’ll want to configure the database. This defines the storage and CPU utilization of the databases. There are primarily two sorts of configurations – DTU and vcore-based- DTU stands for the Database Transaction Unit that can outline what number of sources your database has. DTU presents a mix of computing, reminiscence and I/O sources. There are three configurations
- Fundamental: DTU:5, Measurement:2GB
- Normal: DTU:10-3000, measurement: 1TB
- Premium: DTU:125-4000, measurement: 4TB
- vCore Mannequin means that you can dig into the underlying sources and scale them independently for non-obligatory efficiency. It means that you can take Azure Hybrid Profit for SQL Server.
- Common-purpose/Normal: Scalable compute and storage choices
- Enterprise Important/Premium: On-demand scalable storage
- Hyperscale: Excessive transaction charge and excessive resiliency
- DTU stands for the Database Transaction Unit that can outline what number of sources your database has. DTU presents a mix of computing, reminiscence and I/O sources. There are three configurations
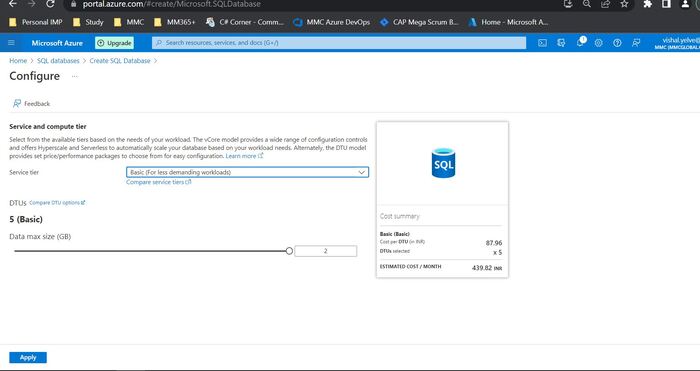
For the preliminary use, the In-Service tier, Choose “Fundamental” beneath the DTU-based buying mannequin. Then, Click on on “Apply”.
Step 7
“Backup Storage Redundancy” part, Choose Geo-redundant backup storage.
- Domestically-redundant backup storage
Copies your backups synchronously thrice inside a single bodily location within the major area. LRS is the least costly replication choice however is not beneficial for functions requiring excessive availability.
- Zone-redundant backup storage
Copies your backups synchronously throughout three Azure availability zones within the major area.
- Geo-redundant backup storage
Copies your backups synchronously thrice inside a single bodily location within the major area utilizing LRS, then copies your knowledge asynchronously to a single bodily location within the paired secondary area.
Step 8
After configuring the server, Now, Click on on “Subsequent: Networking >” to leap onto the networking part
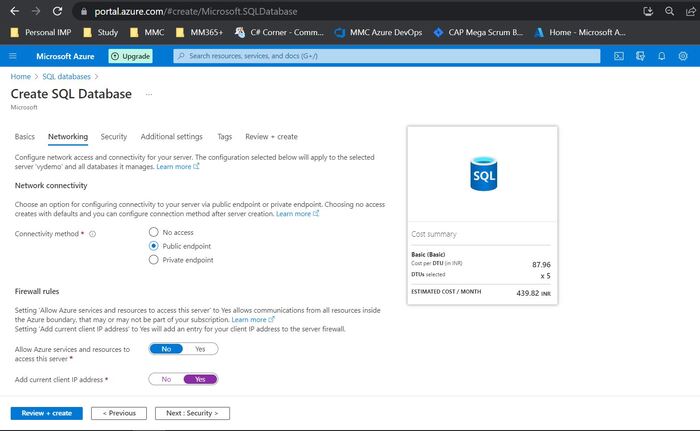
Now, Within the Networking tab, Select the beneath choices
- Choose the Connectivity methodology as a Public endpoint
- Select the No choice for Enable Azure Providers and sources to entry this server.
- Choose the Sure choice for Add present consumer IP handle.
Step 9
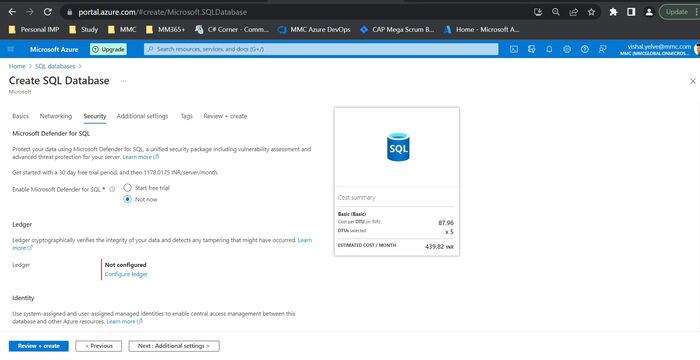
Click on on “Subsequent: Safety >” and Hold these choices as it’s.
Step 10
Click on on “Subsequent: Extra Settings >” and go to the Extra Settings tab. Choose the “None” choice for “Use current knowledge”.
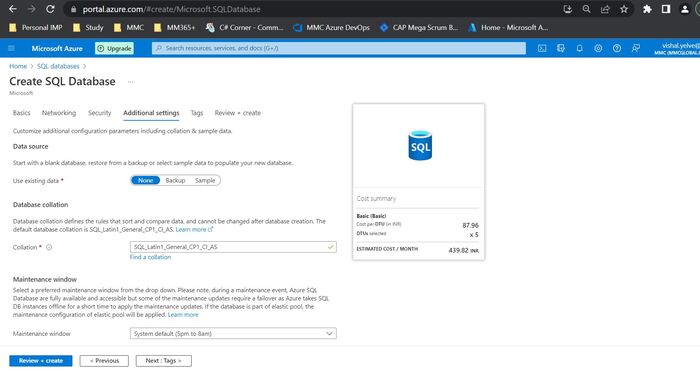
Step 11
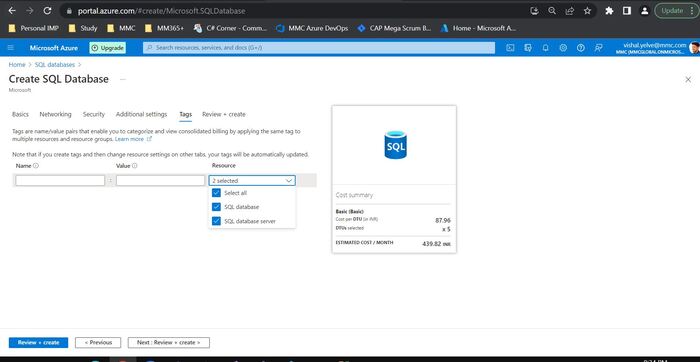
Click on on “Subsequent: Tags >” and Hold it as it’s. Then, Click on on “Evaluation + Create”.
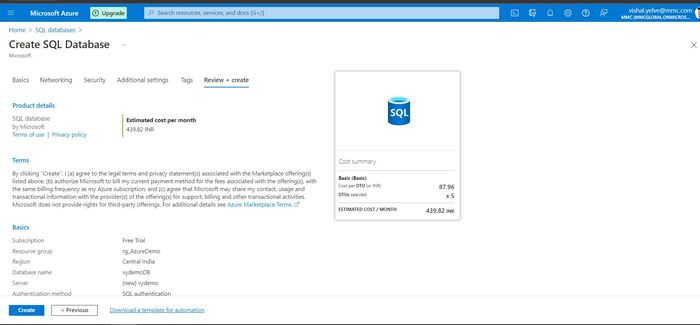
Step 12
“Evaluation + Create” choice will give you an outline of your Azure SQL Database. Afterwards, click on on “Create” to create your database.
Step 13
As soon as click on on “Create” it’ll Initialize validation for deployment
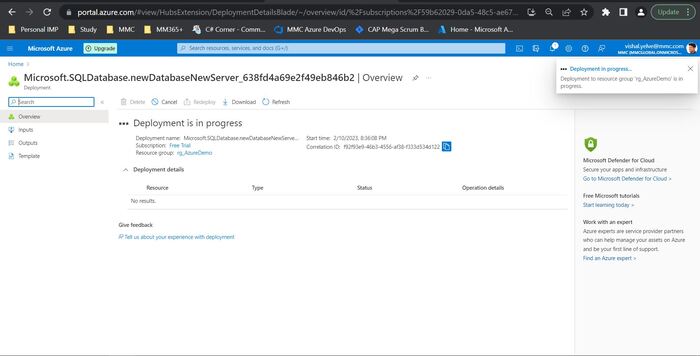
Step 14
Initializing deployment After Validation Handed
Step 15
A message will notify you as soon as the deployment is finished.
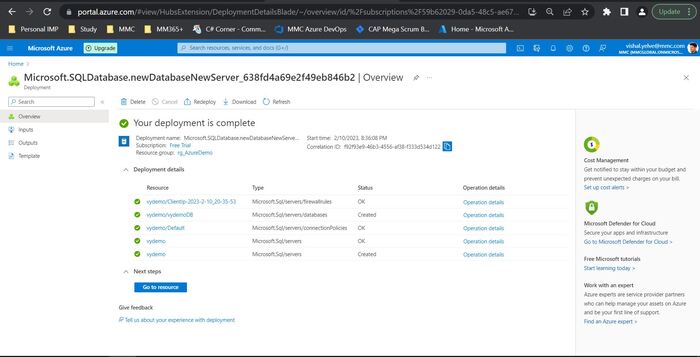
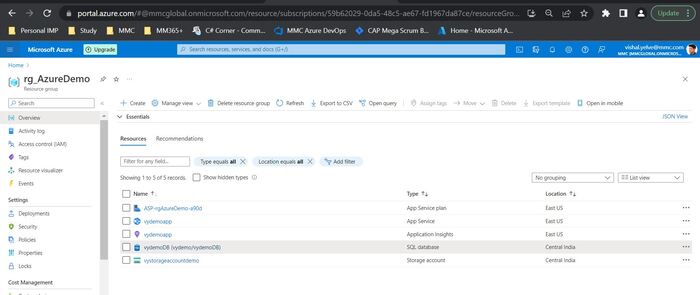
Step 16
As soon as performed with the deployment, if you go to the Useful resource group, you may see the database that you’ve got simply created. Choose your database.
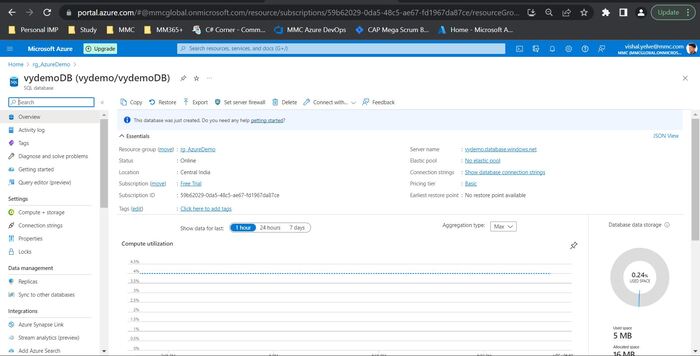
Step 17
If you click on on the database, you’ll the ‘server identify’. Copy the server identify after which open SQL Server Administration Studio (SSMS).
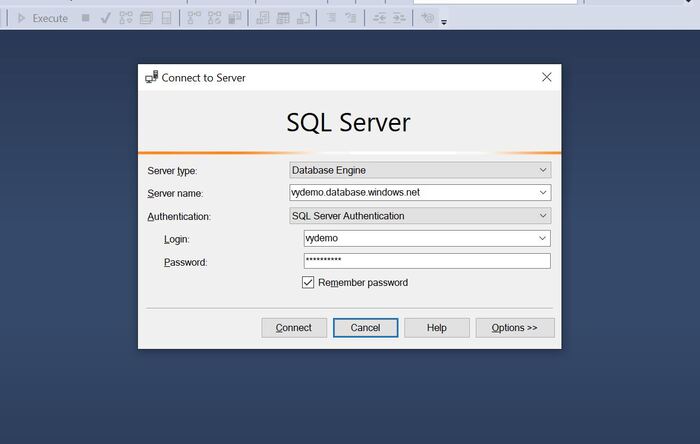
Step 18
Open SSMS, Enter the server identify which you’ve copied within the earlier step, and change the Authentication to “SQL Server Authentication”. Click on on “Join”.
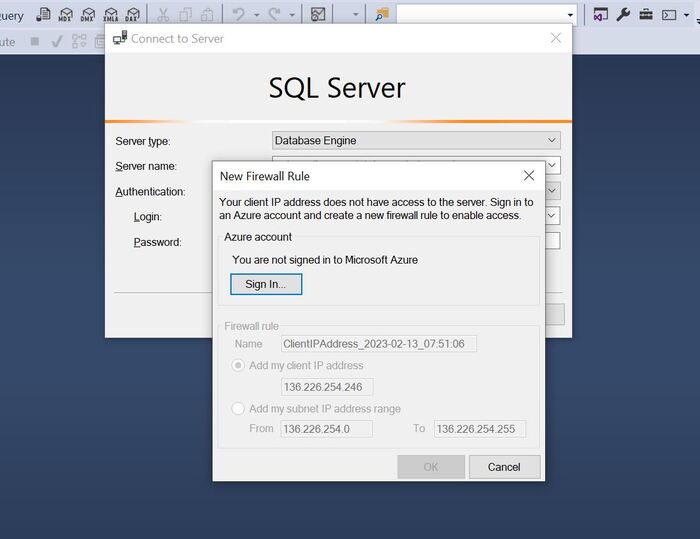
Step 19
After clicking on “Join”, the beneath pop-up window seems. Now, you must set the firewall guidelines in your Azure SQL server.
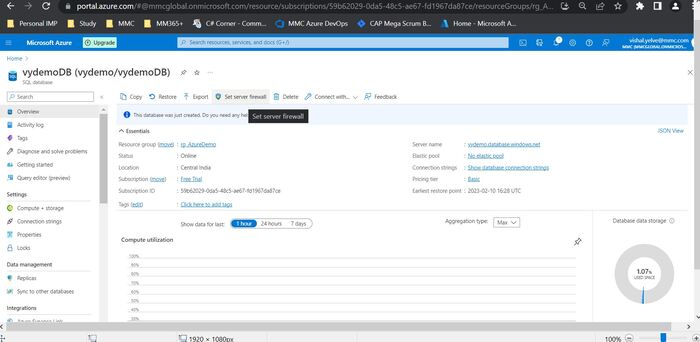
Step 20
Now, Click on on Set Server Firewall from the Overview tab of the SQL Database.
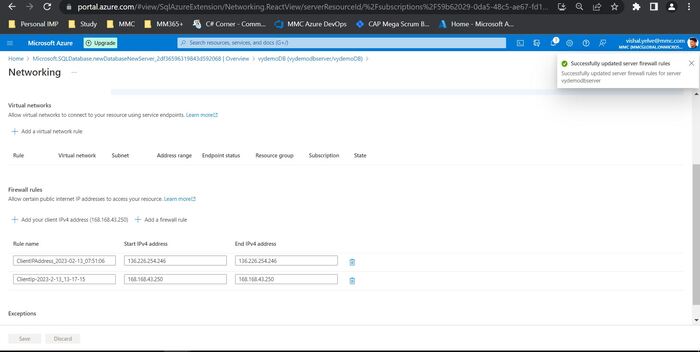
Step 21
Now, Within the firewall guidelines part, Add your “Shopper IP handle”. Then, you’ll discover one IP handle will get routinely added to the beneath checklist. “Save” the Adjustments.
Step 22
Now once more, Within the SSMS once more, Click on on “Join” after coming into the credentials.
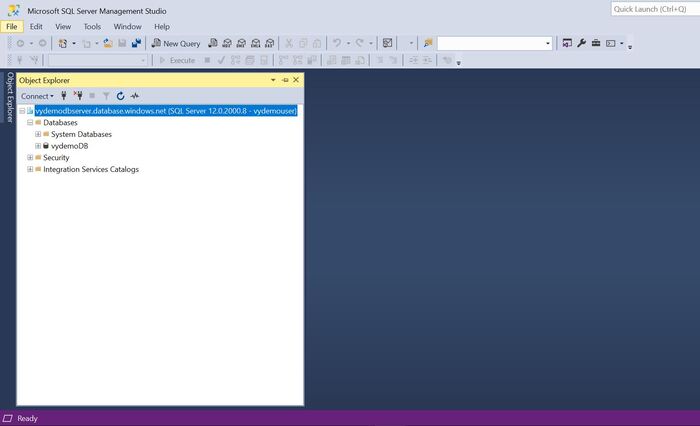
Step 23
Your Azure SQL Database is now efficiently related. You possibly can entry the database from Azure Database in SSMS.