To this point we’ve created a perform app challenge with Http set off perform with default template and put in the required NuGet packages.
Now we’re going to write the precise operation carried out by the perform. As I already talked about, the aim of this perform is to create container and add some JSON blob content material into the container.
Add further parameter into perform Run technique as ExecutionContext which can give the likelihood to make use of of ConfigurationBuilder in order that Azure perform can learn storage connection string from Json file or from perform configuration settings on Azure.
- utilizing System;
- utilizing System.IO;
- utilizing System.Threading.Duties;
- utilizing Microsoft.AspNetCore.Mvc;
- utilizing Microsoft.Azure.WebJobs;
- utilizing Microsoft.Azure.WebJobs.Extensions.Http;
- utilizing Microsoft.AspNetCore.Http;
- utilizing Microsoft.Extensions.Logging;
- utilizing Newtonsoft.Json;
- utilizing Microsoft.Azure.Storage;
- utilizing Microsoft.Azure.Storage.Blob;
- utilizing Microsoft.Extensions.Configuration;
- namespace AzFunctions
- {
- public static class UploadBlobHttpTriggerFunc
- {
- [FunctionName(“UploadBlobHttpTriggerFunc”)]
- public static async Process<IActionResult> Run(
- [HttpTrigger(AuthorizationLevel.Function, “get”, “post”, Route = null)] HttpRequest req,
- ILogger log, ExecutionContext context)
- {
- log.LogInformation($“C# Http set off perform executed at: {DateTime.Now}”);
- CreateContainerIfNotExists(log, context);
- CloudStorageAccount storageAccount = GetCloudStorageAccount(context);
- CloudBlobClient blobClient = storageAccount.CreateCloudBlobClient();
- CloudBlobContainer container = blobClient.GetContainerReference(“dummy-messages”);
- for (int i = 1 ; i <= 5; i++)
- {
- string randomStr = Guid.NewGuid().ToString();
- CloudBlockBlob blob = container.GetBlockBlobReference(randomStr);
- var serializeJesonObject = JsonConvert.SerializeObject(new { ID = randomStr, Content material = $“<html><physique><h2> This is a Pattern e-mail content material {i}! </h2></physique></html>” });
- blob.Properties.ContentType = “software/json”;
- utilizing (var ms = new MemoryStream())
- {
- LoadStreamWithJson(ms, serializeJesonObject);
- await blob.UploadFromStreamAsync(ms);
- }
- log.LogInformation($“Bolb {randomStr} is uploaded to container {container.Title}”);
- await blob.SetPropertiesAsync();
- }
- return new OkObjectResult(“UploadBlobHttpTrigger perform executed efficiently!!”);
- }
- non-public static void CreateContainerIfNotExists(ILogger logger, ExecutionContext executionContext)
- {
- CloudStorageAccount storageAccount = GetCloudStorageAccount(executionContext);
- CloudBlobClient blobClient = storageAccount.CreateCloudBlobClient();
- string[] containers = new string[] { “dummy-messages” };
- foreach (var merchandise in containers)
- {
- CloudBlobContainer blobContainer = blobClient.GetContainerReference(merchandise);
- blobContainer.CreateIfNotExistsAsync();
- }
- }
- non-public static CloudStorageAccount GetCloudStorageAccount(ExecutionContext executionContext)
- {
- var config = new ConfigurationBuilder()
- .SetBasePath(executionContext.FunctionAppDirectory)
- .AddJsonFile(“native.settings.json”, true, true)
- .AddEnvironmentVariables().Construct();
- CloudStorageAccount storageAccount = CloudStorageAccount.Parse(config[“CloudStorageAccount”]);
- return storageAccount;
- }
- non-public static void LoadStreamWithJson(Stream ms, object obj)
- {
- StreamWriter author = new StreamWriter(ms);
- author.Write(obj);
- author.Flush();
- ms.Place = 0;
- }
- }
- }
Open native.settings.json and add CloudStorageAccount connection string which is required for testing from native.
This worth might be discovered out of your Azure storage account. For that, login to Azure account => Go to storage account => Click on on Entry Keys below settings on left menu => You will note two keys there => Copy anybody of the connection sting => Previous that into native.settings.json
- “Values”: {
- “AzureWebJobsStorage”: “UseDevelopmentStorage=true”,
- “FUNCTIONS_WORKER_RUNTIME”: “dotnet”,
- “CloudStorageAccount”: “DefaultEndpointsProtocol=https;AccountName=;AccountKey=;EndpointSuffix=core.home windows.internet“,
- }
Let’s construct and run the perform and check in native. You will note the beneath window open.
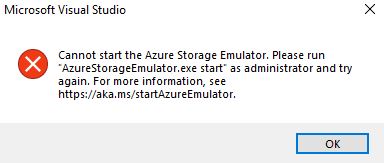
Whereas working perform app challenge in native after urgent F5, in case you see beneath error, you might want to begin Azure storage emulator from begin menu of your PC.
If emulator cmd is giving error and didn’t create native storage occasion, you may run AzureStorageEmulator.exe begin –inprocess in emulator cmd to bypass it as of now.

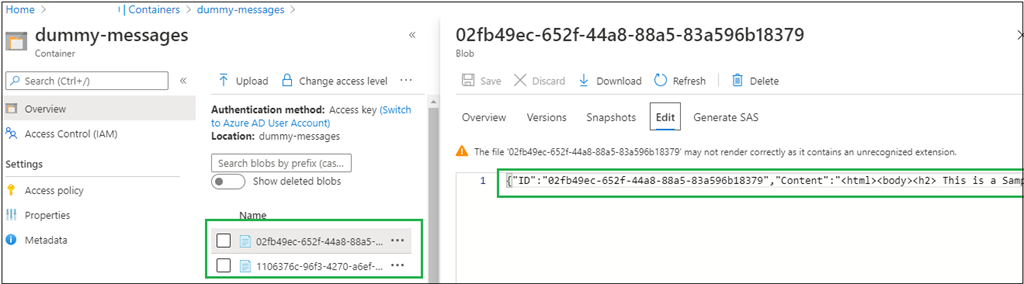
Now copy the http url from native perform console window (in my case it’s http://localhost:7071/api/UploadBlobHttpTriggerFunc) and paste it into the browser. As soon as it’s executed, you will note message “UploadBlobHttpTrigger perform executed efficiently!!” which we truly returned from the perform. And in case you take a look at the storage account in Azure portal, you will note container is created and blob messages are uploaded.
Superior! Let’s deploy the perform.
Deploy Azure Perform from Visual Studio
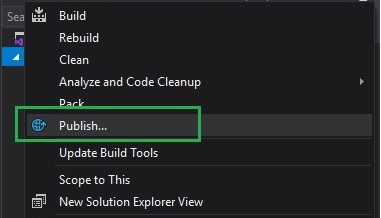
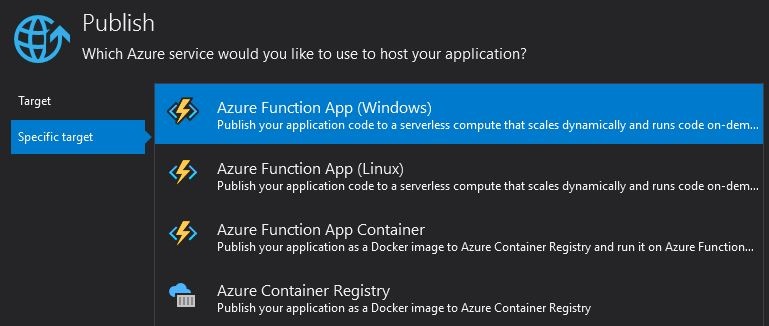
We are actually able to publish our perform app to Azure. For that, proper click on on challenge and click on on Publish… => Choose Goal as Azure => Click on on Subsequent => Choose particular goal as Azure Perform App (Home windows) => Click on on Subsequent => Choose your azure account to log in.

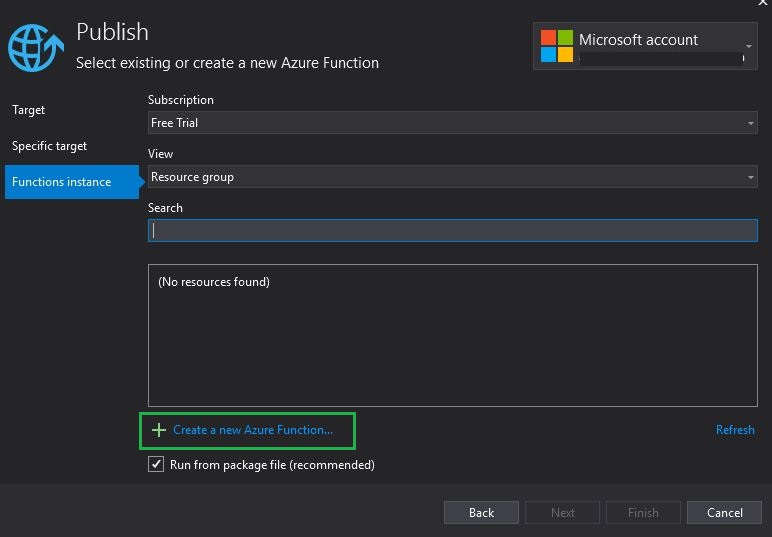
When you logged in and choose your Azure account from visible studio it is time to create Azure perform app.
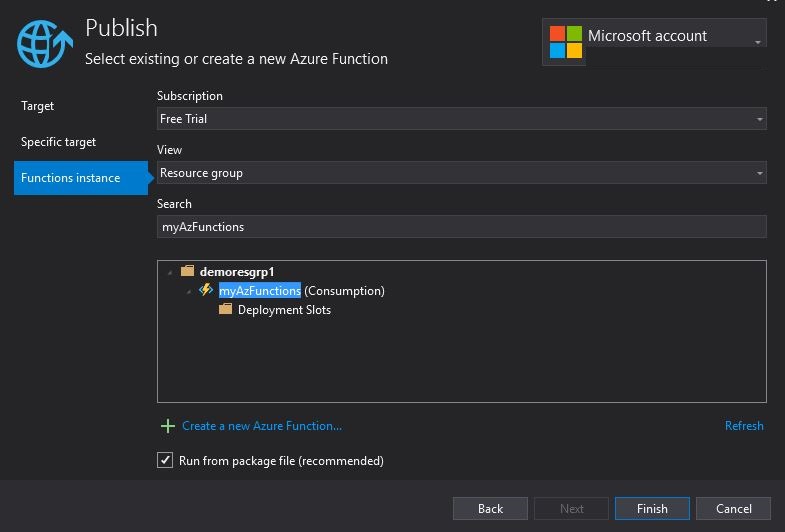
In the event you already created perform App from Azure or when you have present perform app, then you may instantly choose that, in any other case you may create new Azure Perform app by clicking on “Create a brand new Azure Perform…” possibility.
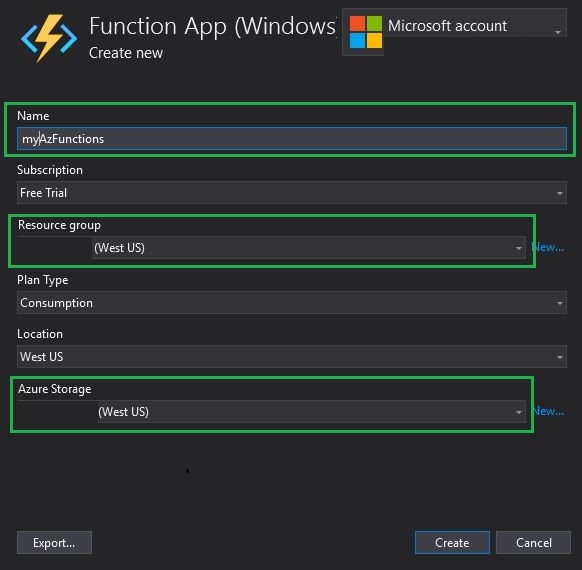
Give Title to perform app, choose useful resource group and azure storage => Click on on Create.
Now choose Azure Perform app => Click on on End.
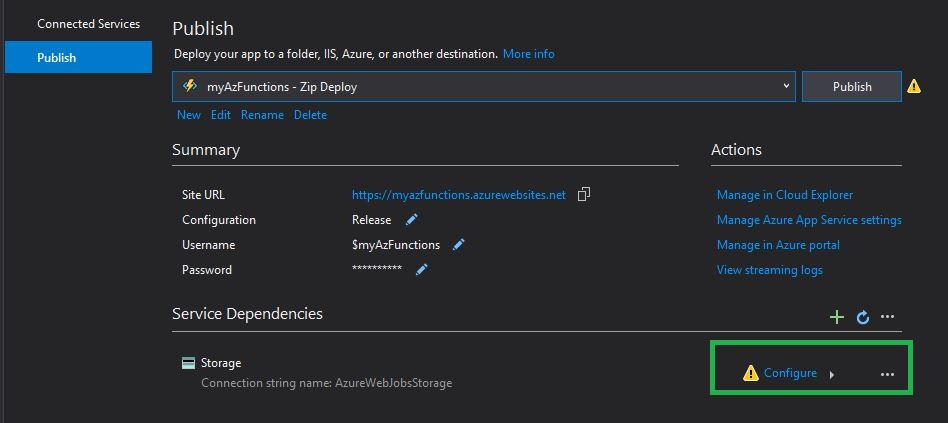
Now Click on on Configure => Choose Storage account and click on on Subsequent => Click on End
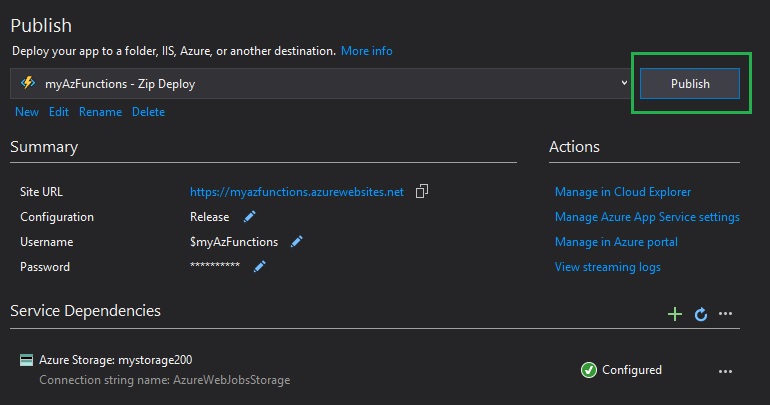
Lastly, we’re able to publish. Click on on Publish. As soon as it’s accomplished, test on Azure portal.
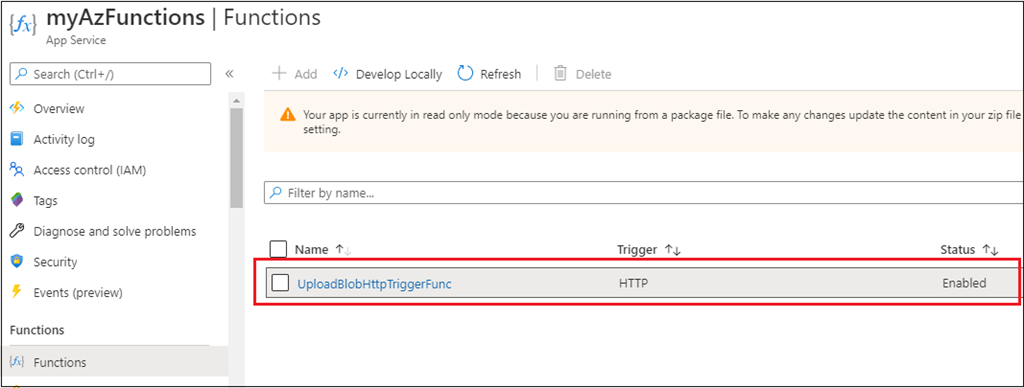
On Azure portal, you will note the newly created Azure perform.
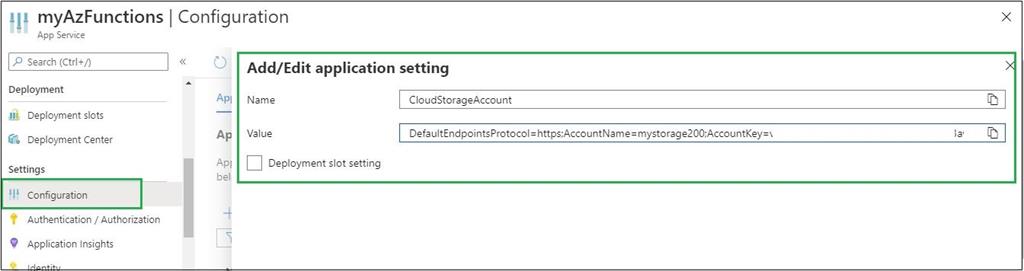
Let’s modify the configuration so as to add further settings as “CloudStorageAccount” and replica connection string worth from storage account and click on on save.
Take a look at Azure Perform
Now we will check the perform, navigate to perform and click on on “Click on+Take a look at” => Click on on Take a look at/Run to run it. You may alternatively run by hitting the url. For that, you may click on on “Get perform url” and replica and paste url into the browser.
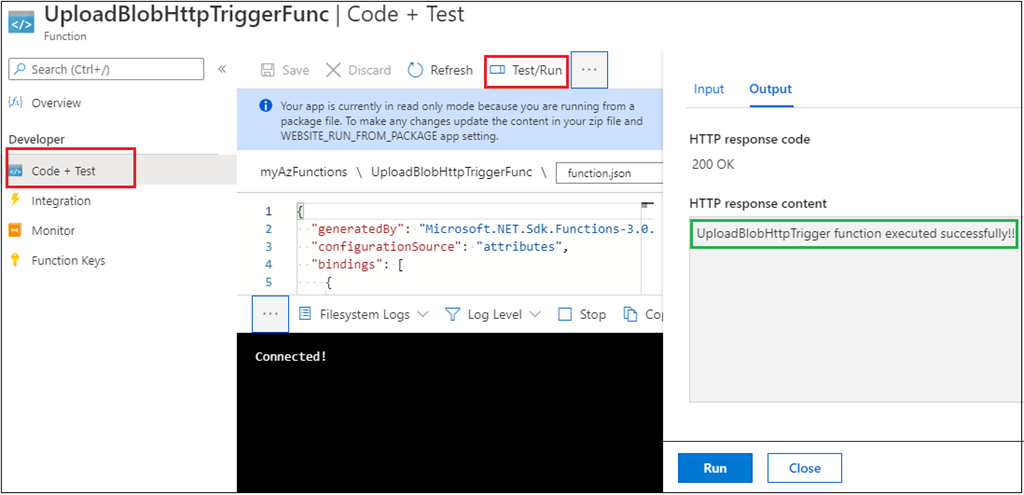
As soon as it is profitable, let’s cross confirm the uploaded content material on container into storage account.
Glorious! We created and examined Http set off perform and deployed it to Azure.
Abstract
On this article, we created a container and uploaded pattern blob although Azure http set off perform utilizing .NET Core. Additionally we’ve seen deploy an Azure Perform from Visual Studio itself step-by-step and examined the perform from Azure portal. I hope you discover this text helpful!


