Introduction
Within the earlier article, we are going to discover ways to create an Angular 11 app with .NET 5 API that may do CRUD operations on Azure Cosmos DB utilizing EF Core. We’ll proceed this text add authentication to the app utilizing Microsoft Authentical Library (MSAL). The app we might be utilizing on this instance additionally helps dwell information refresh. If you wish to combine that please ensure to take a look at this article.
Conditions
- Azure account – If you do not have it already you’ll be able to create one totally free by visiting Cloud Computing Providers | Microsoft Azure.
- Azure Cosmos DB Setup – Create a database in Azure Cosmos DB referred to as VideogamesDB and a container referred to as Videogames. If you would like step-by-step directions on how to do this please comply with this text
- .NET 5 REST API – Please comply with this text to create .NET 5 REST API
- Angular CLI model 11. You possibly can test the put in model utilizing the command ng model.
- Visual Studio Code or every other IDE. If you do not have VS Code put in you’ll be able to obtain it from right here
- A working angular app we constructed on this article
Step 1 – Register your app on Azure Lively Listing
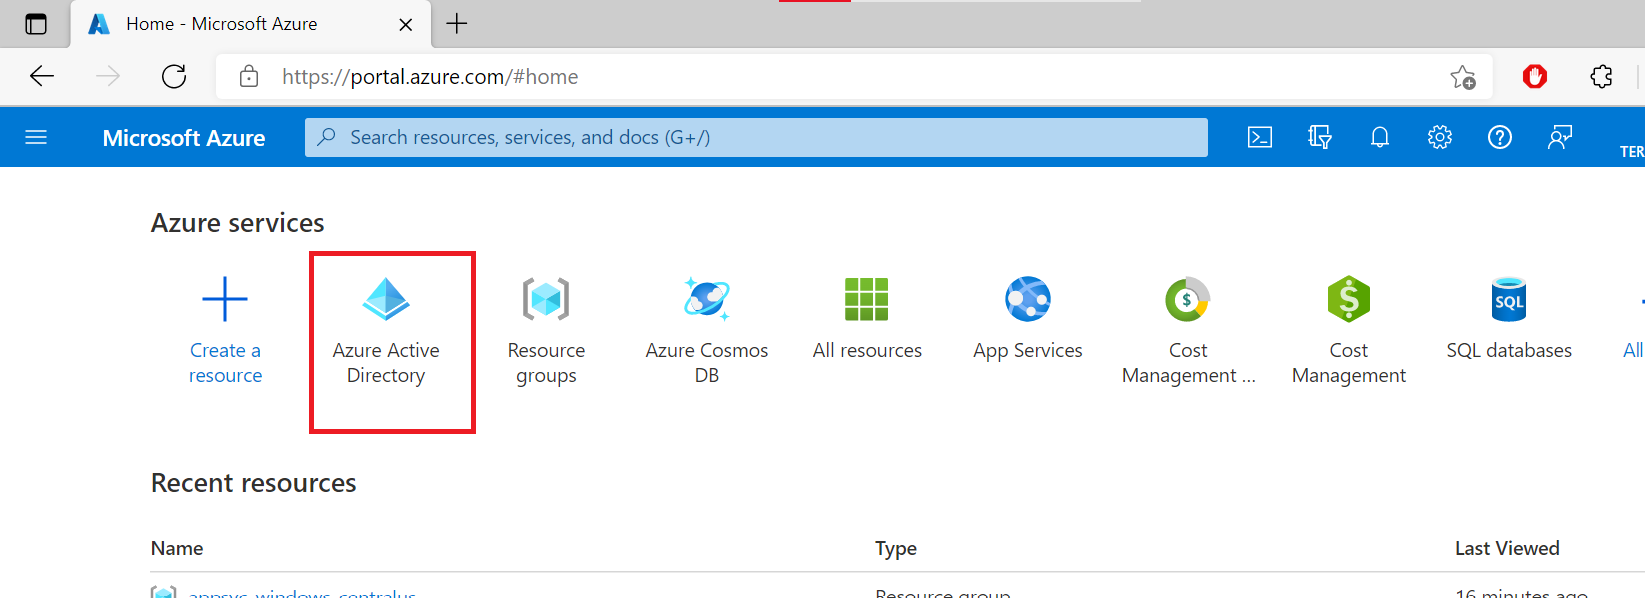
1. Log in to the Azure portal and click on on Azure Lively Listing. In the event you do not see that choice on your own home web page you may as well seek for it by typing it within the search bar
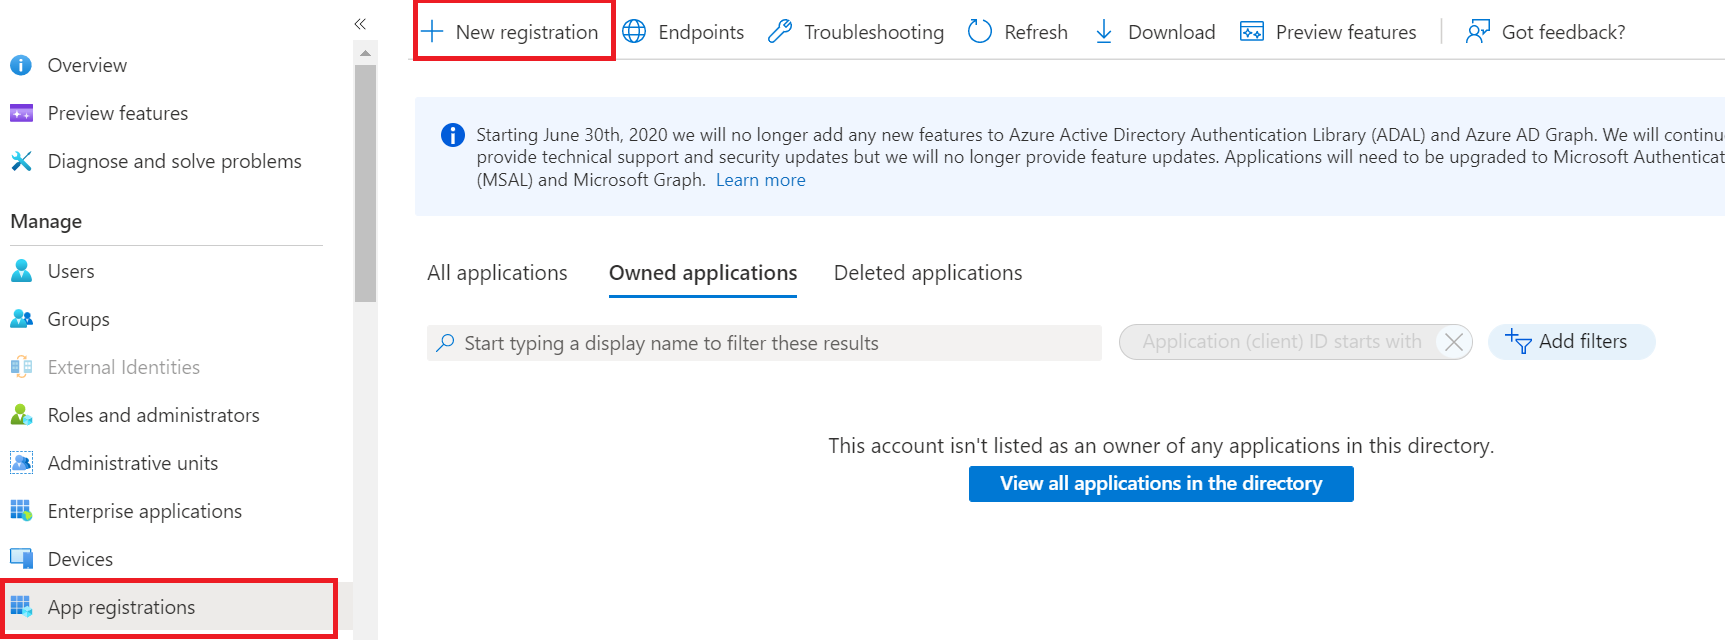
2. Click on on the “App Registration” choice on the left menu and click on on “New Registration” choice on the highest of the web page
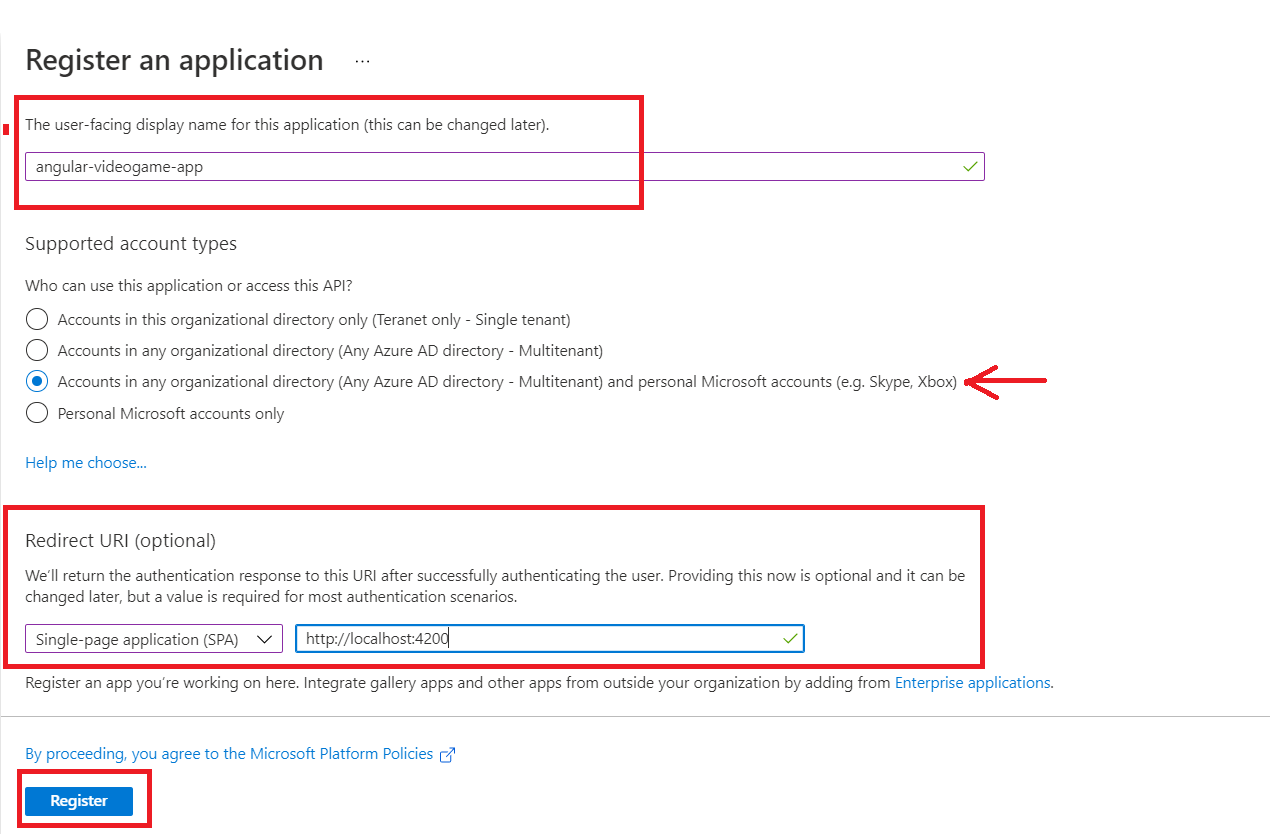
On the App registration web page
- Give a display-name, it may be any related identify of your selection.
- Select a supported account kind, i’ve chosen the choice that may permit any type of Microsoft account to login
- Give a redirect URI choice. Right here choose the app kind as SPA as a result of we’re authenticating an angular app which is a single web page utility and in redirect URI provides the URL of your own home web page. Since our app is native so I gave the URL as “http://localhost:4200”
- Click on the Register button
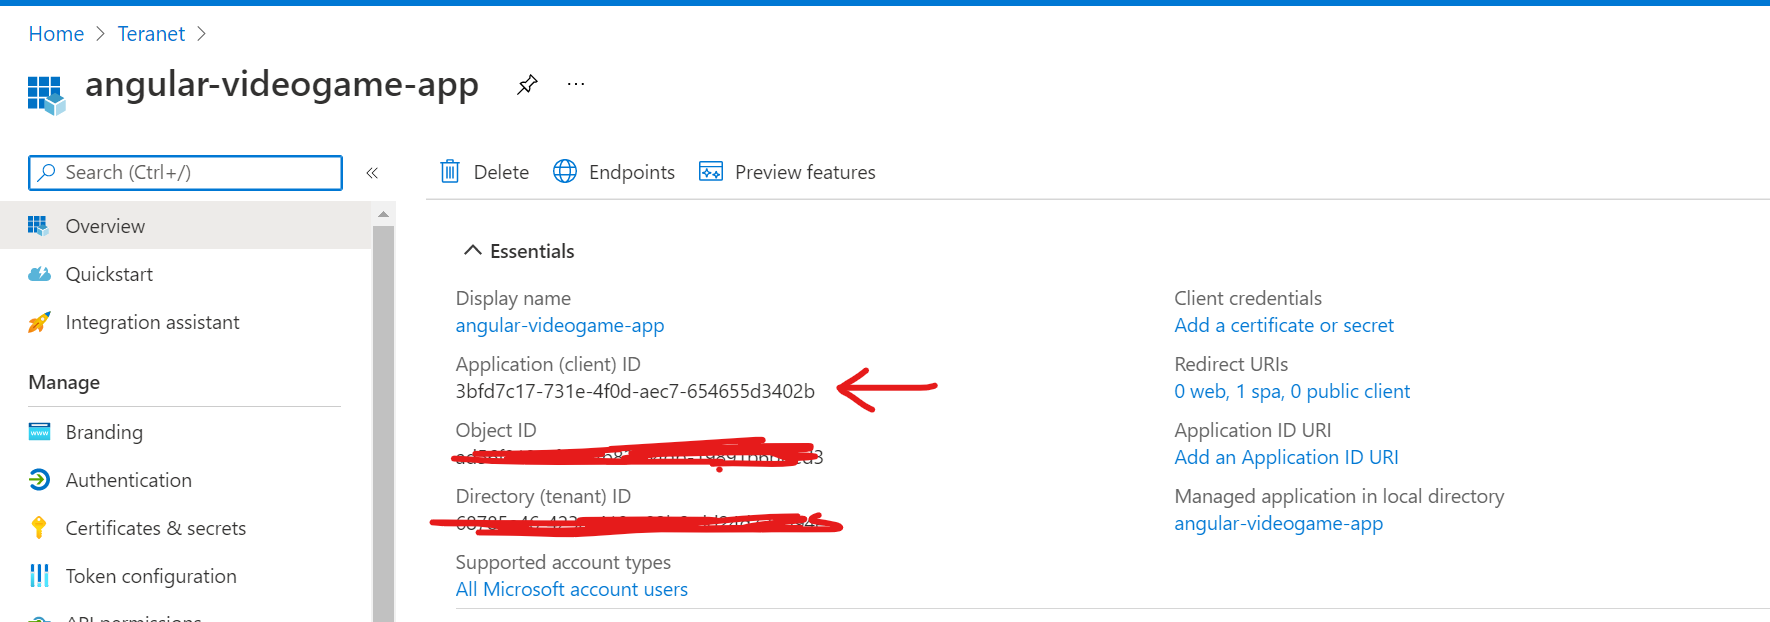
If all the things goes properly app registration might be created and a brand new web page might be loaded. We want the Software (Consumer) ID from there which we might be utilizing in our angular app.
Step 2 – Add MSAL for Angular
1. Open VS Code and go to the angular venture we developed in our earlier article. Go to terminal and run the next command to put in packages
npm set up @azure/msal-angular @azure/msal-browser
2. Open app.module.ts file. Right here we must configure MSAL for angular. It may be achieved in a number of methods. We might be utilizing Manufacturing unit suppliers to offer configuration choice
Word: For extra configuration choices and understanding please discuss with official Github hyperlink right here.
Step 3 – Add Angular Guard
1. To stop customers from accessing the routes with out login we are going to create guards. Run the next command on terminal
“ng g guard userauthguard” and select CanActivate
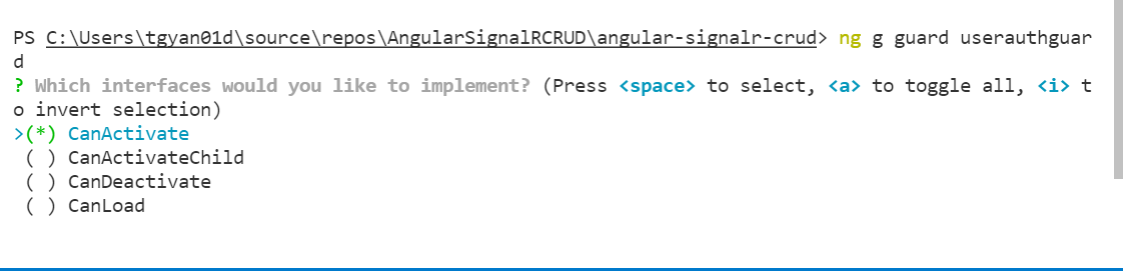
2. Open userauthguard.guard.ts file and copy-paste the next code.
We have now created a constructor and added an occasion of MsalService. We’re utilizing the occasion in CanActivate technique to test if there’s an energetic account (which signifies the person is logged in or not) presently. If sure then the person needs to be allowed to entry the guarded routes.
import { MsalService } from '@azure/msal-angular';
import { Injectable } from '@angular/core';
import { ActivatedRouteSnapshot, CanActivate, RouterStateSnapshot, UrlTree } from '@angular/router';
import { Observable } from 'rxjs';

@Injectable({
  providedIn: 'root'
})
export class UserauthguardGuard implements CanActivate {

  constructor(personal msalService:MsalService)
  {

  }
  canActivate(

    route: ActivatedRouteSnapshot,
    state: RouterStateSnapshot): Observable<boolean | UrlTree> | Promise<boolean | UrlTree> | boolean | UrlTree {

      if(this.msalService.occasion.getActiveAccount()!=null)
      {
        return true;
      }
      else
      {
        return false;
      }

  }

}
Step 4 – Guard your routes
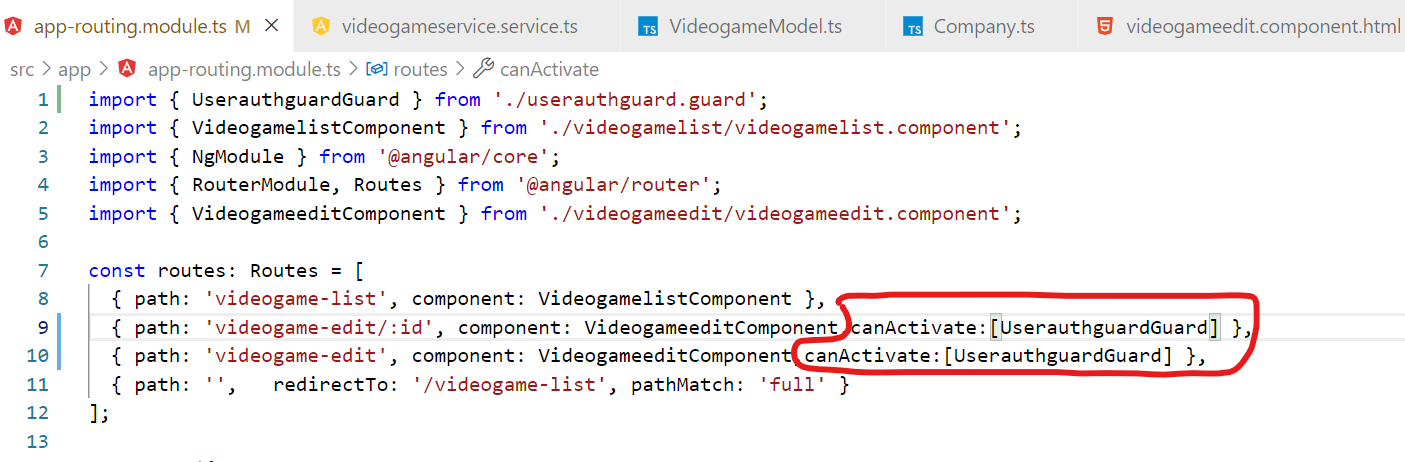
We do not need the unauthenticated customers so as to add new video video games or edit present video video games. Go to app.routing.module.ts and add the canActivate property for the routes we need to guard. canActivate is an array so we offer the identify of the guard we simply created and Guard phrase is added to the identify by default so will probably be a good suggestion to not use the phrase guard within the file identify as I did!
Step 5 – Conceal the hyperlinks that are inaccessible
Now to keep away from any confusions we are going to cover the hyperlinks which aren’t accessible to unauthenticated customers utilizing ngIf.
1. Go to app.element.html and substitute the router hyperlink for including new videogame with the code talked about under. Discover we’ve got added *ngIf=”isUserLoggedIn()”
<a routerLink="/videogame-edit" routerLinkActive="energetic" class="navbar-brand " *ngIf="isUserLoggedIn()">Add New Videogame</a>
2. Go to videogamelist.element.ts and add a brand new technique as proven under. Additionally, add an occasion of the MsalService to the constructor.
 isUserLoggedIn():boolean
  {
    if(this.msalService.occasion.getActiveAccount()!=null)
    {
      return true;
    }
    return false;
  }
constructor( personal service: VideogameserviceService, personal router: Router,personal http: HttpClient,personal msalService:MsalService) { }
3. Go to videogamelist.element.html file and substitute the edit and delete button code with the next. Discover we’ve got added *ngIf=”isUserLoggedIn()”
<td><button render="renderer" id="editbutton" (click on)="editbuttonclicked(videogame.id)" class="btn btn-primary" *ngIf="isUserLoggedIn()">Edit</button></td>
          <td><button render="renderer" id="editbutton" (click on)="deletebuttonclicked(videogame.id)" class="btn btn-primary" *ngIf="isUserLoggedIn()">Delete</button></td>
Step 6 – Check your code
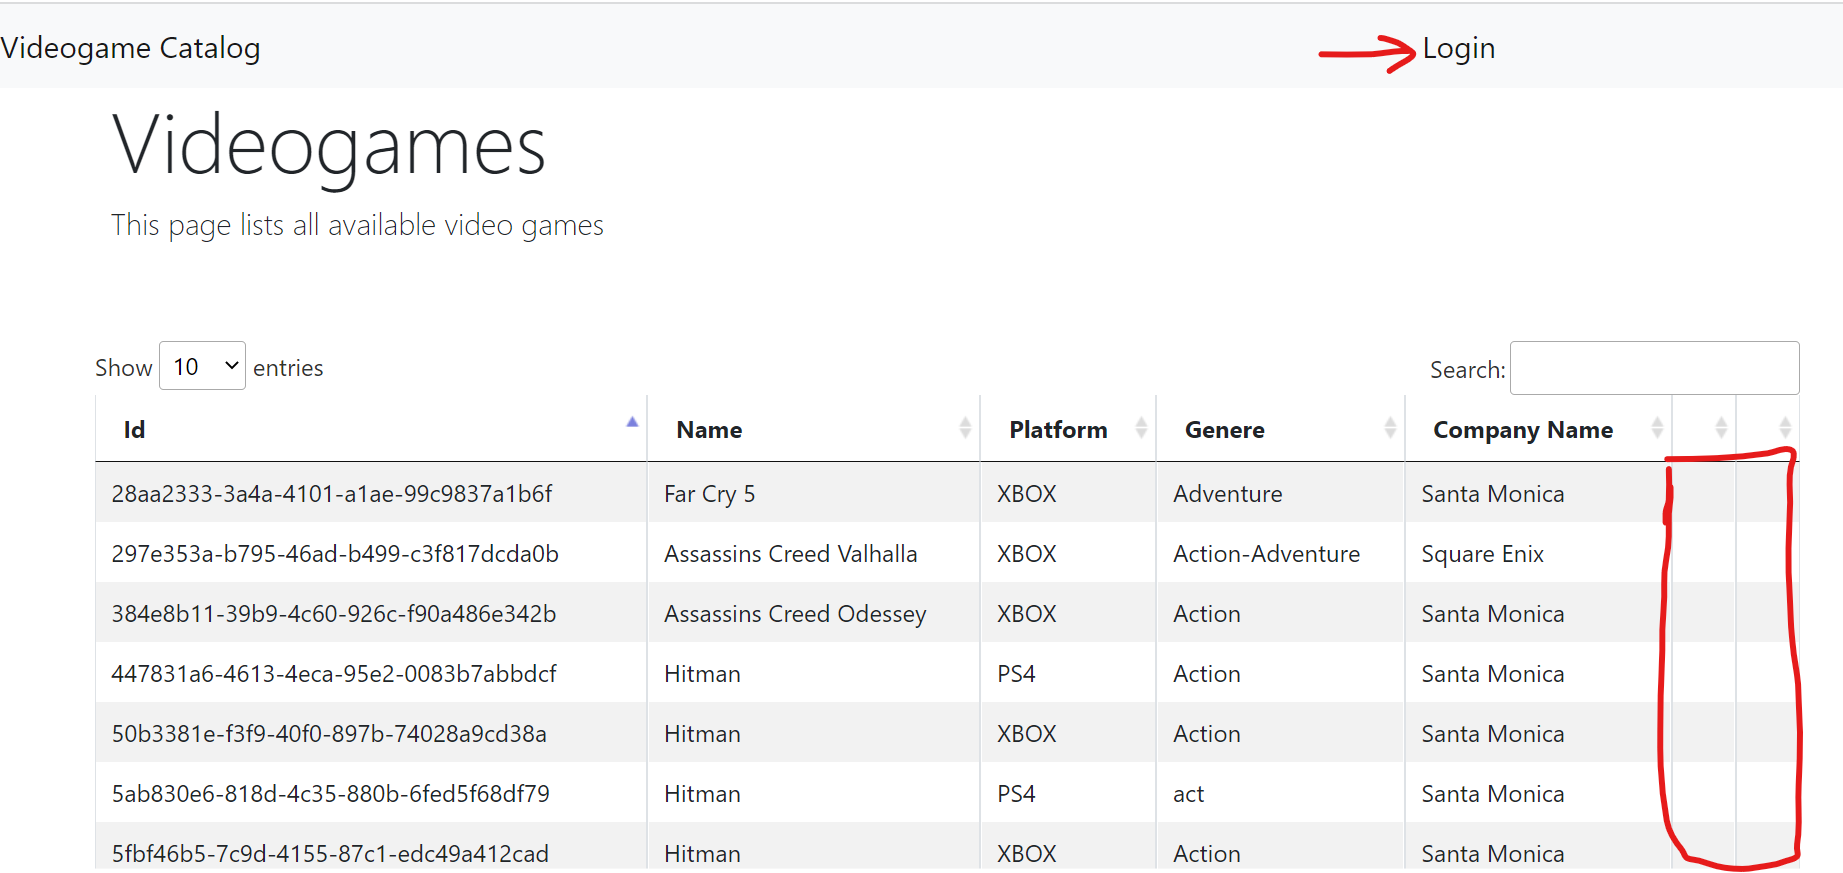
1. Go to terminal and kind ng serve -o to launch the app. If all the things goes properly you’ll discover that on the house web page you get a login hyperlink and in addition the hyperlink so as to add video video games is just not current. Additionally, the edit and delete buttons aren’t seen
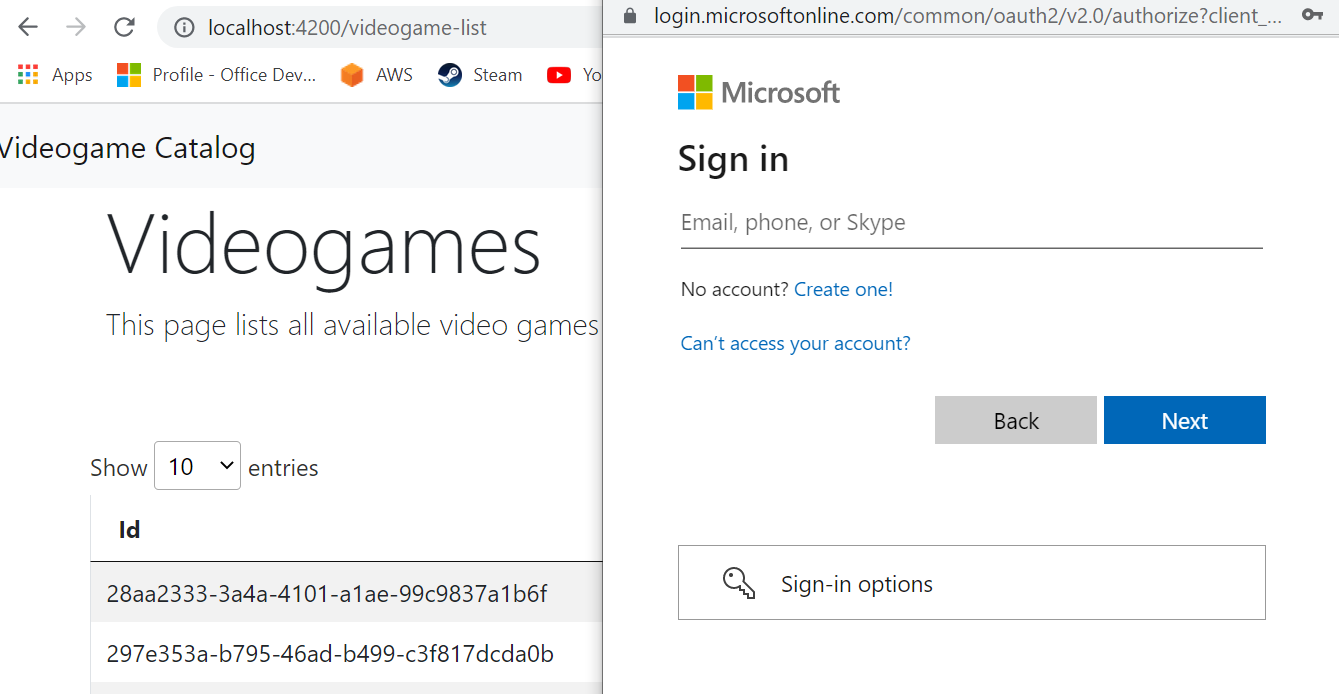
2. Click on on Login and it ought to open a popup for you. Enter your Microsoft credentials
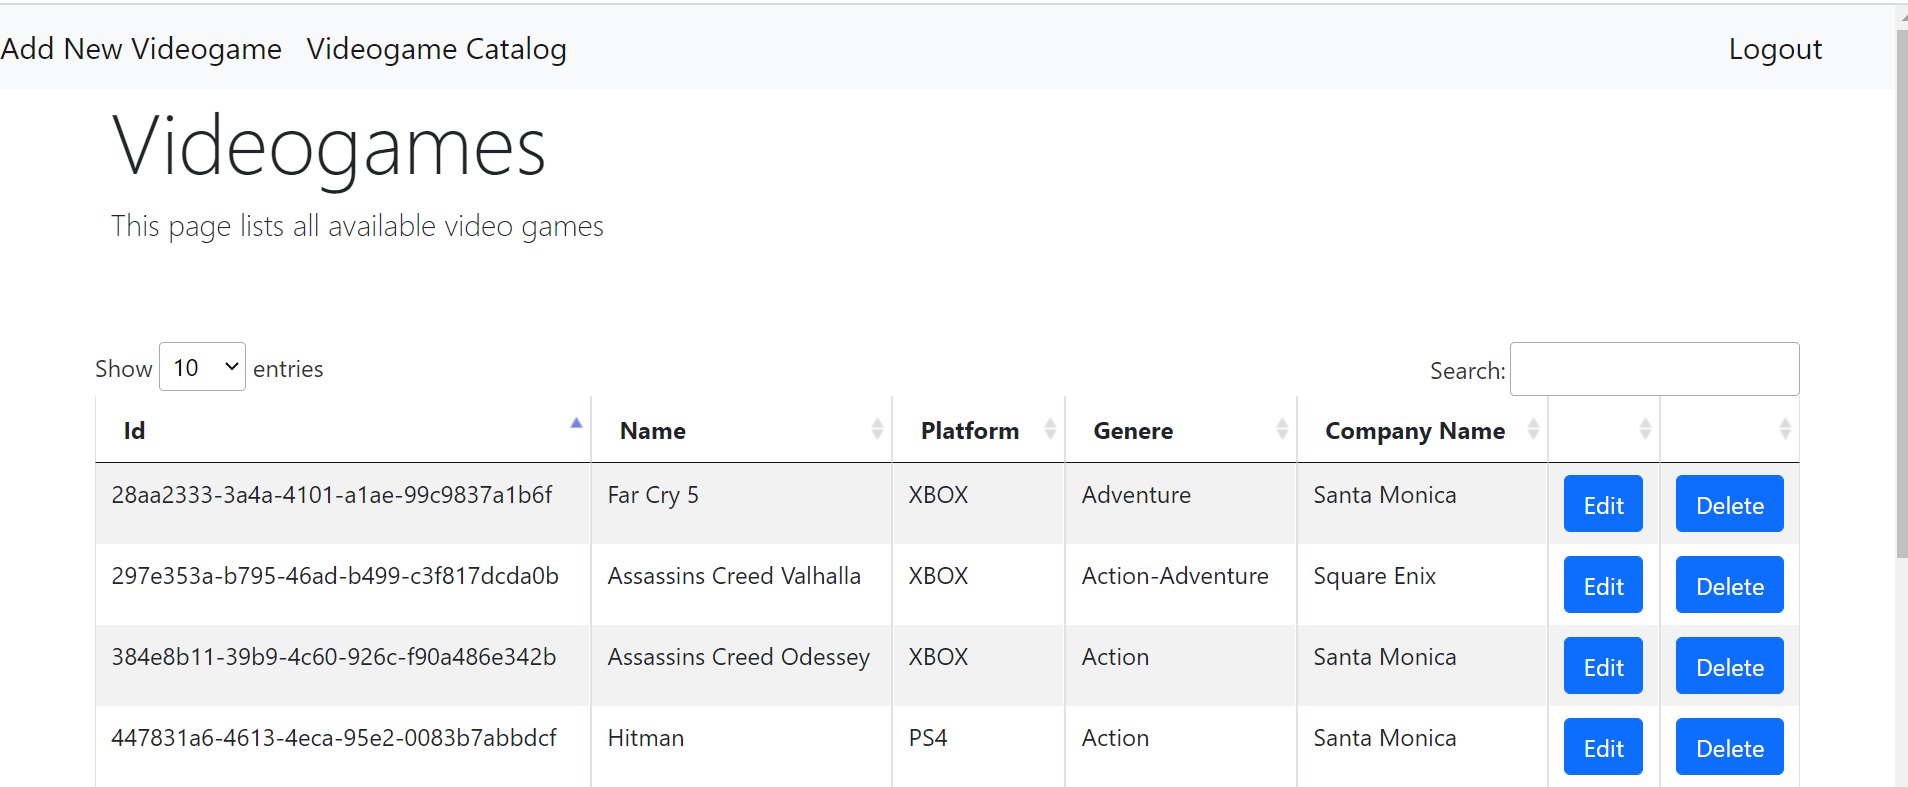
3. As soon as you might be logged in efficiently, it is best to be capable to add/edit/delete video video games. To logout once more, click on on the Logout hyperlink
Abstract
On this article, we discovered tips on how to authenticate customers with Microsoft login utilizing MSAL and Azure Lively listing. Please word that though our front-end app is safe, our relaxation API service continues to be not safe and does not want authentication. Within the upcoming article, we are going to see how we are able to resolve this drawback.
Thanks for studying and need you a day full of new coding adventures! Comfortable Coding!
Github Hyperlink: https://github.com/tanujgyan/angular-signalr-crud


