Introduction
Azure Digital Community (VNet) is a illustration of your individual community within the cloud. It’s a logical isolation of the Azure cloud devoted to your subscription
I’ll let you understand how to create a Digital Community (VNet) in azure step-by-step.
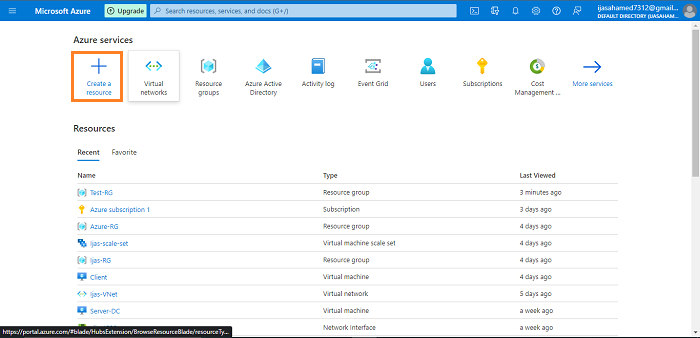
Step 1
Sign up to your Azure portal.
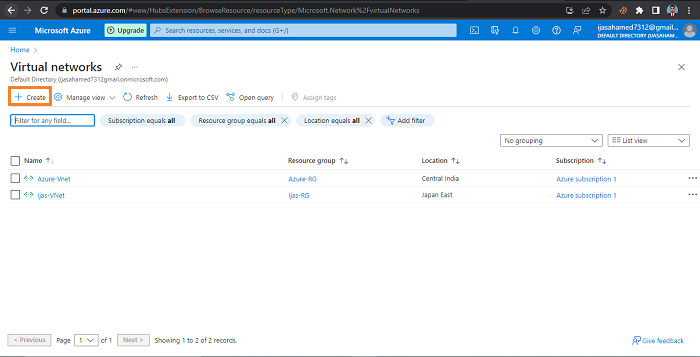
Step 2
Create Digital community. Click on create.
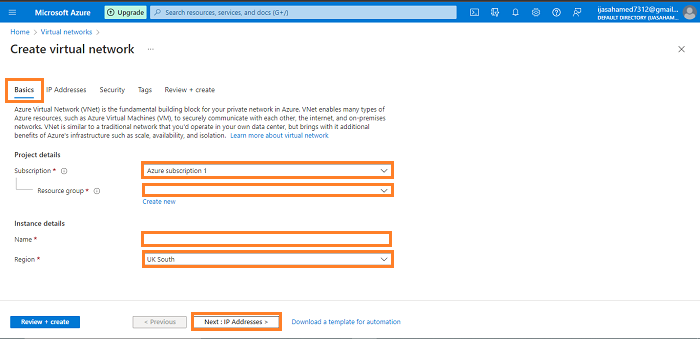
Step 3
Choose Your Subscription Subsequent choose or create Assets group Title.
Subsequent Occasion Particulars create Digital Community Title and Area
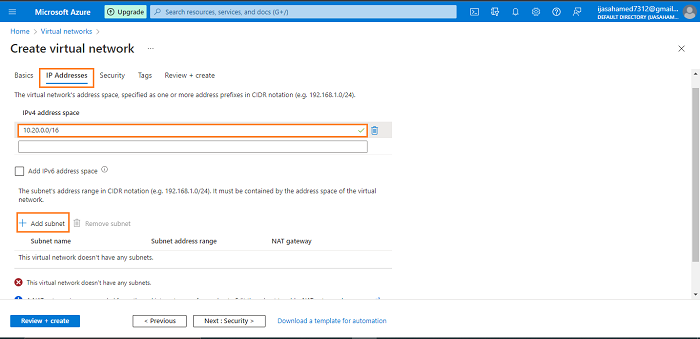
Step 4
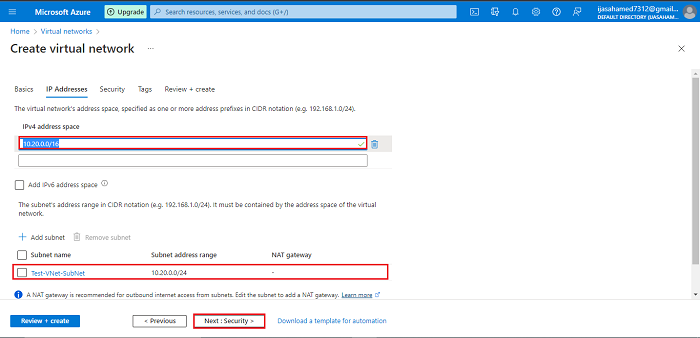
Enter Your IP and Add subNet.
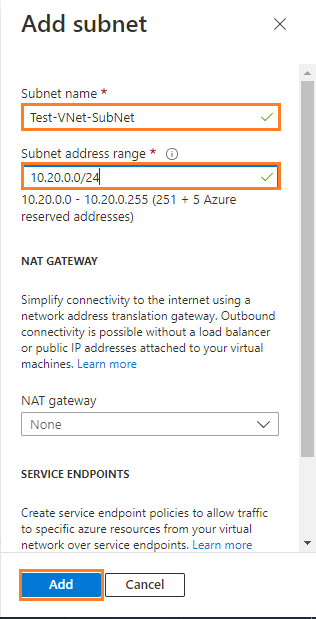
Step 5
Create subnet Title and sub internet Handle Vary, click on Add Button.
Step 6
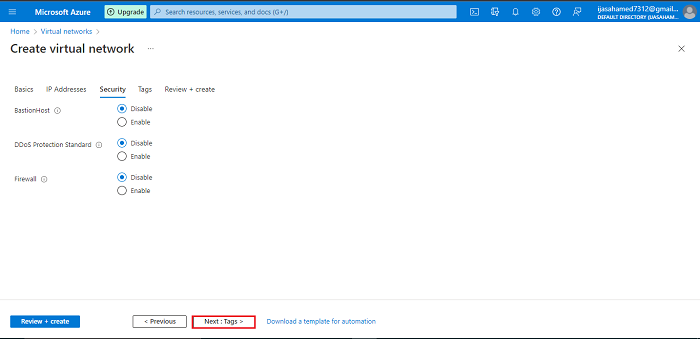
Click on Subsequent Safety
Step 7
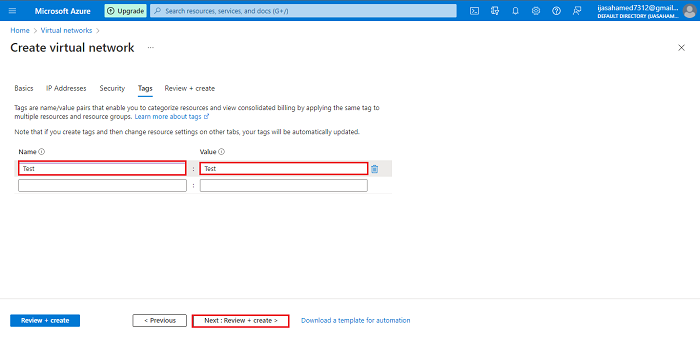
Click on Subsequent Tag
Step 8
Tags are metadata parts that you simply apply to your Azure sources. They’re key-value pairs that make it easier to determine sources based mostly on settings which can be related to your group.
Enter Tag Title
Click on Subsequent + Evaluation + create
Step 9
Click on create
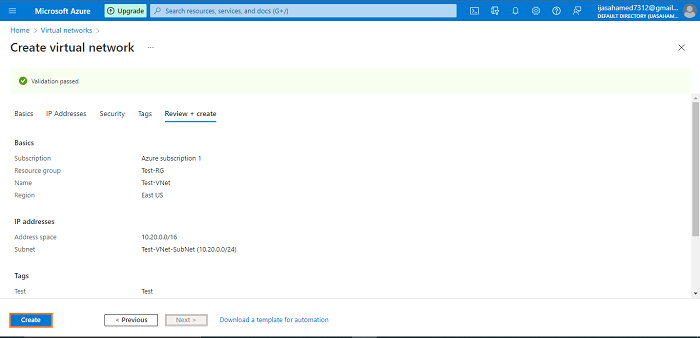
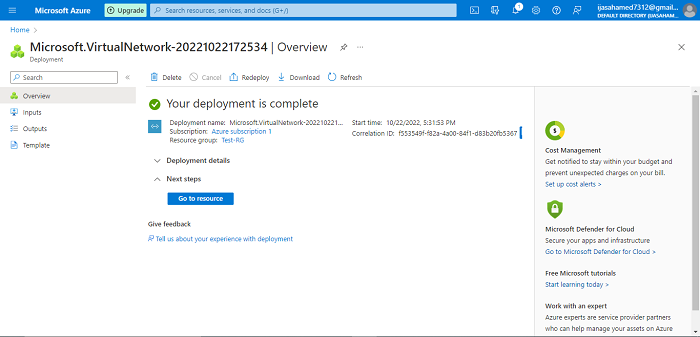
Efficiently created Digital Community
Conclusion
This text taught us create a Digital Community (VNet) in our azure portal. And in case you have any questions please contact me.
Thanks.


