Containerize .NET Core Software And Push It To Azure Container Registry Utilizing Docker Instructions
Introduction
Azure Container Registry is a personal container registry on the Azure Platform. You’ll be able to containerize your utility and push it to the Azure Container Registry. Container-based companies like Azure Container Occasion, Azure WebApp, Azure Kubernetes Service and Azure Service Material can pull the picture and run it. You can too pull the picture from anyplace exterior the Azure platform like on-premises or different vendor clouds and run it. The pictures saved in Azure Container Registry usually are not publicly accessible and it’s essential to give specific permission to customers who ought to be pulling and utilizing it.
You’ll be able to create a .NET Core utility, containerize it and push it to Azure Container Registry utilizing Visual Studio. Nevertheless, all purposes usually are not developed utilizing Microsoft Applied sciences and Azure Container Registry can maintain containers photos for purposes constructed on non-Microsoft applied sciences like Java, Python, and so on. In such instances you should utilize Docker instructions to containerize the applying and push it to the Azure Container Registry.
On this article we are going to containerize a.NET Core utility and push it to the Azure Container Registry. The folowing are the hyperlinks to the earlier articles on this sequence.
You must have these following conditions prepared earlier than attempting out the steps illustrated on this article.
- You must have created an Azure Container Registry
- You must have created a Dockerfile to containerize the picture
- You must have stored the Dockerfile in the identical folder the place you resolution (.sln) file is current for the .NET Core utility
- You must have put in Docker Desktop in your system
Containerize .NET Core utility
Upon getting developed your utility and met the above-mentioned conditions, open the command immediate or PowerShell immediate and navigate to the folder the place you could have stored the Dockerfile. Run the next command to construct the Docker picture for the applying.
- docker construct -t mydemoapp:demo .
Now allow us to confirm if the picture bought created utilizing the next command.
You’ll be able to run the docker picture regionally as a container utilizing the next command. You’re publishing the applying to the port 80 within the container and mapping it to native port 8080 in your system.
- docker run –publish 8080:80 –detach –name mydemoapp mydemoapp:demo
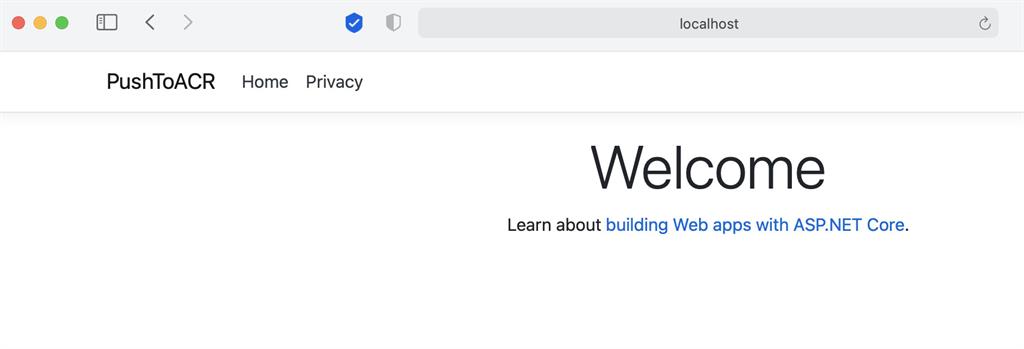
You’ll be able to entry the containerized utility utilizing the next command.
http://localhost:8080
Push the Container to Azure Container Registry
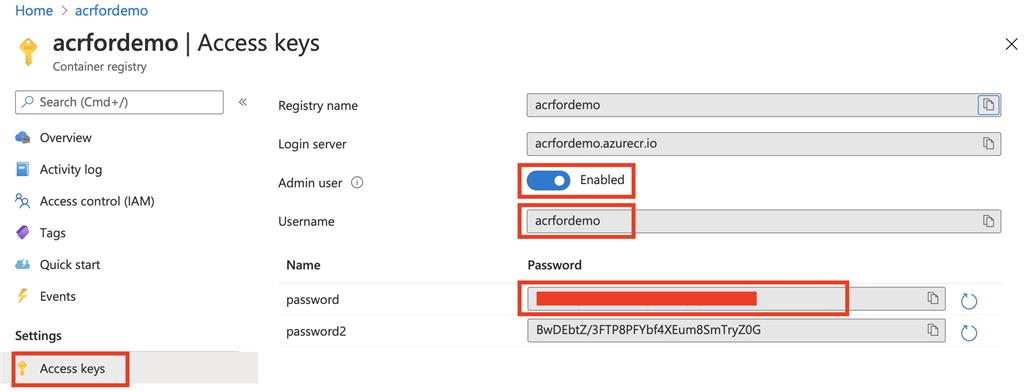
Now allow us to go to the Azure Container Registry within the Azure Portal. Navigate to the Entry Keys and allow Admin Person. Copy the Username and Password.
Run the next command to authenticate with the Azure Container Registry. Present the username and password for the Azure Container Registry when prompted.
- docker login acrfordemo.azurecr.io
Run the next command to tag the Docker picture to the Azure Container Registry.
- docker tag mydemoapp:demo acrfordemo.azurecr.io/mydemoapp:demo
Run the next command to push the picture to the Azure Container Registry.
- docker push acrfordemo.azurecr.io/mydemoapp:demo
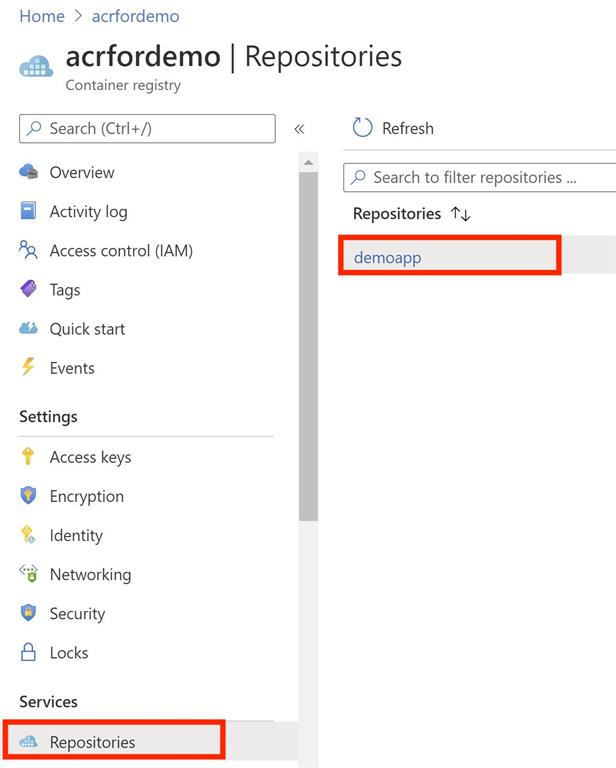
Go to the Azure Portal and open the Azure Container Registry. Go to Repositories and confirm if the picture is efficiently pushed.
Conclusion
On this article we realized containerize a .NET Core net utility and push it to Azure Container Registry utilizing Docker instructions. You should utilize this method to containerize and push container photos for non-Microsoft purposes to the Azure Container Registry.