Introduction
On this article, you’ll find out about join an Azure SQL database with Visual Studio code. Visual studio code is without doubt one of the hottest IDEs for programming and improvement in software program fields. In case internet builders growing internet functions and Azure or different databases are a backend of internet functions. Throughout improvement time builders can check some DML operations within the database. Dealing with a number of instruments is troublesome in some locations. So, we’re going to join the Azure SQL database in VS code.
Stipulations
-
Azure cloud account
-
Edge (or) Different browsers
-
Secure Web Connection
-
Minimal data in Database
-
Azure SQL server & database
Step 1
Step 2
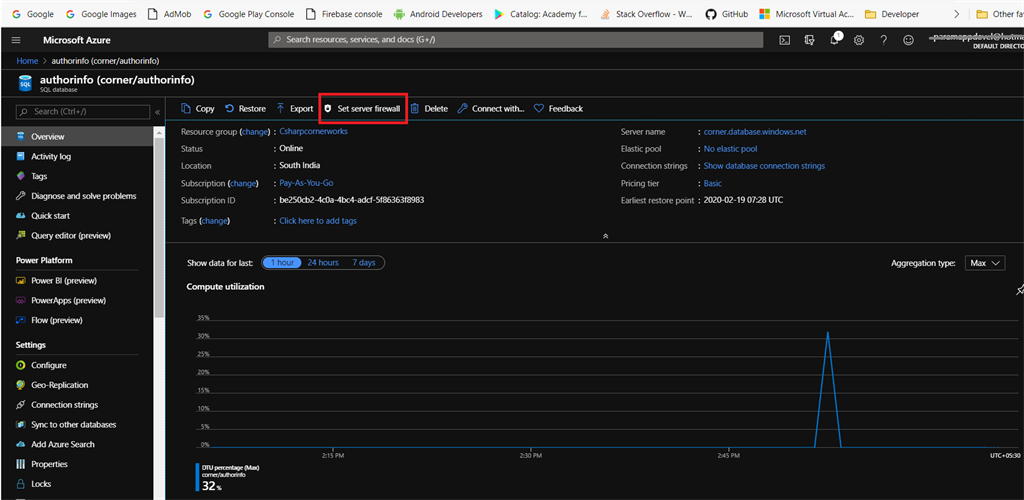
Go to your database Dashboard after which click on the “Set server firewall” choice on the prime of the dashboard.
Step 3
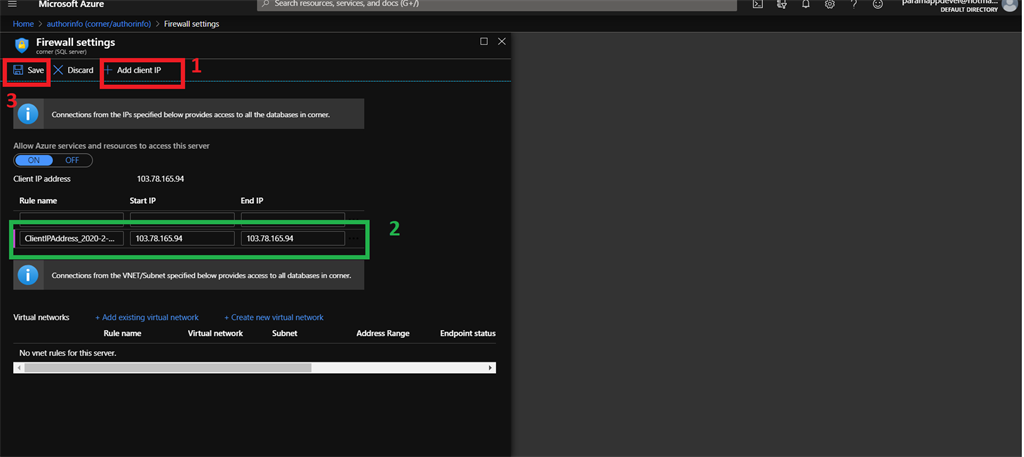
Within the firewall settings web page, click on the “Add shopper IP” button, our shopper IP added to the rule record. Subsequent, click on the “Save” button to save lots of our shopper IP.
Step 4
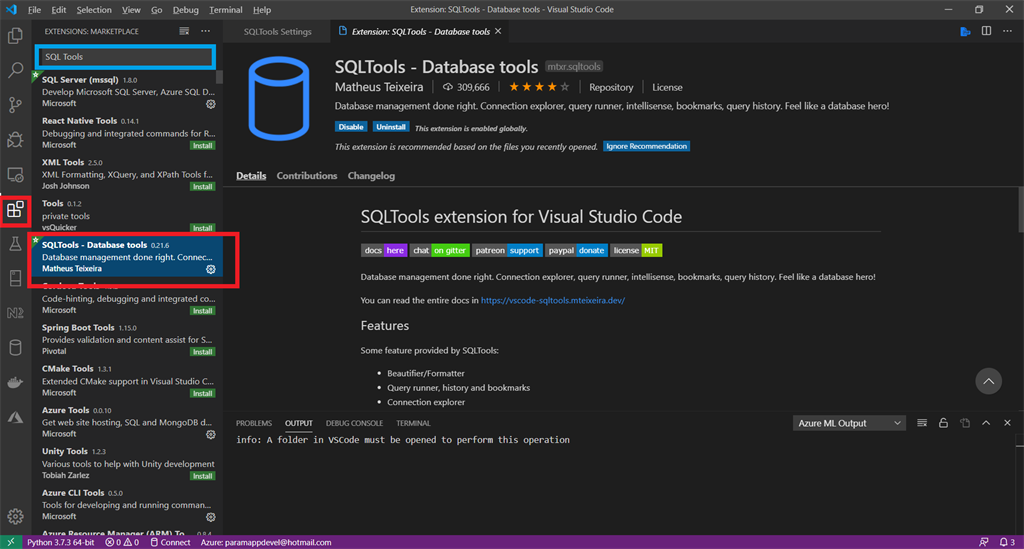
Open your visible studio code IDE, first we set up SQL device in visible studio code. Click on the “Extension” icon from the left sidebar after which search “SQL Instruments’ ‘ within the extension search bar. SQL device is obtainable in extension after which click on the set up button and wait a couple of minutes to finish the set up.
Step 5
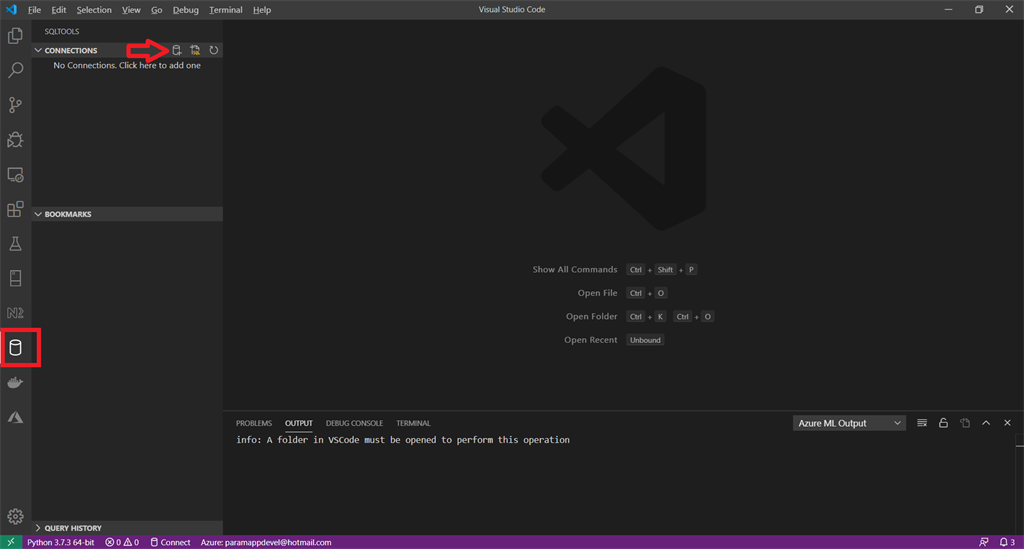
After set up is accomplished, click on the database icon after which click on the “SQL Instruments” icon after which click on the “Add connection” icon on the connection space.
Step 6
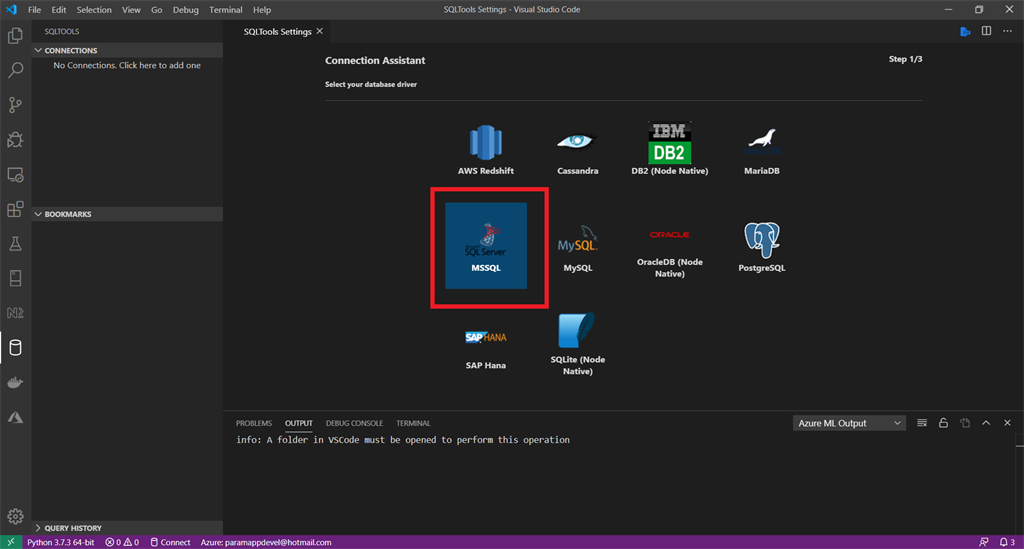
Subsequent, choose “My SQL Server” on the connection help web page.
Step 7
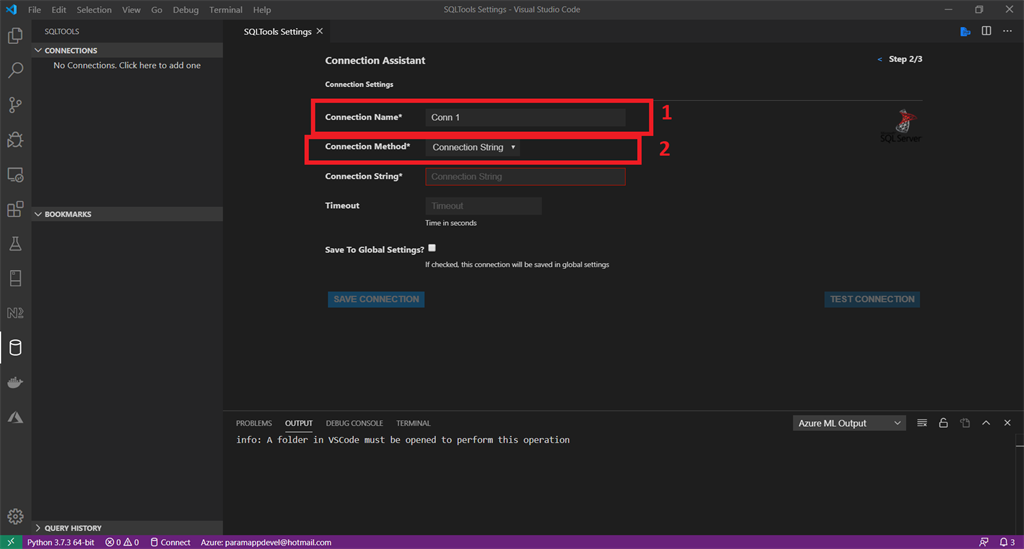
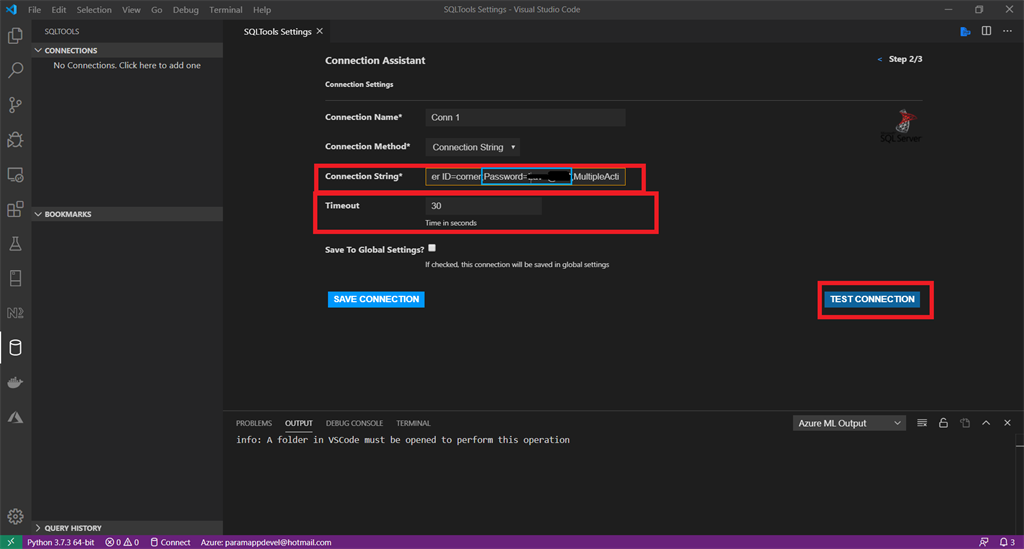
The connection settings web page provides a “Connection identify” and “Connection Technique” to create a brand new connection.
Step 8
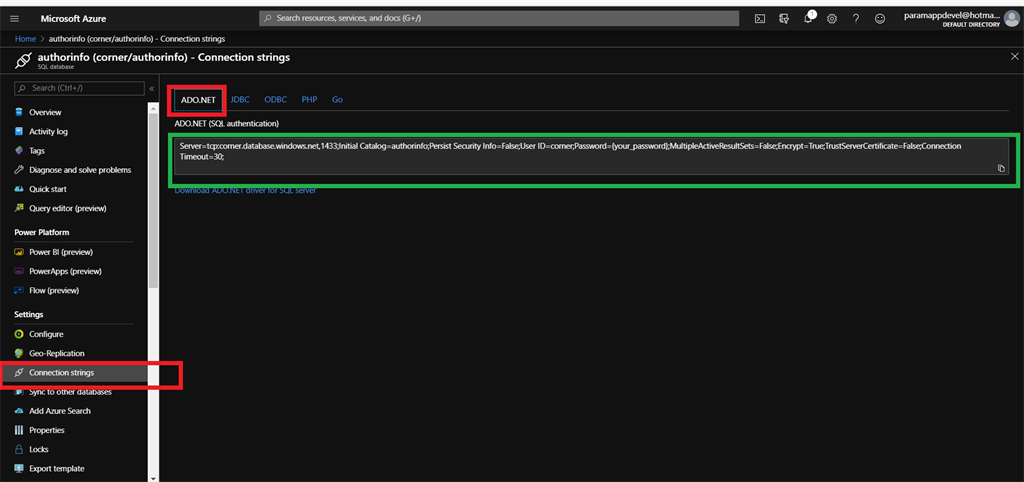
Subsequent, we will get a connection string from Azure. So, go to the Azure SQL database dashboard after which choose “Connection strings” from the left pane.
Copy the connection string from the “ADO.NET” tab.
Step 9
Subsequent, come to the visible studio code, now paste the copied connection string and set the timeout. Within the connection string, we can provide our SQL server password. (Password is given through the server creation).
The entire fields are accomplished, click on the “Check connection” button.
Step 10
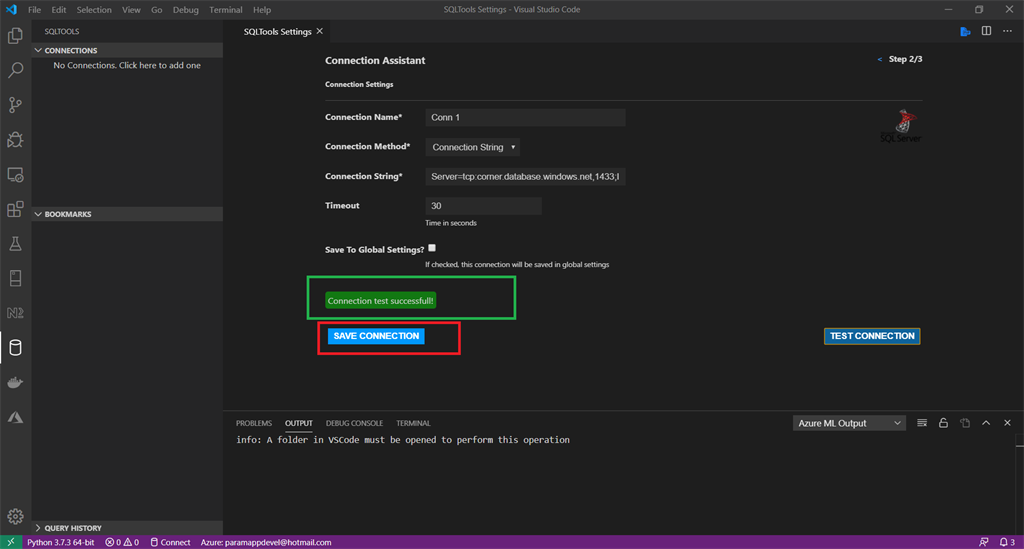
Our connection is profitable, click on the “Save connection” button.
Step 11
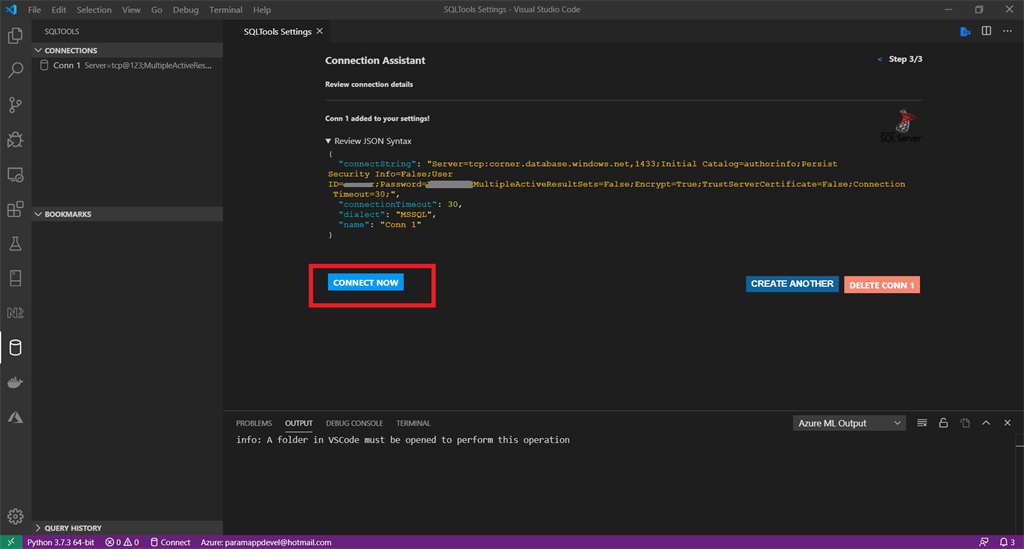
Within the connection evaluation web page, our connection info is displayed on that web page. Click on the “Join now” button.
Step 12
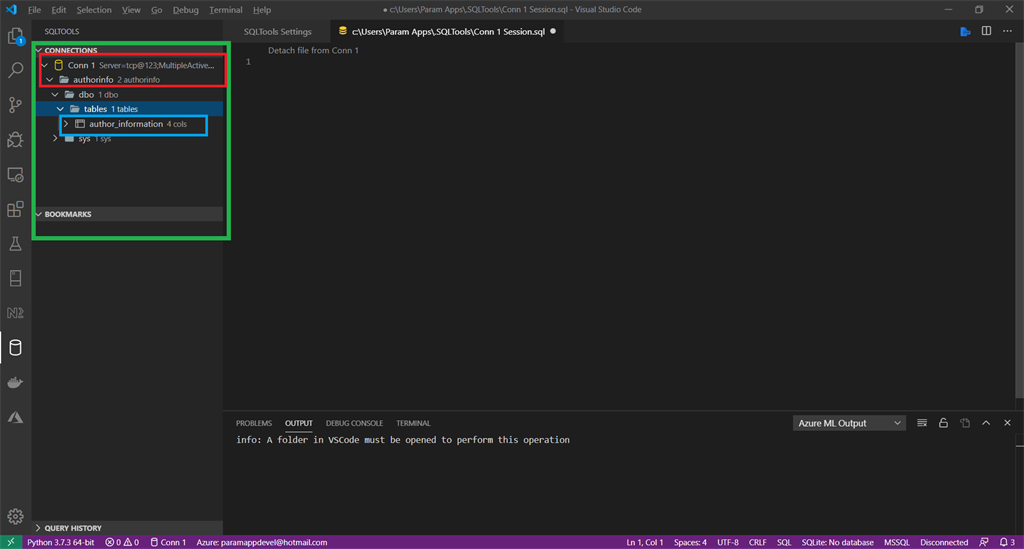
Our database connection is established with a visible studio. On the left aspect pane, our database info is displayed, together with the database identify, desk identify and column identify.
Abstract
Execute the straightforward SELECT question in vs code to fetch all knowledge from chosen tables.
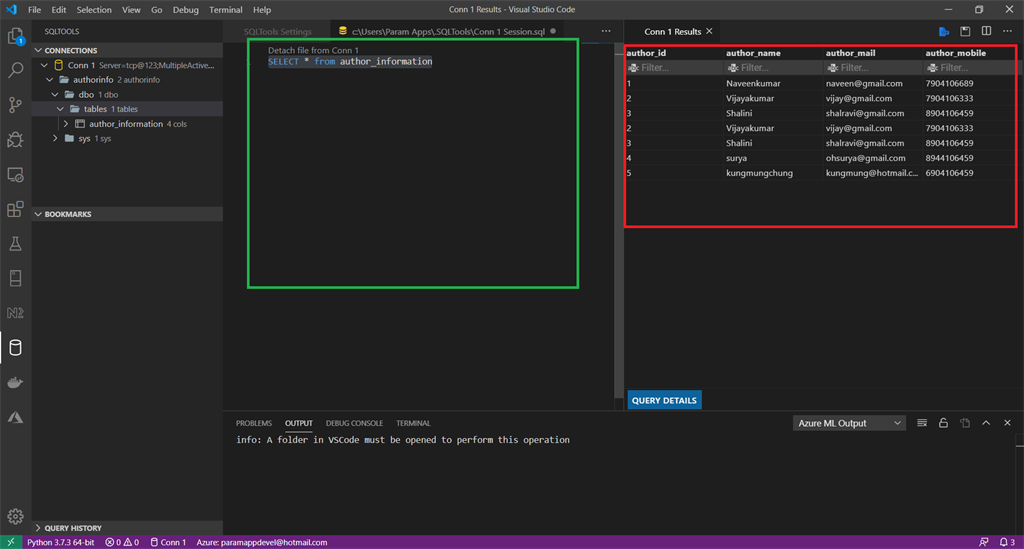
Lastly, we’ve efficiently related our Azure SQL database with our Visual Studio code.