Introduction
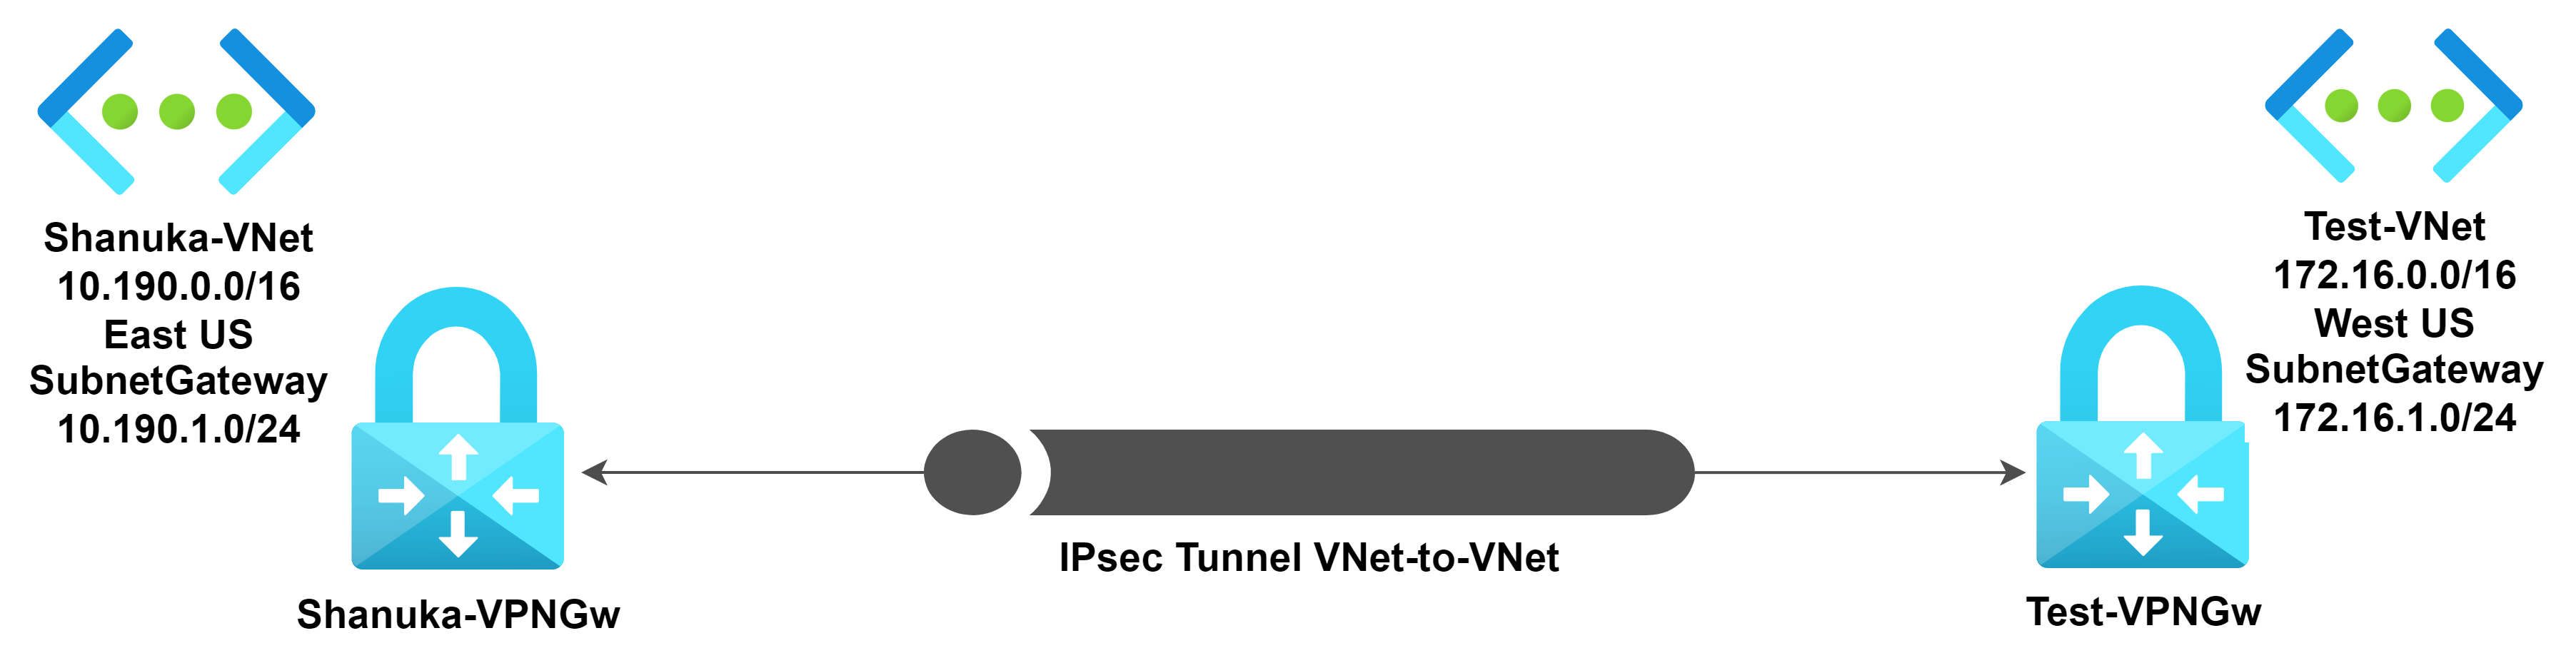
This text helps out you to attach two digital networks (VNets) through the use of VNet to VNet connection kind, by way of Digital Community Gateway in your Azure surroundings. And you’ll create digital networks in two totally different areas and in addition totally different subscriptions as nicely.
Stipulations
- Two Resouce Group (RG)
- Two Digital Networks (VNet)
- GatewaySubnet
- Two Digital Community Gateway (VPNGw)
That is my Demo LAB setup, and I’ve carried out the clear steps of the configuration.
Step 1
Signal into your azure portal.

Step 2
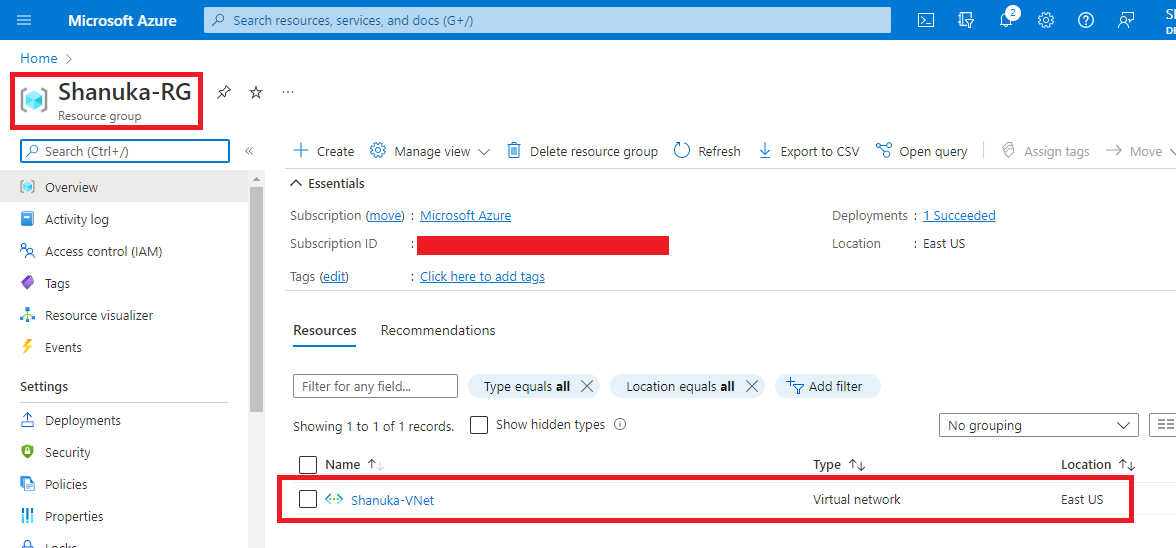
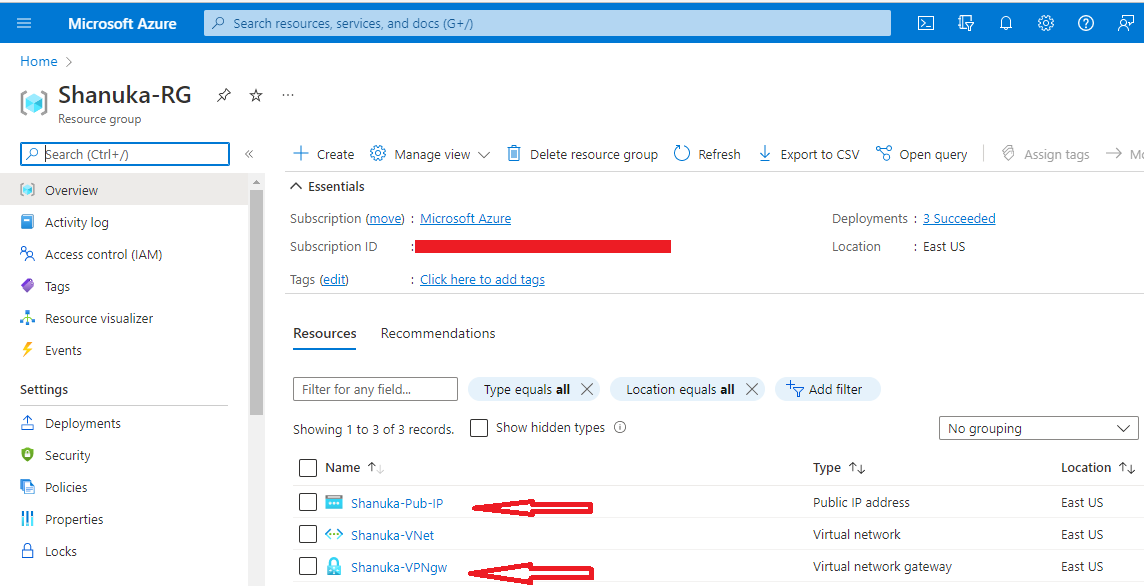
It’s essential to make certain your RG and VNet are created or not. In my case, I’ve created already Shanuka-RG>Shanuka-VNet.
Step 3
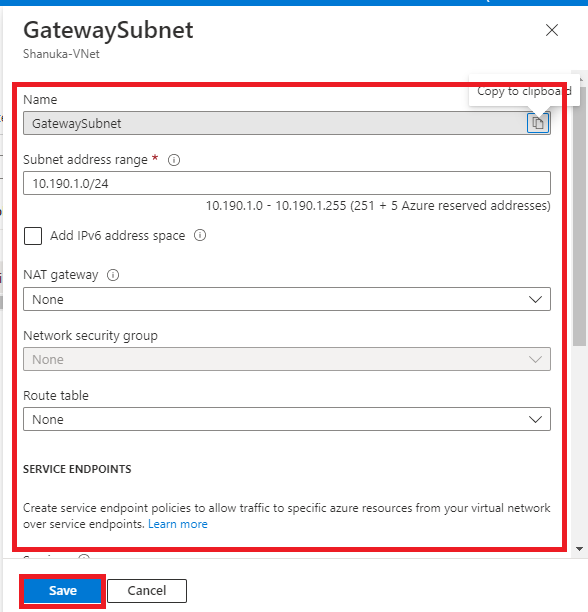
Earlier than going to create Digital Gateway want to verify GatewaySubnet Navigate to Shanuka-VNet> Choose Subnet> GatewaySubnet> when you click on GatewaySubnet it can mechanically decide the IP handle and Subnet title.
Step 4
Efficiently created subnet gateway

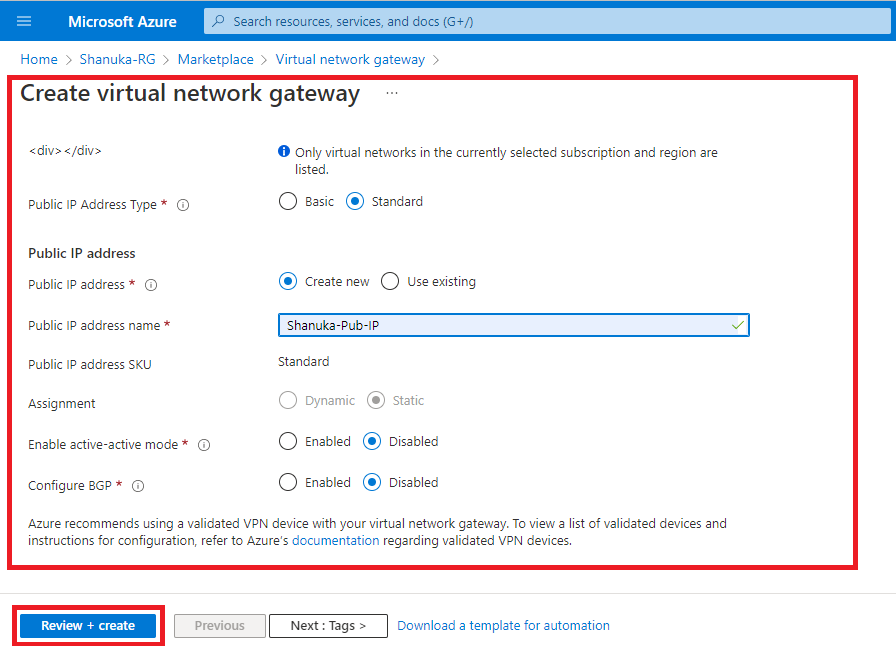
Configure a Digital Community Gateway
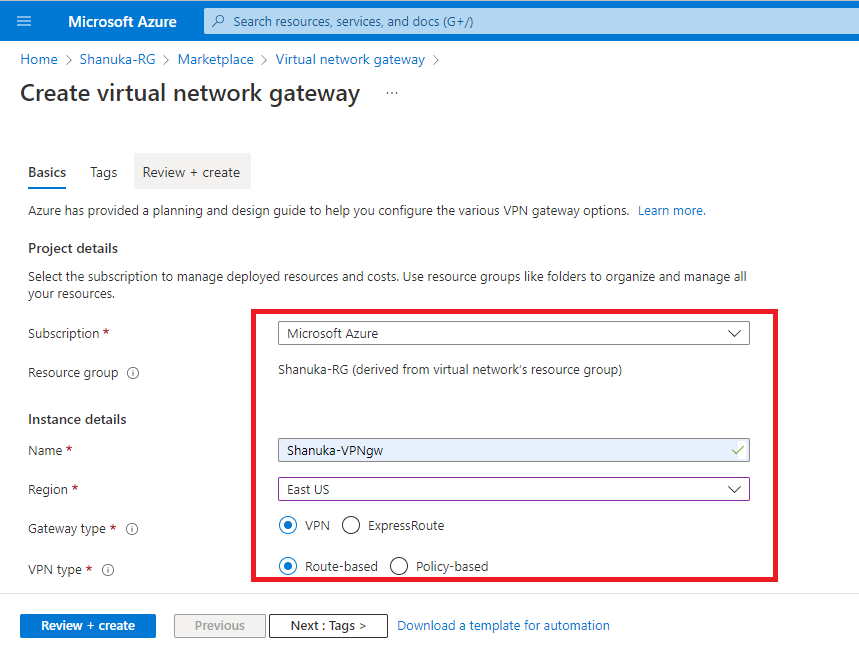
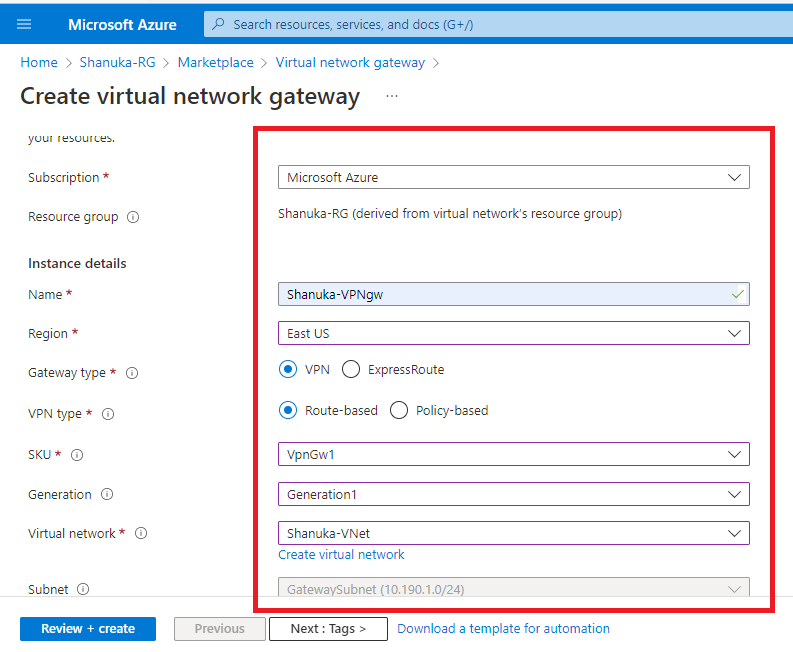
- Useful resource Group: Shanuka-RG
- Title: Shanuka-VPNGw
- Area: East US
- SKU: VpnGw1
- Era: Generation1
- Digital Community: Shanuka-VNet
- Subnet: GatewaySubnet (10.190.1.0/24)
- Gateway kind: VPN
- VPN kind: RouteBased
- Allow active-active mode: Disabled
- Configure BGP: Disabled
- Public IP handle: Shanuka-Pub-IP
Step 5
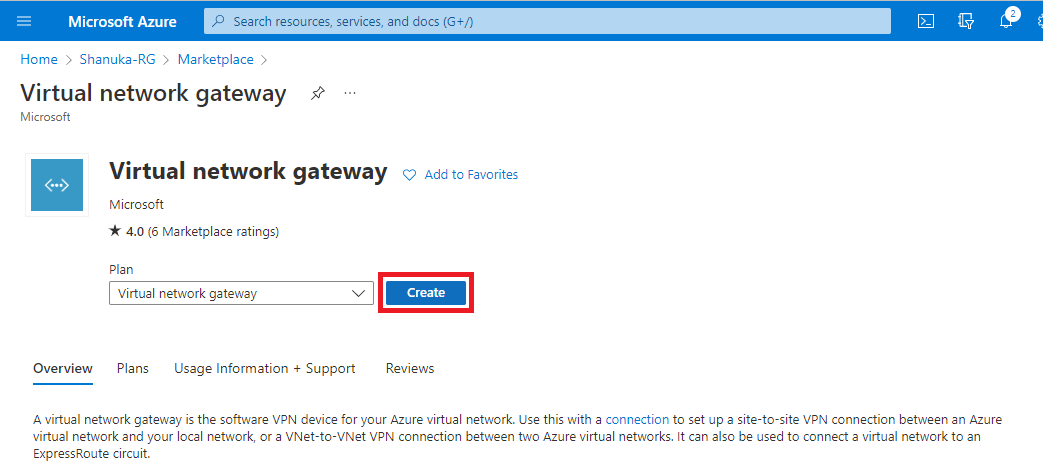
Navigate to your Shanuka-RG> and search Digital Community Gateway and create it
Step 6
Please comply with the suitable steps
Step 7
Right here have the choice to decide on SKU In my case, I’ve chosen VpnGw1 as per your requirement you possibly can select. You possibly can verify the SKU throughput through the use of the under hyperlink.
About Azure VPN Gateway | Microsoft Docs
Step 8
Set your Public IP title and Evaluate and Create
Word: It can take an estimated time of 45 minutes to create a VPN Gateway
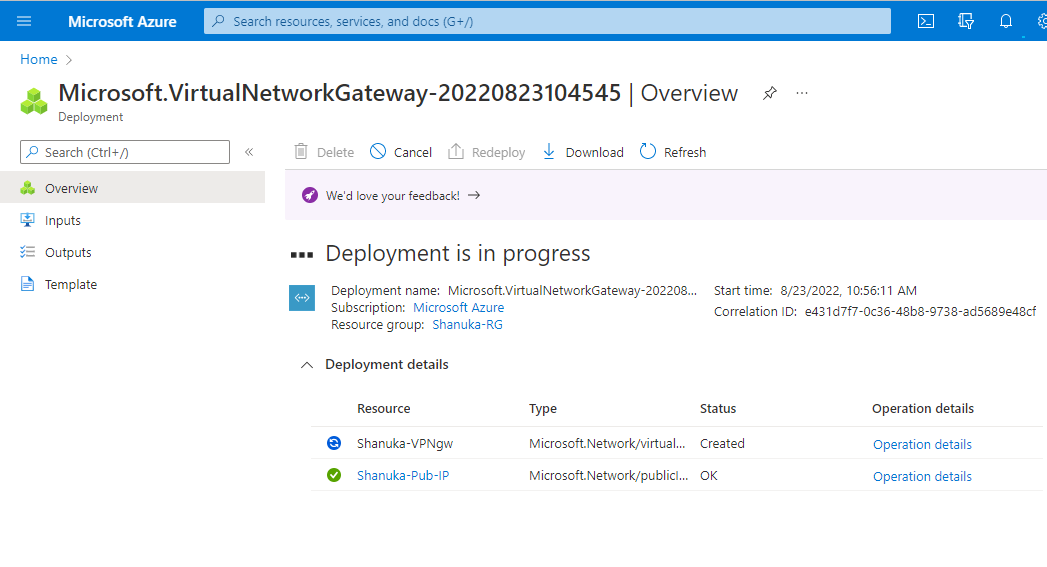
Step 9
Digital Community Gateway is efficiently created.
Create a Native Community Gateway configuration step-by-step
Stipulations
- Two VNets
- Two Digital Community Gateway
In my case, I’ve created in accordance with my above situation
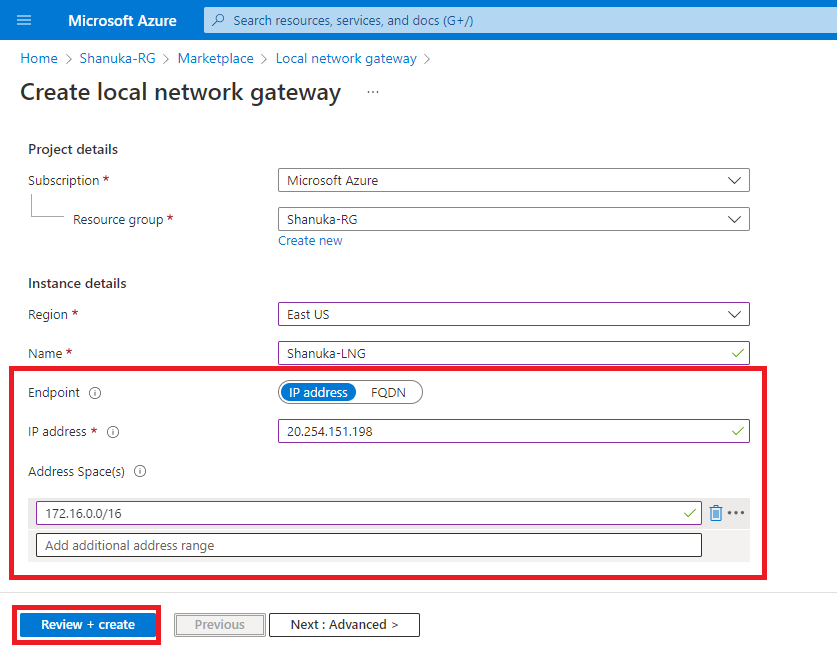
Configure a Native Community Gateway
- Useful resource Group: Shanuka-RG
- Title: Shanuka-LNG
- Area: East US
- Endpoint: IP handle
- IP handle: 20.254.151.198 (Use your distant website public ip)
- Deal with Area: 172.16.0.0/16
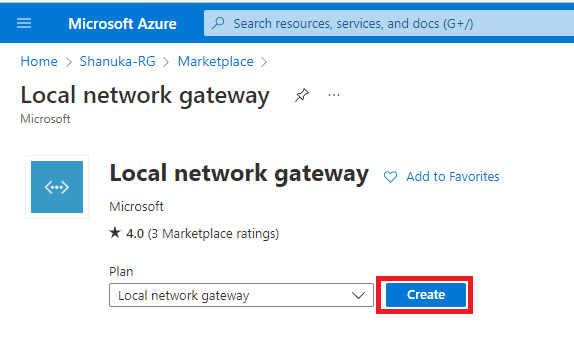
Step 1
Choose your specified useful resource group (RG) and Go to Market>Kind Native Community Gateway> Create it.
Step 2
Following the suitable steps and assessment and create
Essential: Be sure your Endpoint particulars are corrected
- Endpoint IP Deal with is your opponent’s Public Deal with (Public-IP)
- Deal with Area is (VNet-IP)
In my case, I’ve added my Take a look at-RG VPN Gateway particulars right here
Step 3
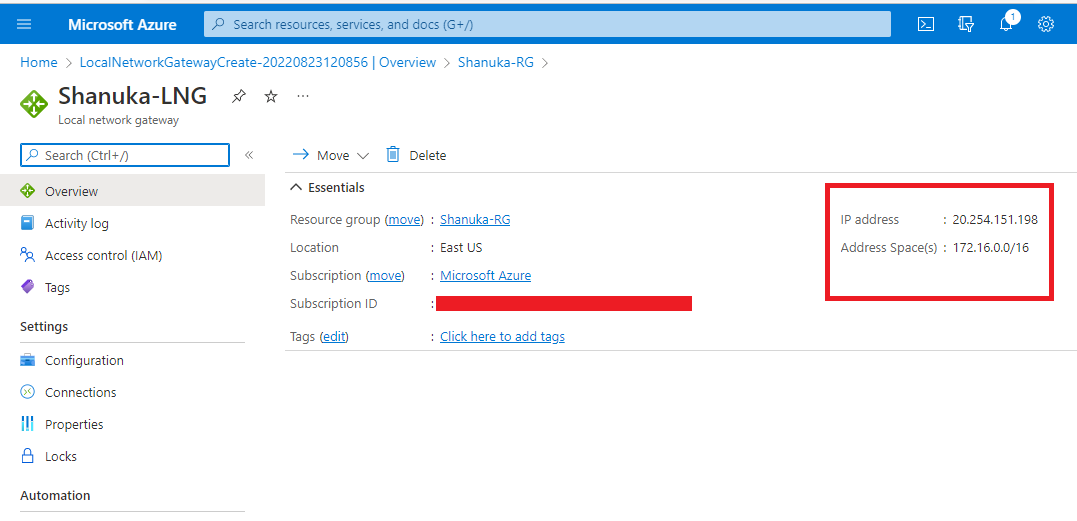
Efficiently created my Native Community Gateway (LNG)
Add Connection configuration Steps
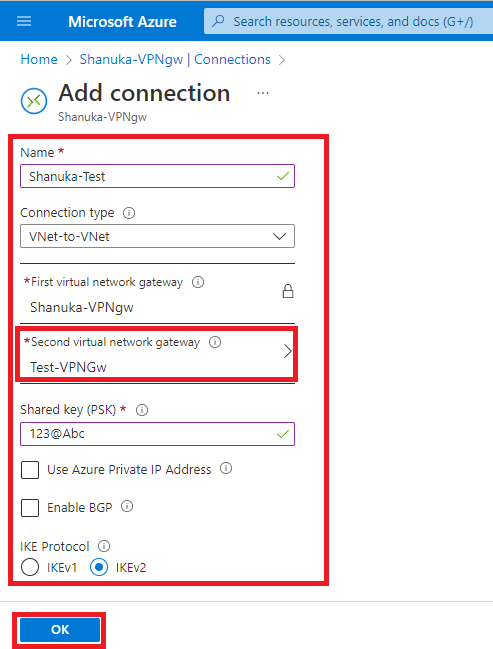
Step 1
Navigate to your Digital Community Gateway Shanuka-VPNgw>Connection>Add Connection
- Title: Shanuka-Take a look at
- Connection kind: VNet-to-VNet
- The “First Digital Community Gateway” (Shanuka-VPNGw)mechanically picks up
- You will have choose solely “Second Digital Community Gateway” (Take a look at-VPNGw)
- Shared Key (PSK): For Instance “123@Abc” you possibly can put any keys right here. In my case, I’ve carried out with the 123@Abc
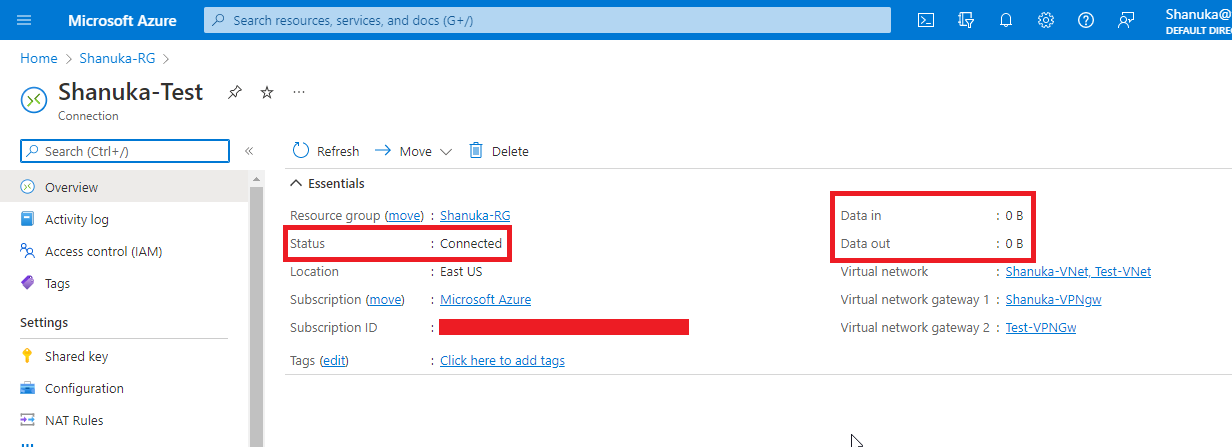
Step 2
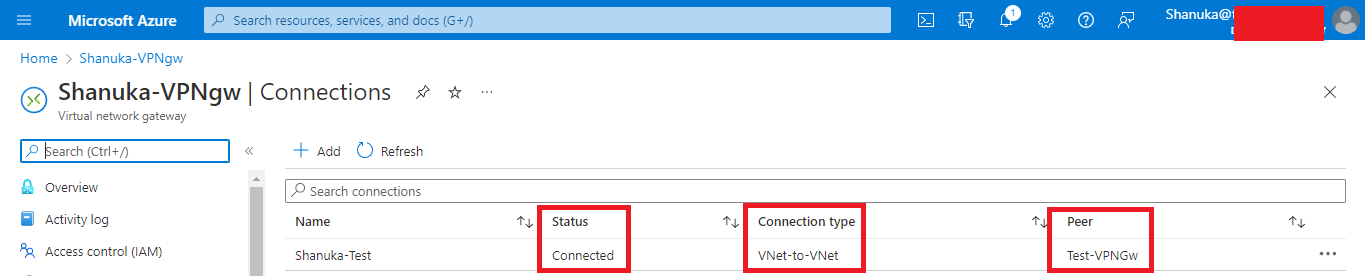
Efficiently linked my VNet-to-VNet Tunnel VPN.
Conclusion
This text taught us tips on how to Implement IPsec for VNet-to-VNet utilizing by VPN gateway. And you probably have any questions please contact me.
Thanks.