Making a Kubernetes Cluster is cumbersome and time-consuming. It includes numerous effort to have the Kubernetes Management Aircraft up and prepared. Typically, it might take days primarily based on the extent of experience we’ve got. Making a Kubernetes Cluster on Azure is straightforward, and you’ll spin it up in minutes. At any time when we create an Azure Kubernetes Service, we really create a Management Aircraft and Cluster Nodes. We run the containerized functions on the Cluster Nodes. The underlying Azure Platform abstracts all needed complexities concerned to create and keep the Kubernetes Management Aircraft. On this article, we are going to create an Azure Kubernetes Service Cluster. Within the subsequent articles, we are going to containerize the .NET Core software and host it within the Azure Kubernetes Service Cluster.
As of now, we’ve got been discussing the theoretical elements of Azure Kubernetes Service and seen an in depth understanding of the essential ideas for Azure Kubernetes Service.
Creating an Azure Kubernetes Service Cluster:
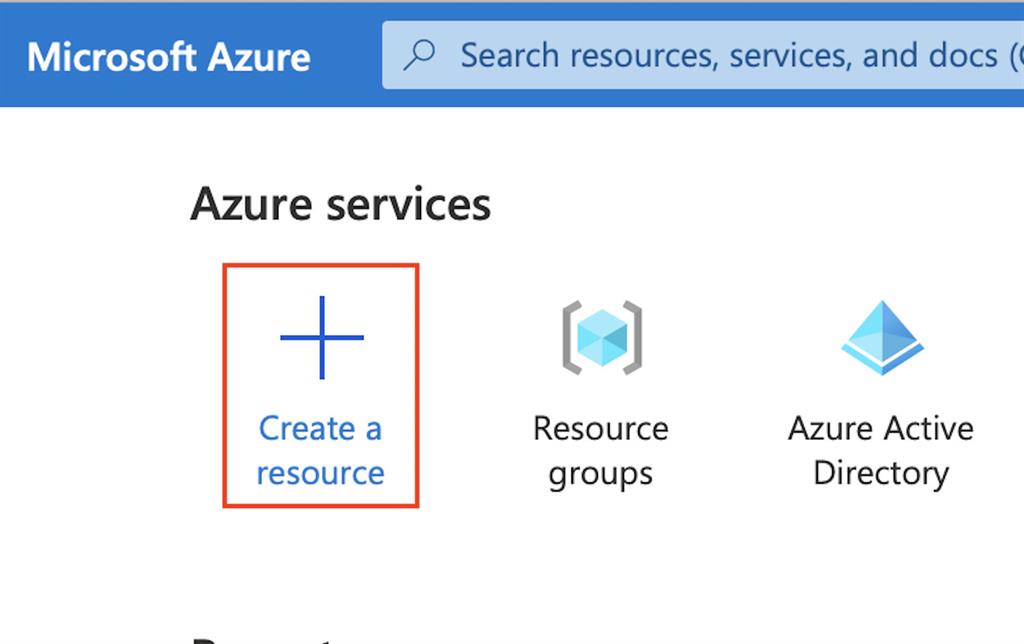
Open Azure Portal – https://portal.azure.com and click on on Create a useful resource.
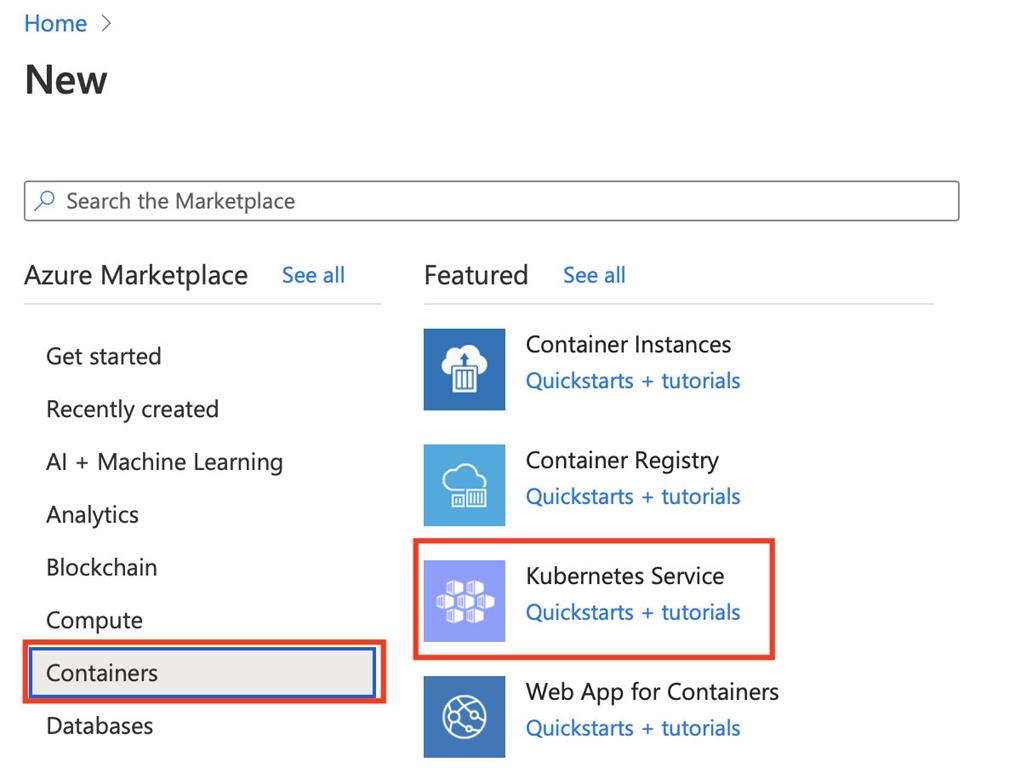
All of the Containers primarily based choices are listed within the Containers part. Click on on Containers after which click on on Kubernetes Service.
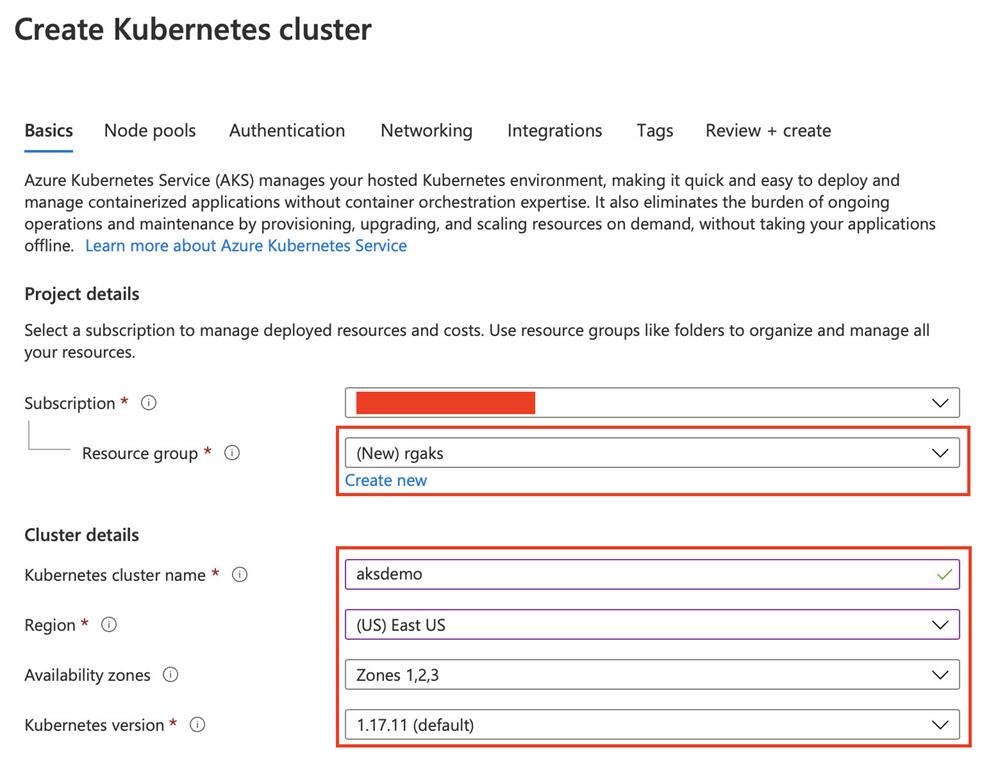
Present the title of the Azure Subscription the place you have to create the Azure Kubernetes Service, Useful resource Group Title, Kubernetes cluster title, Area the place your Kubernetes Cluster could be created, and all different needed info.
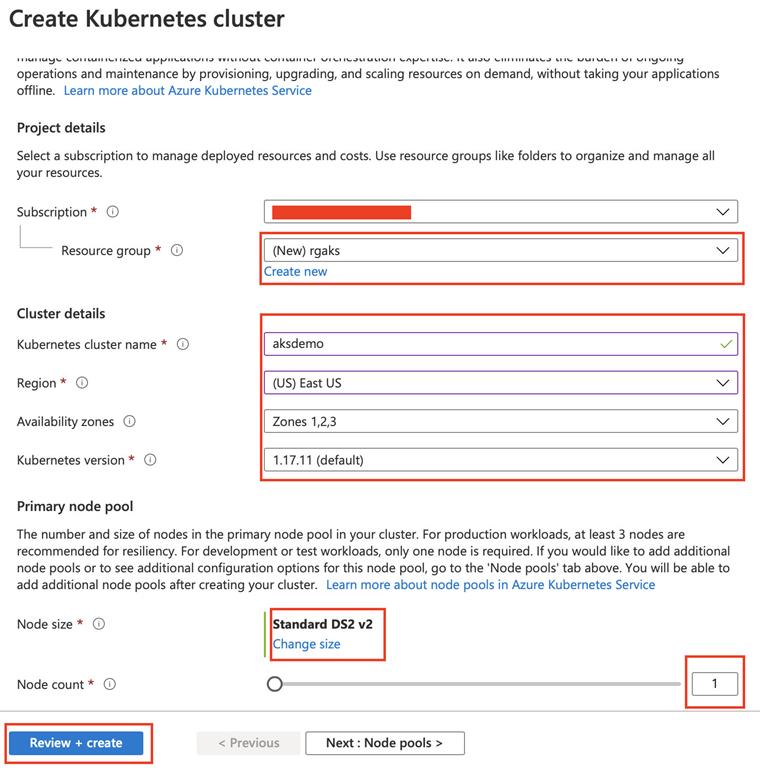
Choose the scale of the Node-based in your requirement and supply various Nodes you want within the Cluster. Click on on Overview + create.
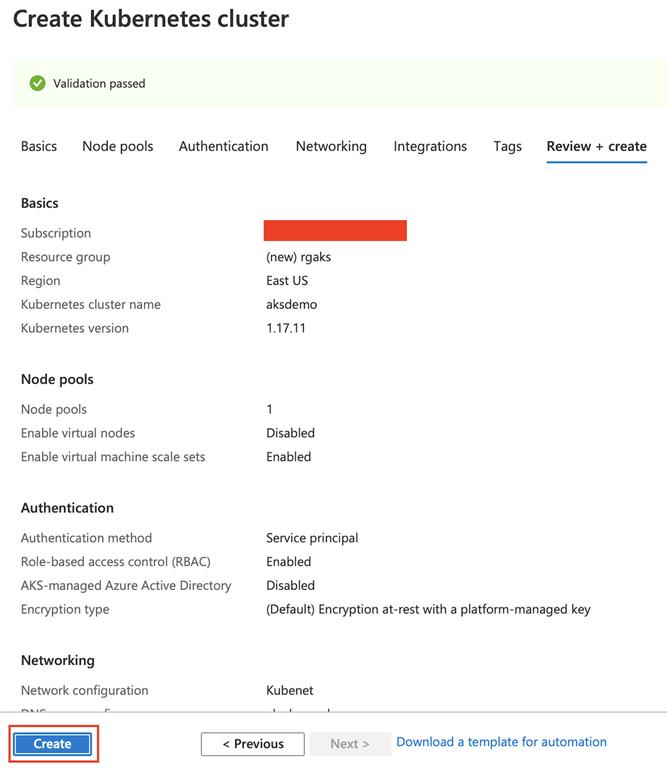
Confirm the small print for the Kubernetes Service and click on on Create.
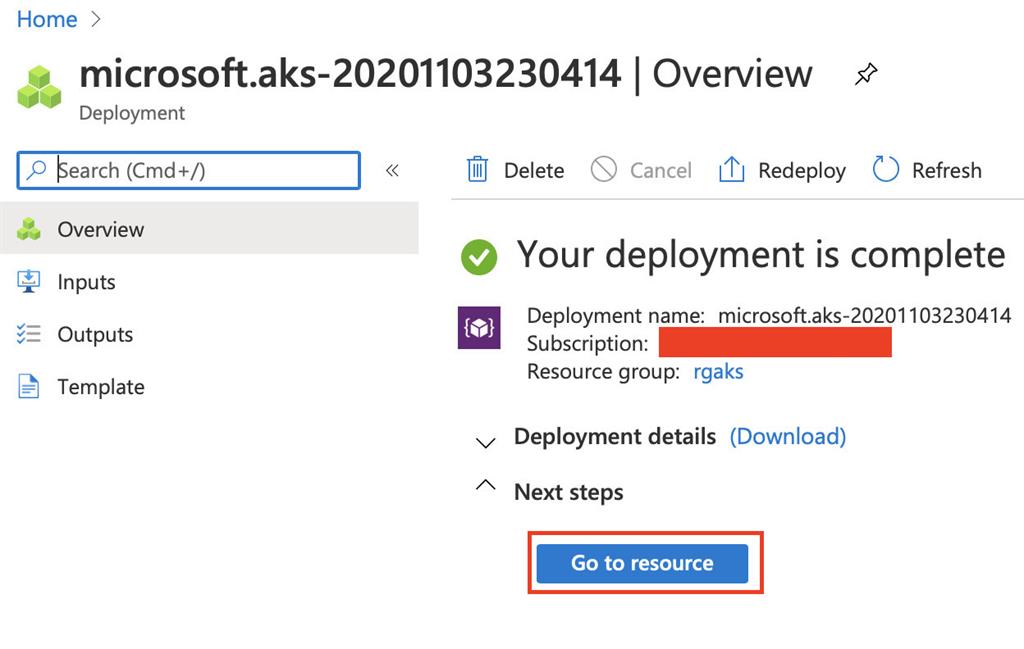
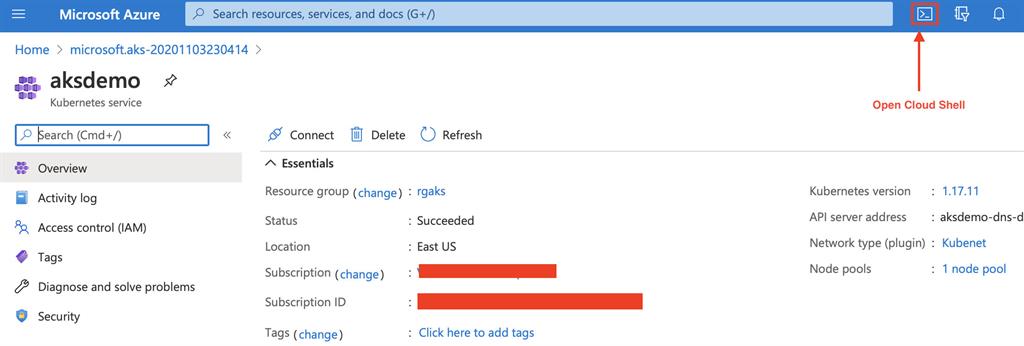
As soon as the Kubernetes Cluster will get created click on on Go to the useful resource. You’re going to get navigated to the newly created Azure Kubernetes Service Cluster.
Now allow us to confirm the Cluster. We will verify the Nodes created within the Cluster. Click on on the Cloud Shell icon to open the Cloud Shell. The Cloud Shell comes loaded with all needed utilities like Azure CLI, Helm Charts, Kubectl command that we are able to use to work together with Azure Kubernetes Service Cluster. You may work together with any Azure Service utilizing the Cloud Shell.
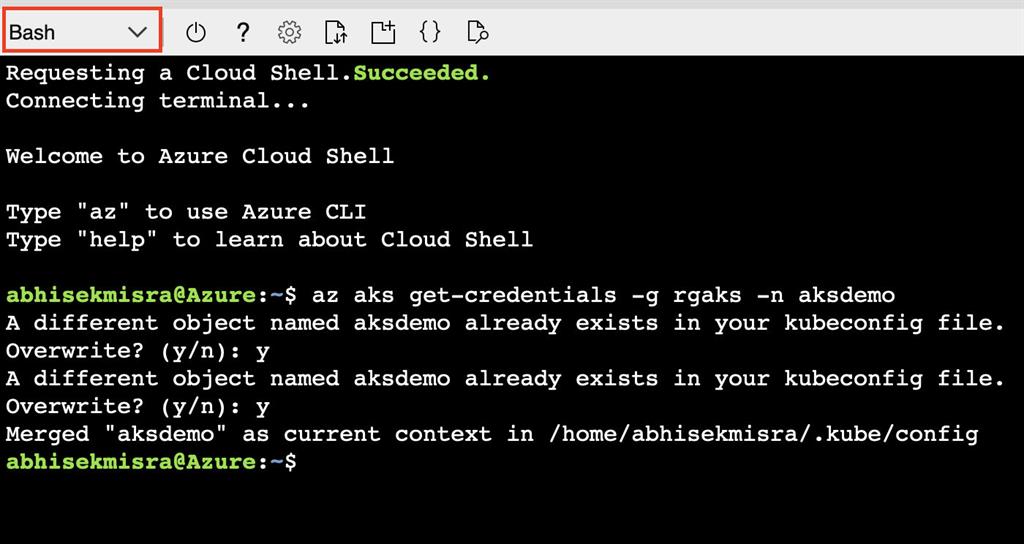
Run the next command to get the credentials of the Azure Kubernetes Service regionally to the Cloud Shell. This would supply all the required credentials to work together with the Kubernetes Management Aircraft. Present the title of the Useful resource Group and the Azure Kubernetes Service within the placeholders.
az aks get-credentials -g [Resource Group] -n [Name of Azure Kubernetes Service]
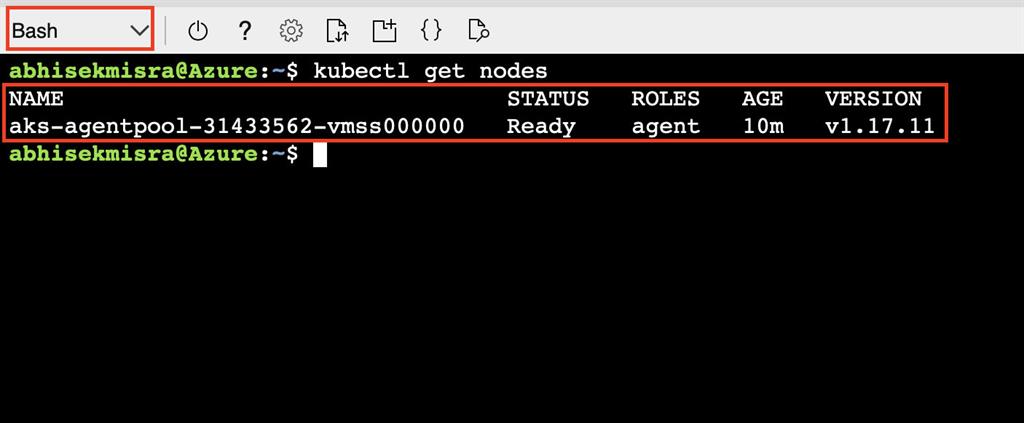
We use the kubectl command to work together with the Azure Kubernetes Service Cluster. Allow us to execute the next command to get the Nodes within the Cluster. We had opted for a single Node within the Cluster whereas creating the Azure Kubernetes Service. So, we must always be capable to see a single Node right here.
kubectl get nodes
Conclusion
On this article, we discovered the way to create a primary Azure Kubernetes Service Cluster. Within the subsequent articles, we are going to containerize a .NET Core software, push it to Azure Container Registry, after which run it within the Azure Kubernetes Service Cluster.