Introduction
Azure IoT Hub is a managed service of the Azure cloud which acts as central bi-directional message hub to change between IoT software and gadgets. Azure IoT hub lets you create dependable and safe communication between IoT gadgets and Cloud apps. The gadgets will be digital. It helps bi-directional communication; i.e. from the gadget to the cloud and from the cloud to the gadget.
Establishing an Azure IoT Hub
There are a number of methods to create Azure IoT Hub comparable to utilizing Azure portal, Azure PowerShell, Azure CLI, and many others. On this article, I’ll clarify methods to create and handle IoT hub utilizing Azure portal.
To create an IoT hub, it’s essential to have an Azure account. Following are the steps to create an IoT hub utilizing Azure portal.
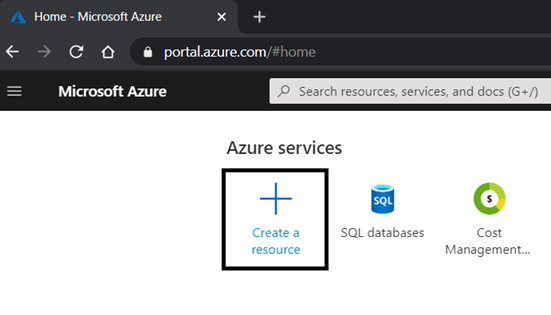
Step 1
Step 2
Click on on “Create a useful resource” button from the portal house display screen.
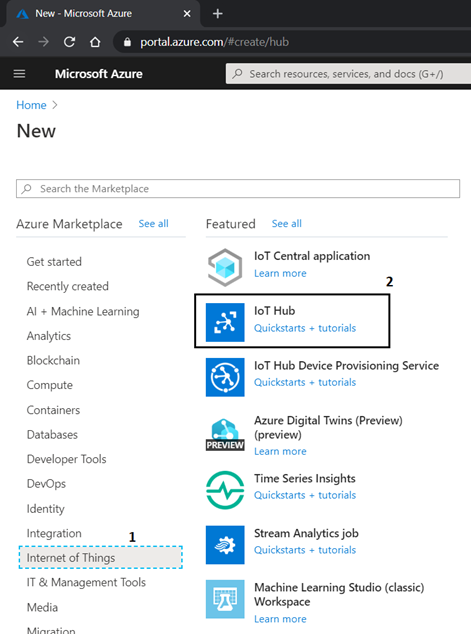
Step 3
This can checklist down all accessible service. Choose “Web of Issues” from left panel and click on on “IoT Hub” from proper panel. You can too search required service from search textbox.
Step 4
There are some obligatory data you could refill for IoT hub. Following data have to fill in “Primary” tab.
- Subscription: choose the subscription that you just wish to use to create IoT hub
- Useful resource Group: choose the present useful resource group or create new one
- Area: choose area by which you wish to host your IoT hub. You may choose area that may be very close to to your gadgets.
- IoT Hub Identify: enter IoT hub title. It should be distinctive at international degree
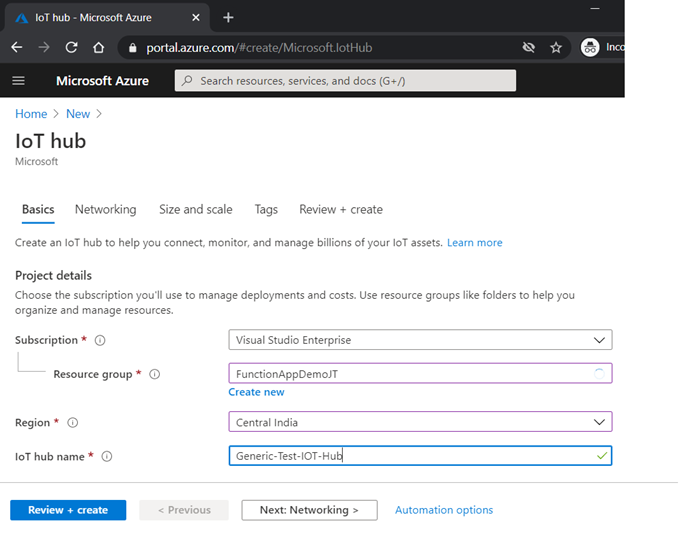
There are another tabs additionally accessible comparable to Networking, Measurement and scale, and Tags. These tabs have some default choice chosen. Chances are you’ll change these default choices base in your requirement.
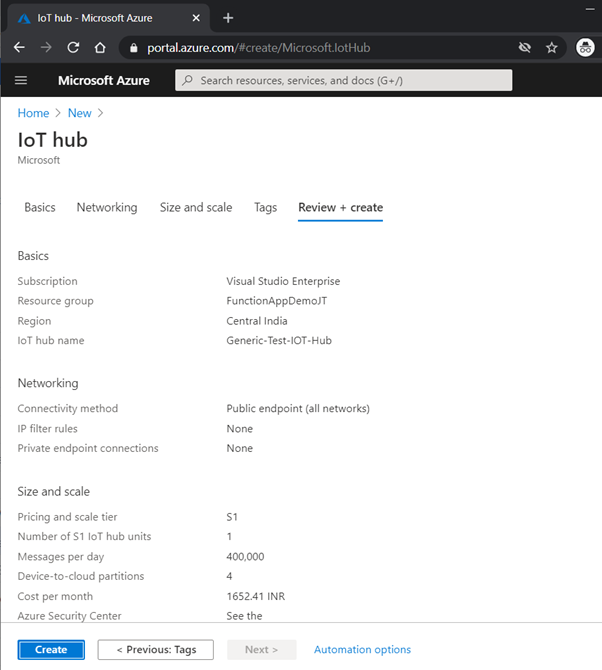
Click on on “Evaluate+ create” button, when you establishing all fields. It summarizes all the choice that you’ve got chosen to create IoT hub. You can too modify the choice if one thing incorrect choice has been chosen by choosing specific tab.
When you wonderful with chosen choices, click on on “Create” button to create IoT hub.
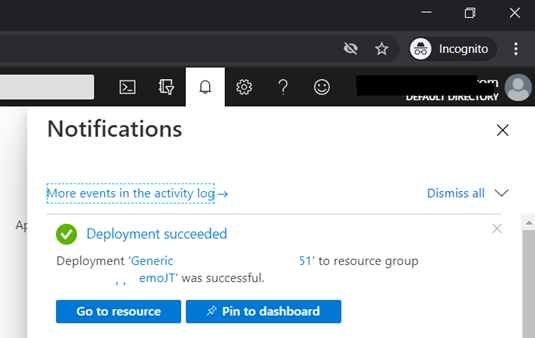
It takes a while to create and host your IoT hub. As soon as your IoT hub hosted and accessible to be used, you’re going to get notification.
You can too modify the setting of the IoT hub when you create have created it.
Shared entry insurance policies
You may view and modify the IoT hub shared entry insurance policies by clicking on “Shared entry coverage” from left panel underneath the setting part. There are some pre-defined shared entry insurance policies which might be outlined. You may add your customized shared entry coverage. Mainly, it comprises the permission of IoT hub entry. The entry insurance policies comprise the important thing and connection string that may be use to attach IoT hub from the gadgets.
You can too view, modify and delete the pre-defined entry insurance policies.
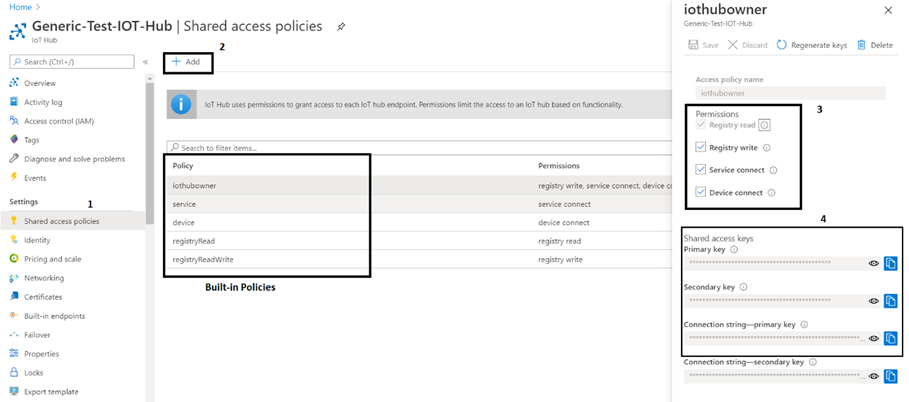
So as to add new entry coverage, click on on “+ Add” button. Right here, it’s a must to present coverage title and set of permission affiliate with the coverage.
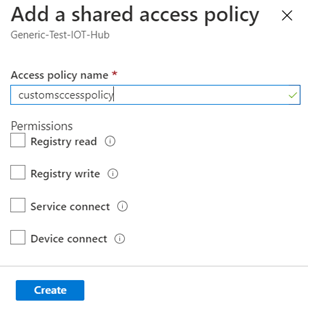
There are 4 permissions which you can set to coverage.
- Registry Learn: It grants the learn entry rights to the id registry
- Registry write: It grants the write entry rights to the id registry
- Service join: It grants permission for entry service endpoints. Once you allow this selection, one can join service finish level and ship and obtain messages from the gadget and likewise learn and modify gadget twin information
- System join: It grants the permission for sending receiving message. It’s used to ship and obtain message from IoT hub. It additionally used to learn and modify gadget twin information.
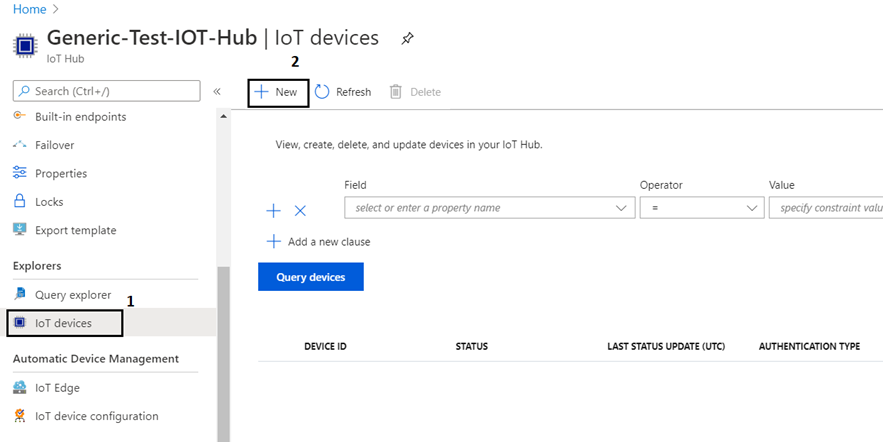
Creating new Units in IoT Hub
The gadgets will be created underneath the IoT hub. To create new gadget, choose “IoT gadgets” from left panel underneath the Explorer part after which click on on “+New” button.
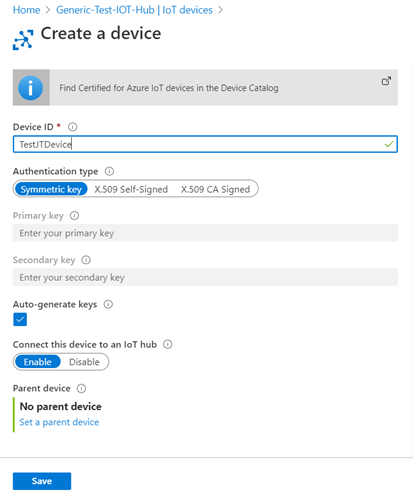
Present the title of gadget and click on on save button. Right here, Azure offers the choice to create customized major key/secondary key. You can too generate a key robotically.
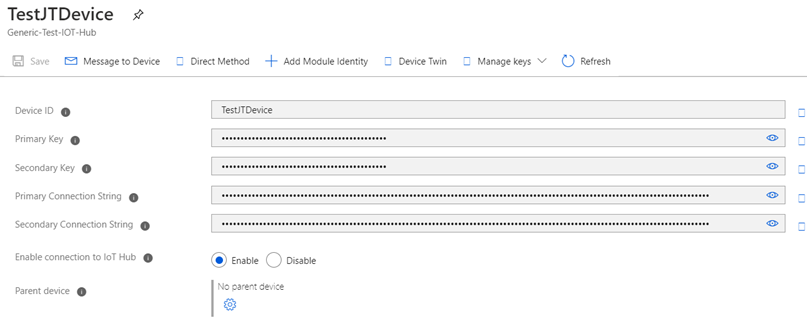
After getting created a tool, you’ll be able to open the gadget from IoT gadget checklist and look at / copy the keys and connection strings.
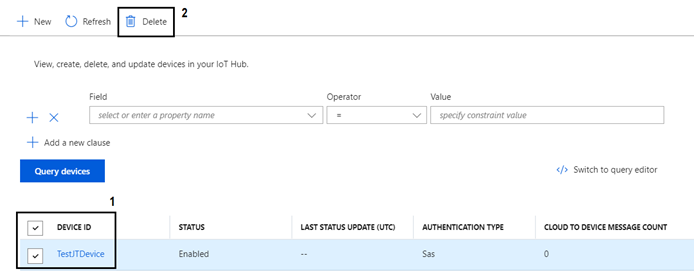
Delete the IoT gadgets
You can too delete the IoT gadgets. To delete gadgets, choose the gadgets from the checklist and click on on “Delete” button. It’s going to ask for the conformation and once you affirm, it should delete the IoT gadget.
Delete IoT hub
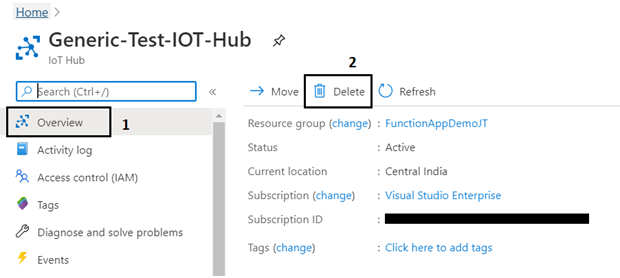
To delete the IoT hub, choose the IoT hub after which click on on the “Overview” part from left panel. Now, click on on “Delete” button from the correct panel.
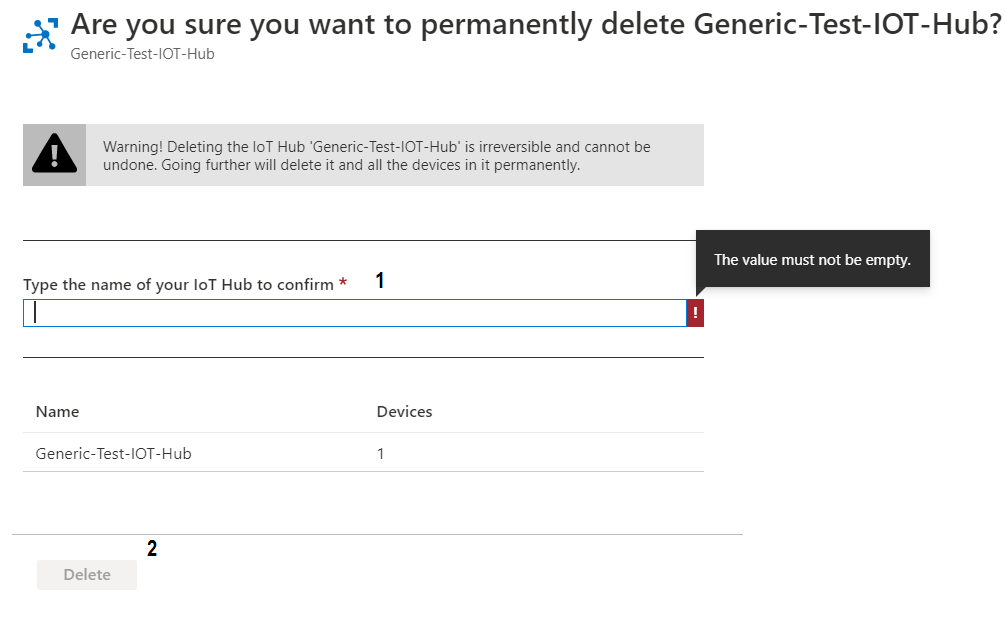
It’s going to ask for affirmation and it’s a must to sort the title of the Iot hub to confirmthen click on on delete button. When you delete the IoT hub, all of the gadgets are completely deleted.
Abstract
Azure IoT Hub is a managed service of Azure cloud which acts as central bi-directional message hub to change between IoT software and gadgets. It permits you create dependable and safe answer for connecting billions of gadgets. You should utilize Azure IoT gadget SDK to construct gadget software program. It helps many languages comparable to C, C#, Java, Python and Node.js. The IoT hub helps many protocols for connecting gadgets comparable to Https, AMQP, MQTT and AMQP/MQTT over WebSocket.