On this article, we’ll study to attach and entry the Azure SQL Database by the Azure Knowledge Studio. In following articles, we’ll study to create tables, question information, view the info after which delete the desk. To start with, we have to create a Azure SQL Database and a SQL Server. You possibly can study it from the earlier articles, How To Create, Question And Delete Database In Azure SQL and Create Single Serverless Database. You can even get launched to Azure Knowledge Studio from the earlier article, Azure Knowledge Studio and discover ways to set up it.
Azure Knowledge Studio
Azure Knowledge Studio is mainly a database instrument that’s cross-platform routinely utilized by information engineers and professionals for each on-premises and cloud companies all through the working system spectrum from Home windows to macOS and Linux. There are quite a few fashionable editor choices with the Azure Knowledge Studio from Code Snippets, IntelliSense, Built-in Terminal, Supply Management Integration, and extra. An awesome expertise with charting of question outcomes, customizable dashboards are supported built-in.
Now, allow us to get into studying how to hook up with Azure SQL Database from the Azure Knowledge Studio with the step-by-step tutorial.
Connecting to Azure SQL Database
Step 1
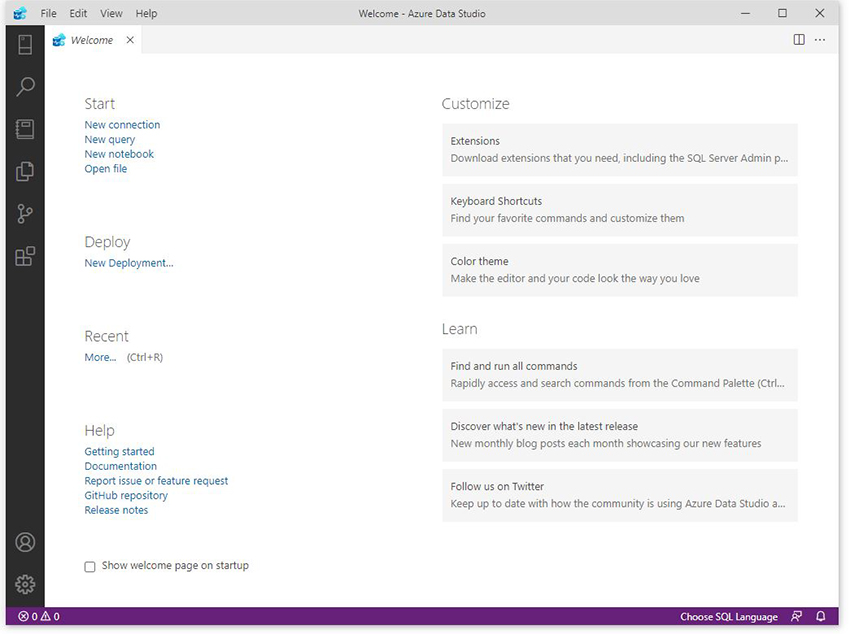
Open your Azure Knowledge Studio. You’ll be welcome to this house web page.
Step 2
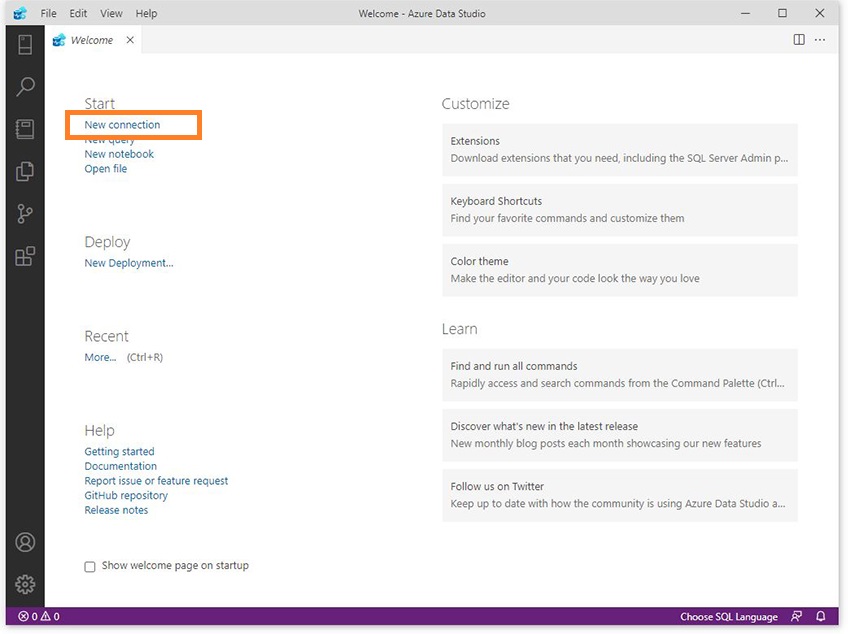
Click on on New Connection.
Step 3
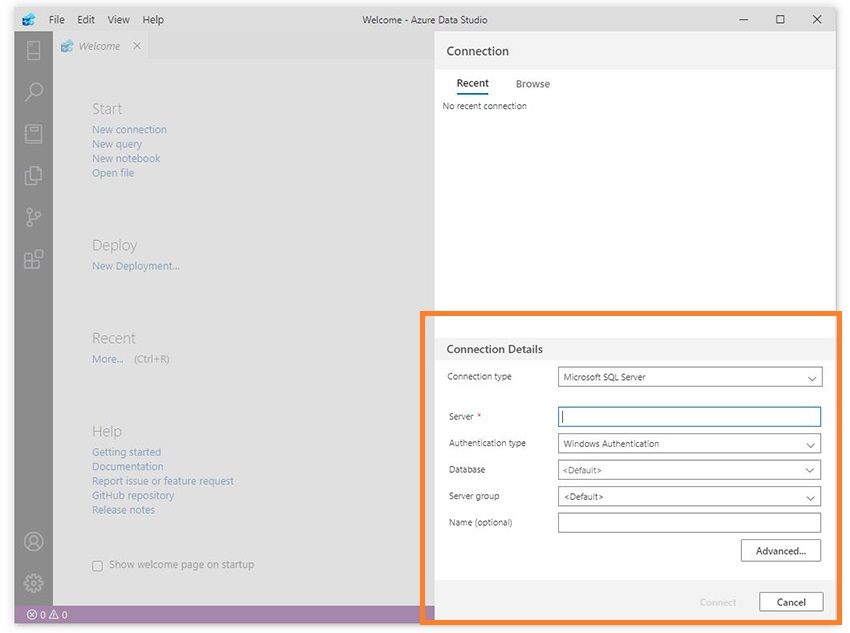
You’ll be prompted with a kind for Connection Particulars. Right here you’ll fill within the Server Particulars, Authentication Varieties and extra particulars. These values are from the Azure SQL Database you’ve created earlier following the Create Single Serverless Database article.
Step 4
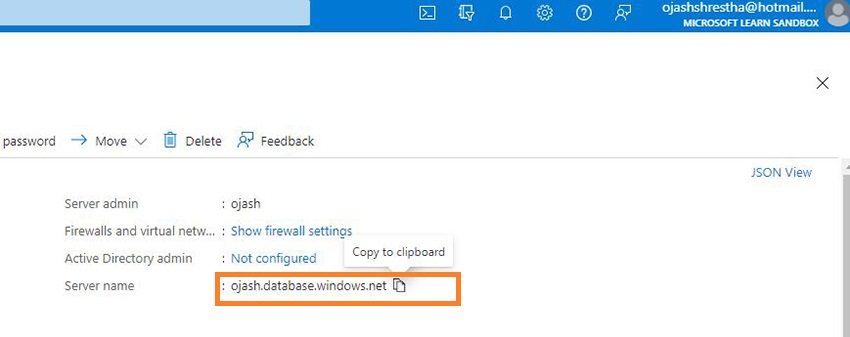
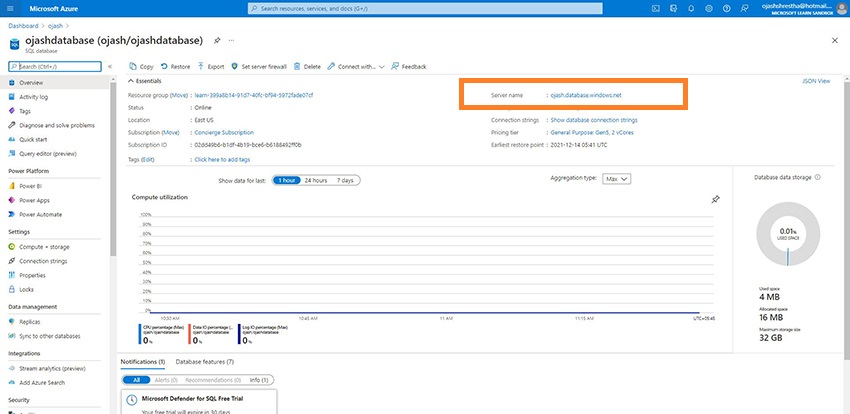
I created the ojash.database.home windows.internet Server.
Right here, the Authentication kind is SQL Login. Subsequent, kind within the Person identify and Password you had set throughout creating the Azure SQL Database.
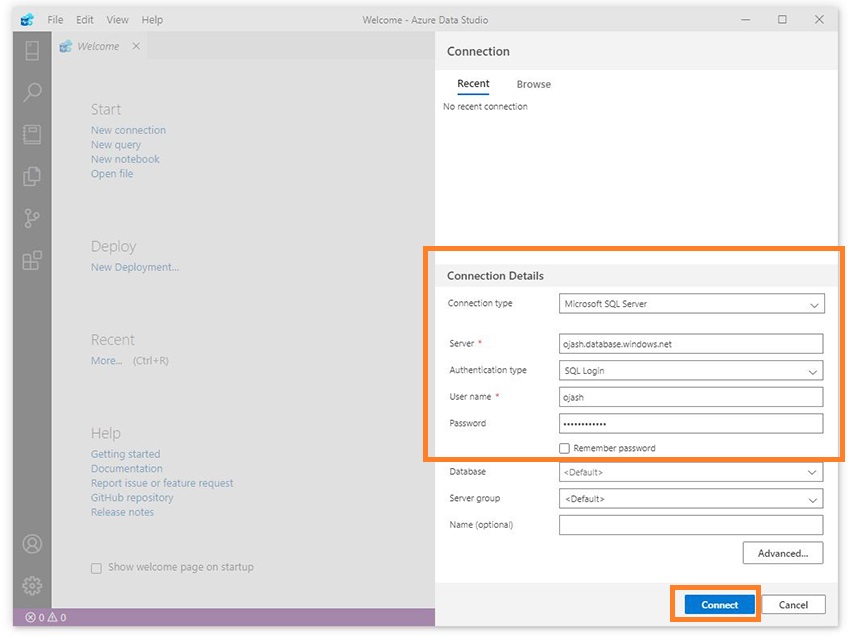
Then, click on on Join.
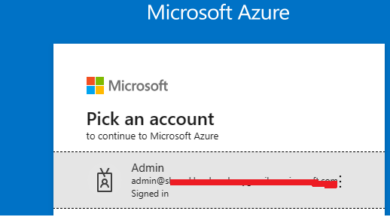
Step 5
Now, you should join the Azure Account.
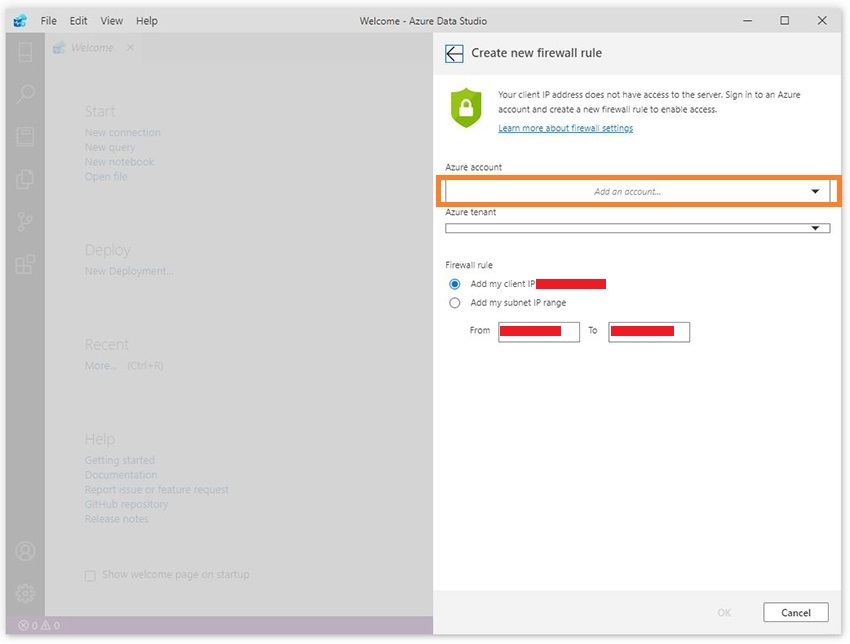
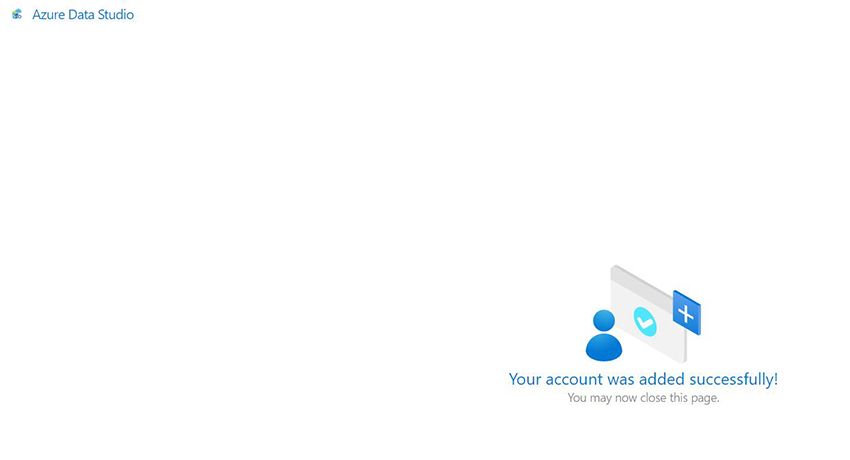
Click on on the Add an Account tab and join accessing your Azure. As soon as finished you’ll be confirmed as follows.
Step 6
Subsequent, we have to setup the Firewall Rule. Select your Azure Account and the Default Listing.
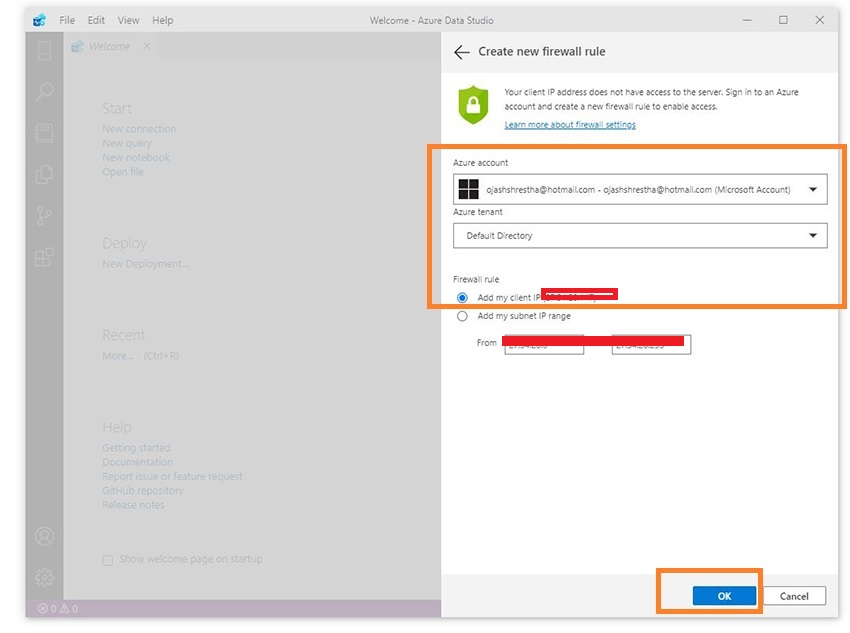
Subsequent, add within the Consumer IP and Click on on OK.
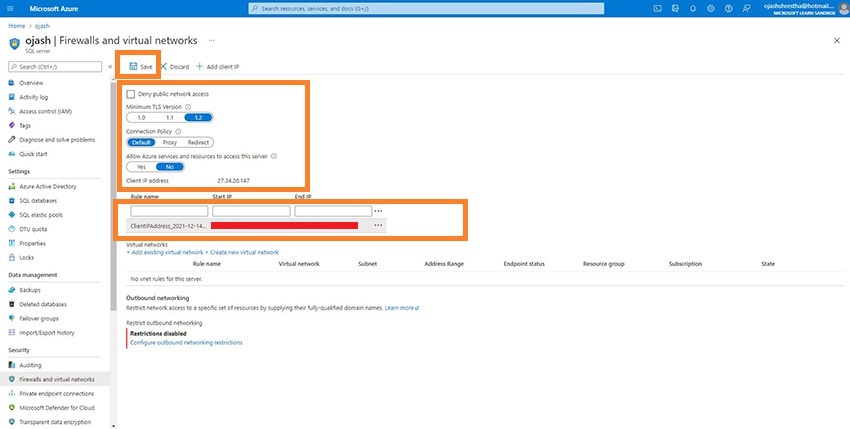
Observe: If the Consumer IP failure dialog field pops up, go to Azure and Set the Consumer IP and Save the setup.
Step 7
Now, the Azure SQL Database has been Linked to Azure Knowledge Studio.
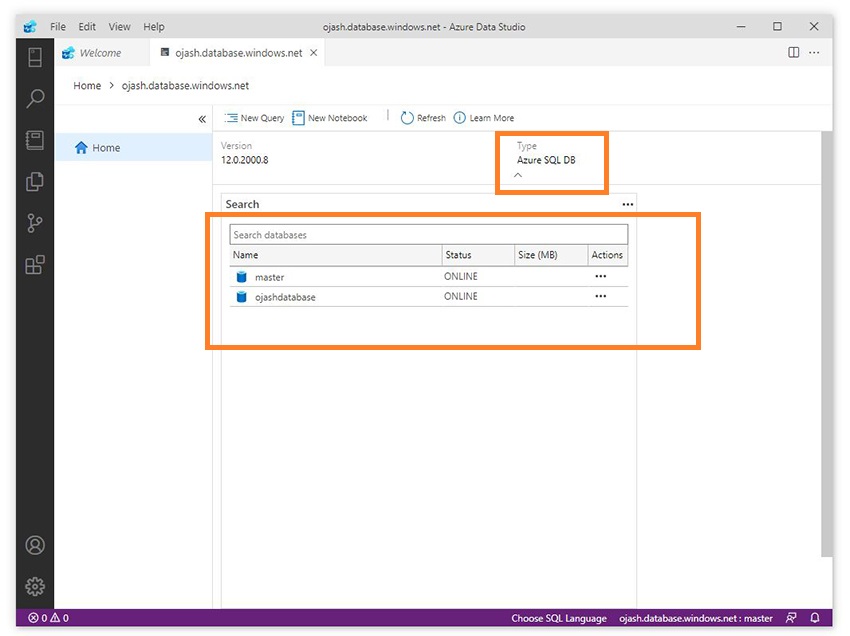
You possibly can see the ojashdatabase and grasp with its standing together with the Kind, Azure SQL DB.
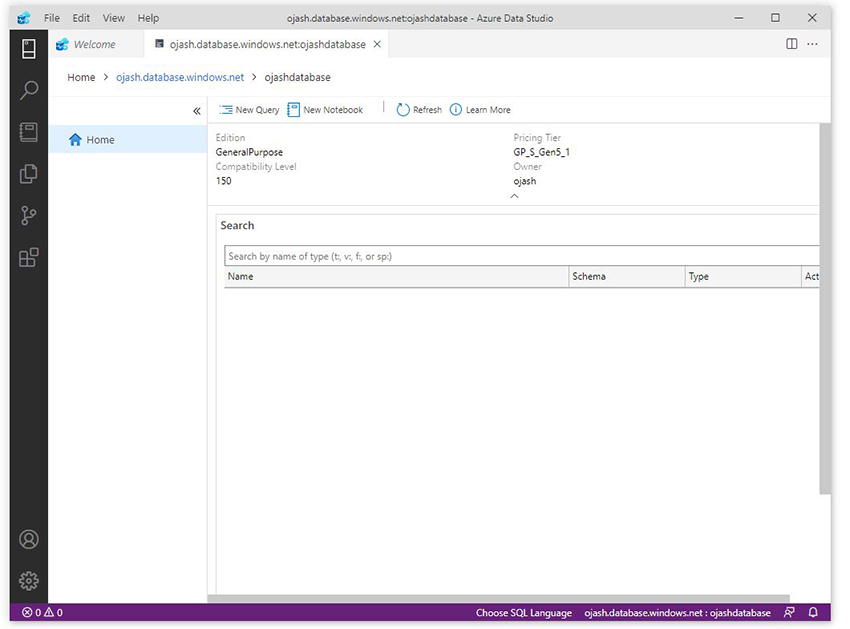
Step 8
Now you can carry out any question into this database from Azure Knowledge Studio. We’ll study extra about it within the subsequent article.
Conclusion
On this article, we realized a step-by-step tutorial to Join Azure Knowledge Studio to Azure SQL Database. With this connection, we will now carry out any question. We’ll study extra about creating tables, including information after which deleting them within the subsequent article.