Azure Information Lake Storage Gen2 Studying Avro Information Utilizing .Web Core
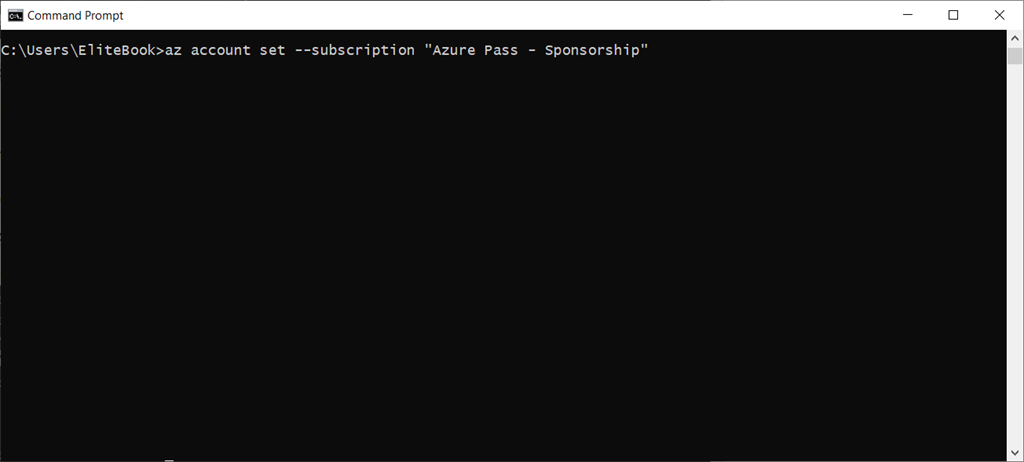
After logging in, you possibly can see your all lively subscriptions within the output and you want to set the subscription for this present context. To take action use the next command. I’ve a number of subscriptions and I’ll use my Azure move sponsorship for this context.
- az account set –subscription “Azure Move – Sponsorship”
Step 2 – Create an Azure Useful resource Group Utilizing Portal and CLI
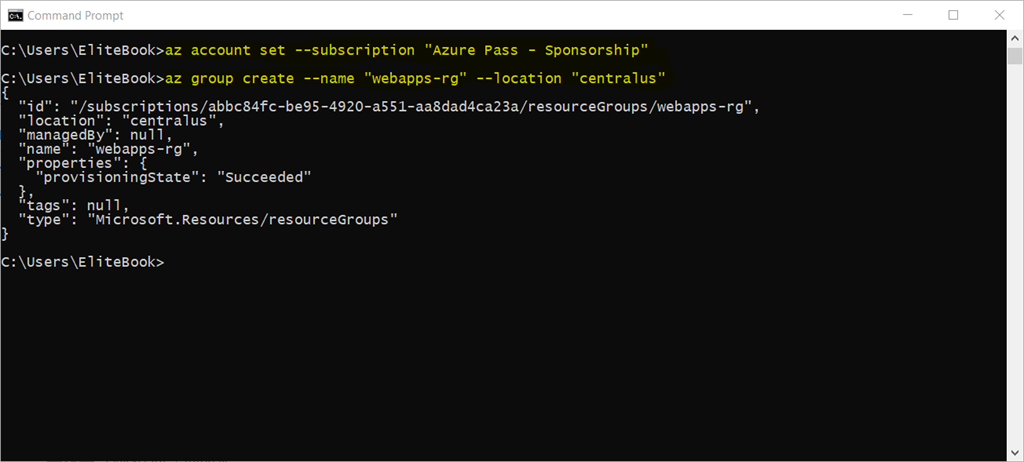
As you understand, we already logged in utilizing CLI. Now we are going to create a useful resource group for the Azure net app and app service plan. We are going to maintain our all assets on this useful resource group that we’re creating. Use the next command with a purpose to create the useful resource group.
- az group create –name “datalake-rg” –location “centralus”

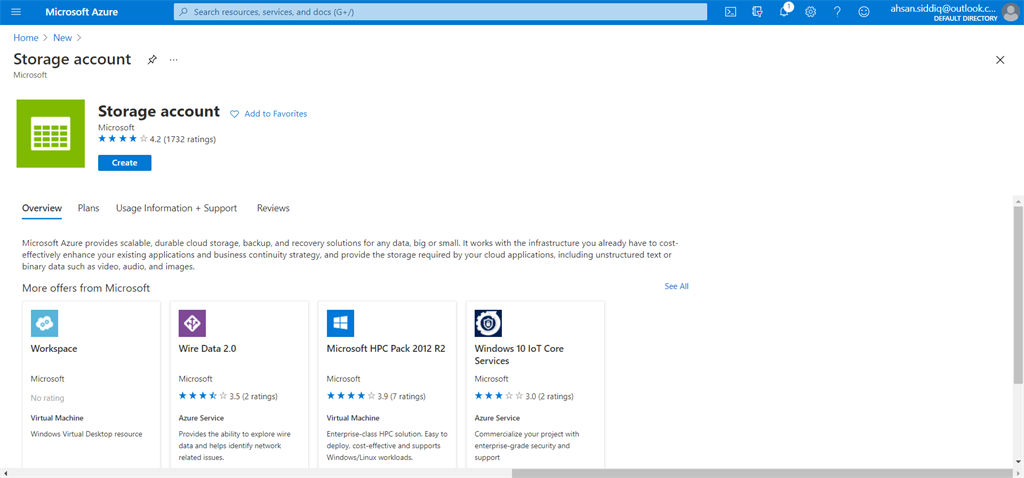
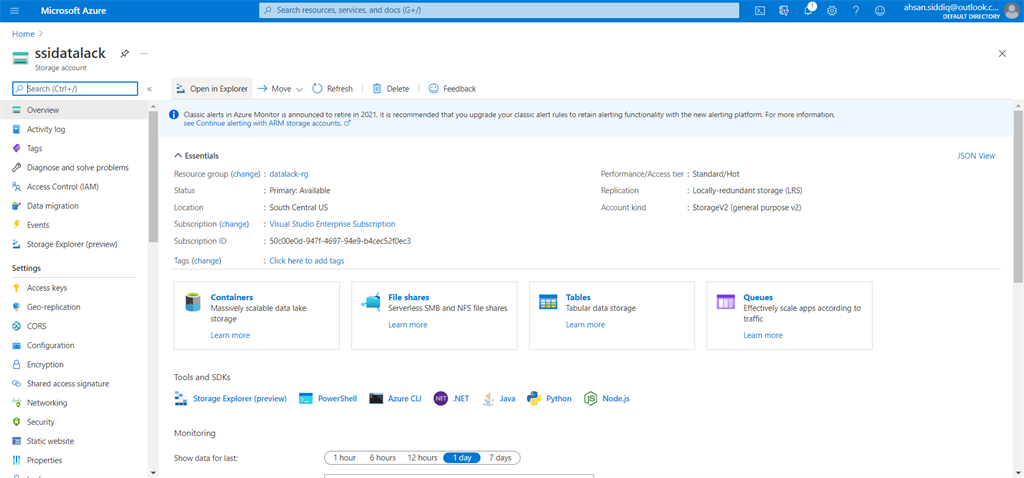
Step 3 – Create Azure Information Lake Storage Gen2 Account
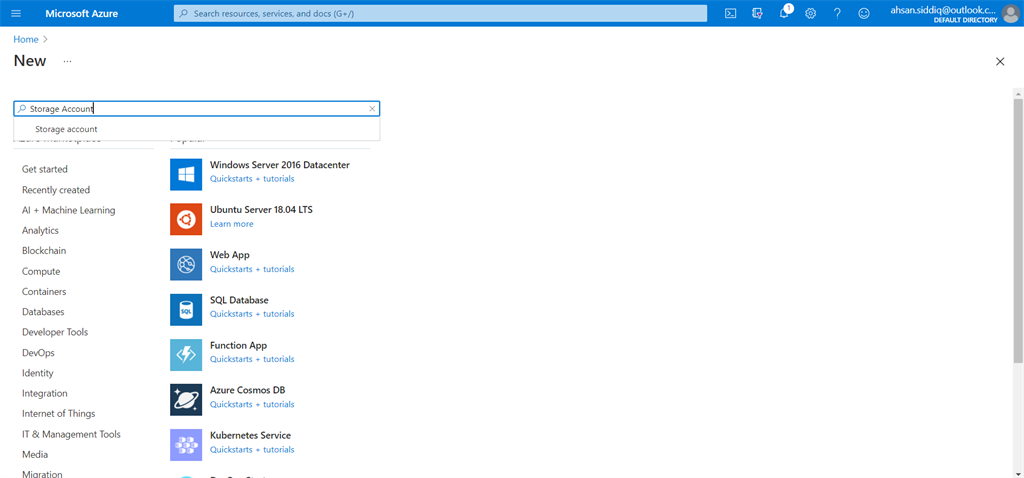
Click on on create a brand new useful resource and search storage account and select the storage account from the outcome. You can even use the next instructions with a purpose to create the storage account utilizing Azure CLI.
- # Create managed id
- az id create -g <RESOURCEGROUPNAME> -n <MANAGEDIDENTITYNAME>
- az extension add –name storage-preview
- az storage account create –name <STORAGEACCOUNTNAME>
- –resource-group <RESOURCEGROUPNAME>
- –location eastus –sku Standard_LRS
- –kind StorageV2 –hierarchical-namespace true
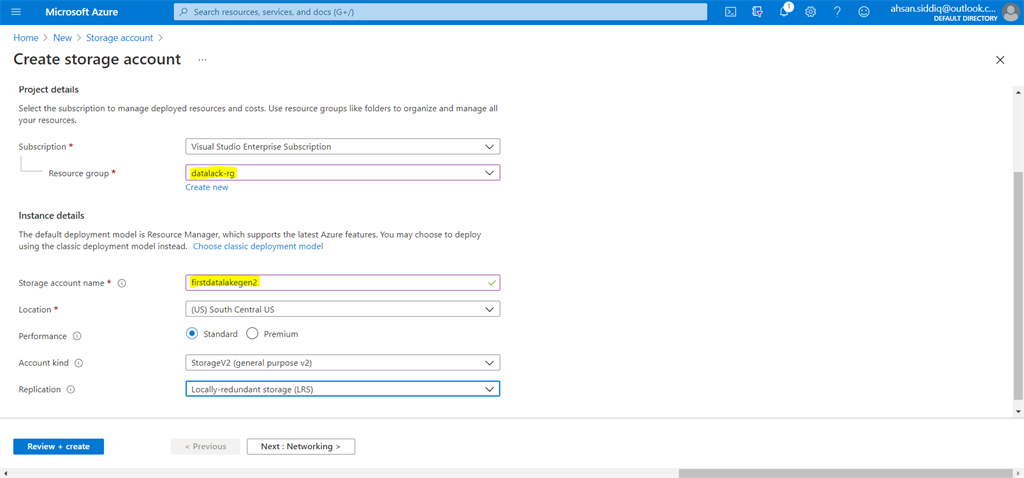
Select your subscription, useful resource group, and storage account title and click on Subsequent: Networking >
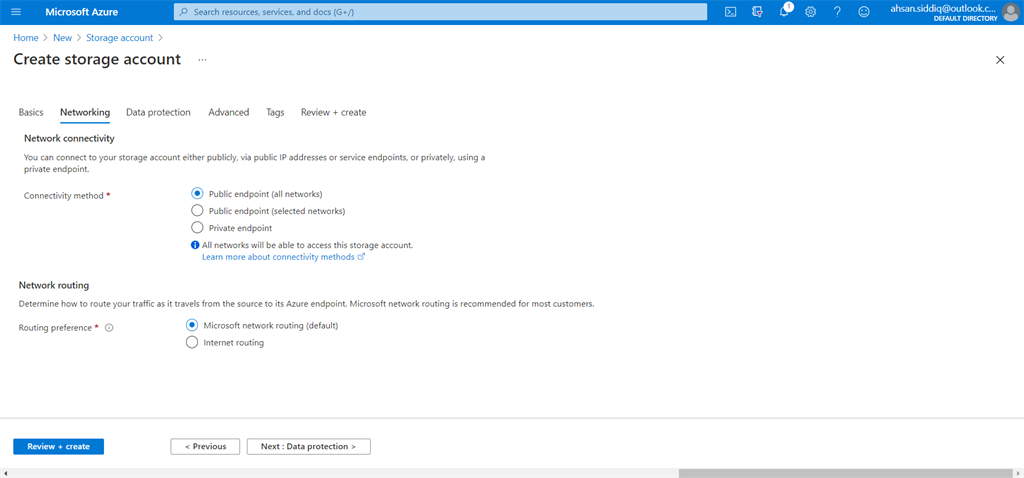
The networking, tab these are the default chosen choices and possibly you wish to use one other one however for this demo please use the default chosen choices and hits Subsequent: Information Safety >
The info safety, tab these are the non-compulsory possibility you wish to use however for this demo please additionally use the default chosen choices and hits Subsequent: Information Safety >

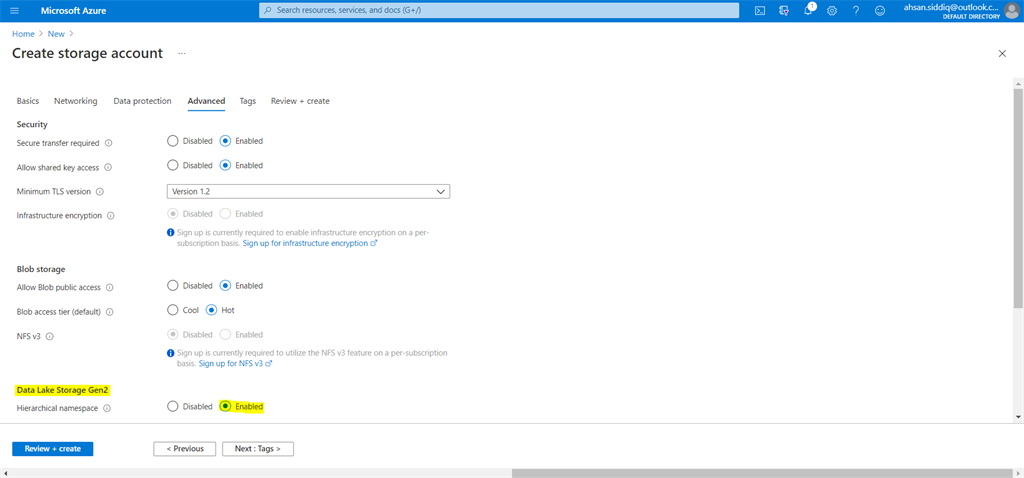
The advance, tab is the default chosen possibility and possibly you wish to use one other one however for this demo please use the default chosen choices and select the allow towards the Information Lake Storage Gen2 possibility, and hits Subsequent: Tags > and subsequent assessment + create.
After creating the azure knowledge lake gen2 account, open the newly created azure knowledge lake storage gen2 account.
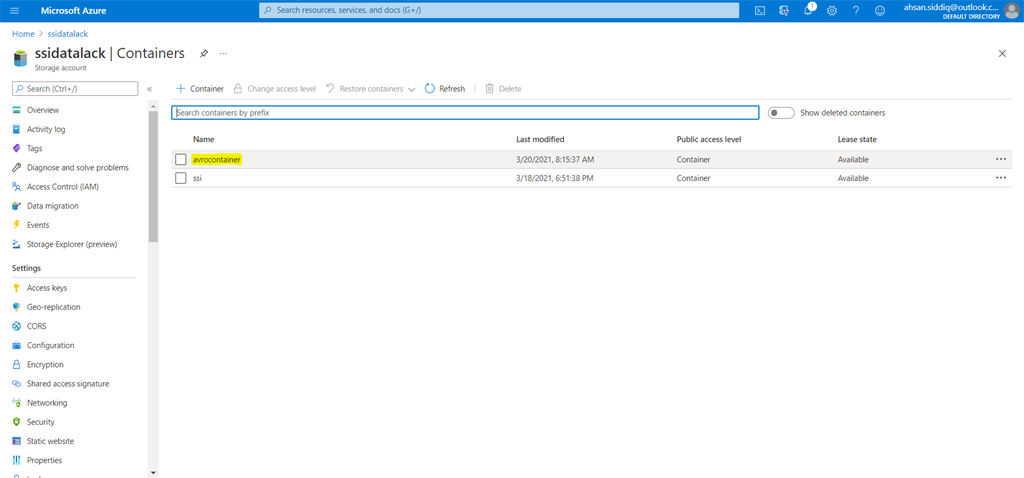
Step 4 – Create Azure Information Lake Container
Choose the container possibility from the left navigation. Click on on the + Container button and create a brand new container.
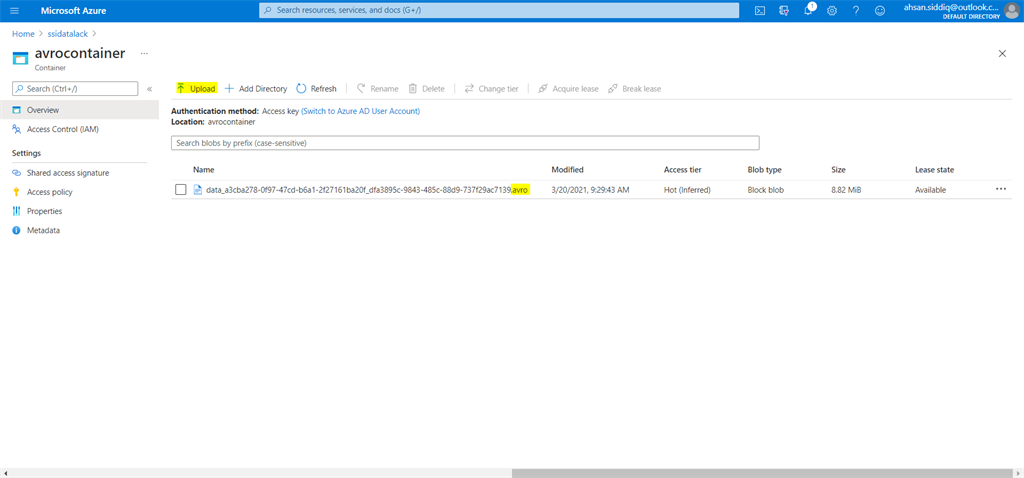
Step 5 – Add Avro File
Open the newly created container and add an Avro file contained in the container. I additionally connected the pattern Avro file on the highest. You’ll be able to obtain and use it to your studying.
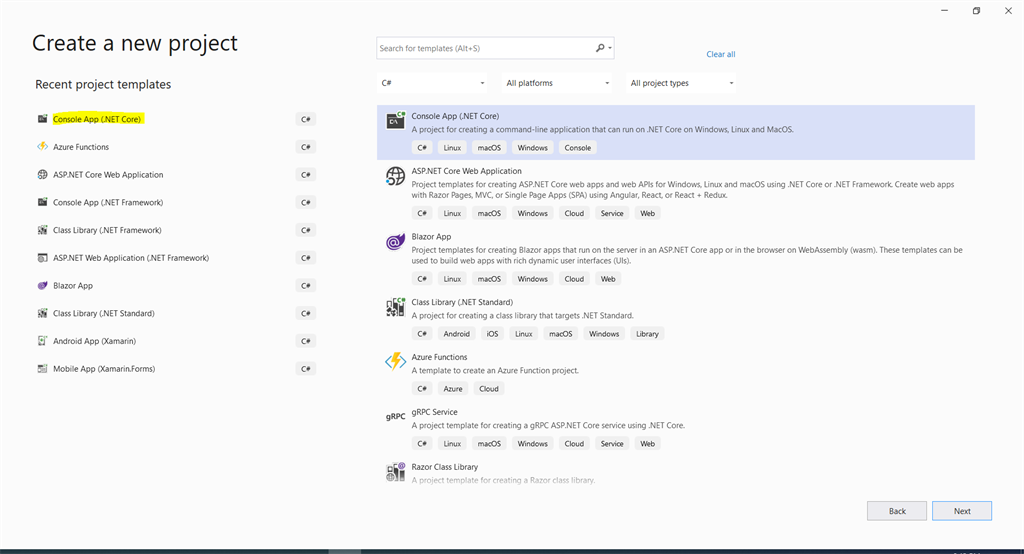
Step 6 – Create a brand new Console App in Visual Studio 2019
Open the visible studio and create a brand new venture and add a console app (.Web Core) with C#.
Step 7 – Add References to NuGet Packages
Initially, in References, add the references to WindowsAzure.Storage, Microsoft.Avro.Core and Newtonsoft.Json utilizing NuGet Bundle Supervisor, as proven under.

Step 8 – Add Sensor Mannequin Class
Add a brand new class to your venture with the title SensorModel.cs. Add the next properties to get the outcome set from JSON response with an acceptable namespace.
(FileName: SensorModel.cs)
- public class SensorModel
- {
- public string refid { get; set; }
- public lengthy measuringpointid { get; set; }
- public lengthy dateid { get; set; }
- public lengthy timeid { get; set; }
- public string timestamp { get; set; }
- public double worth { get; set; }
- public override string ToString()
- {
- return $“DateTime: {timestamp:HH:mm:ss} | MeasuringPointId: {measuringpointid} | “
- + $“Date: {dateid} | Serialnumber: {refid} | SensorValue: {worth} “;
- }
- }
Open the Program class and change the next code with an acceptable namespace. Please seize your connection string out of your storage account and change it within the code and in addition use your container title contained in the code.
Run your console app after which you will notice the next output within the console.