Introduction
These days, I used to be working to improve the structure of my IoT-based software that was primarily based on IoT Hub and Occasion Hub. I used to be dumping the machine’s telemetry knowledge into the on-premises Postgres database however the knowledge is rising extra quickly day-to-day subsequently I made a decision to maneuver my all outdated knowledge to the Azure knowledge lake Storage Gen2. However I additionally wanted the outdated knowledge in my software for some causes. So, I used to be trying to find one of the best resolution for my software to entry the precise knowledge from the Azure knowledge lake then I discovered an optimum resolution for querying particular knowledge from my information.
Azure Information Lake Storage Question Acceleration
Question acceleration is used to retrieve a subset of knowledge out of your storage account. Question acceleration helps CSV and JSON formatted knowledge as enter to every request. Question acceleration permits purposes and analytics frameworks to dramatically optimize knowledge processing by retrieving solely the info that they require to carry out a given operation.
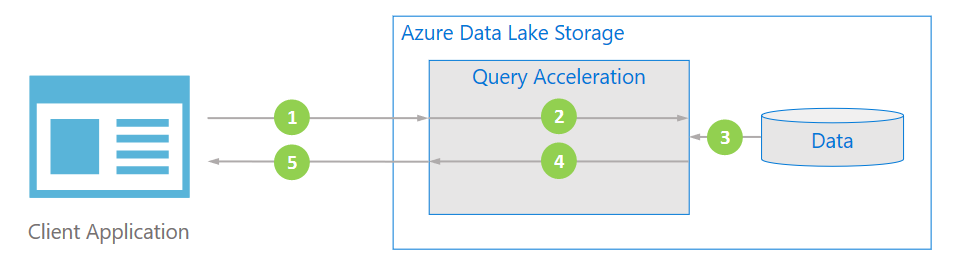
Information stream
The next diagram illustrates how a typical software makes use of question acceleration to course of knowledge.
Conditions
- Create a general-purpose v2 storage account
- Allow question acceleration
- Azure Storage .Internet SDK
Highway Map
- Azure Login
- Allow Question Acceleration
- Create an Azure Useful resource Group
- Create Azure Information Lake Storage Gen2 Account
- Create Azure Information Lake Container
- Add JSON File
- Create a brand new Console App in Visual Studio 2019
- Add References to NuGet Packages
- Question Acceleration Principal Logic
Step 1 – Login Utilizing Azure Portal OR Azure CLI
Log in to the Azure portal or log in via Azure CLI. I’ll present you each methods. Open your command immediate and use the next command as a way to login to Azure. Be sure you have already got put in the Azure CLI in your native.
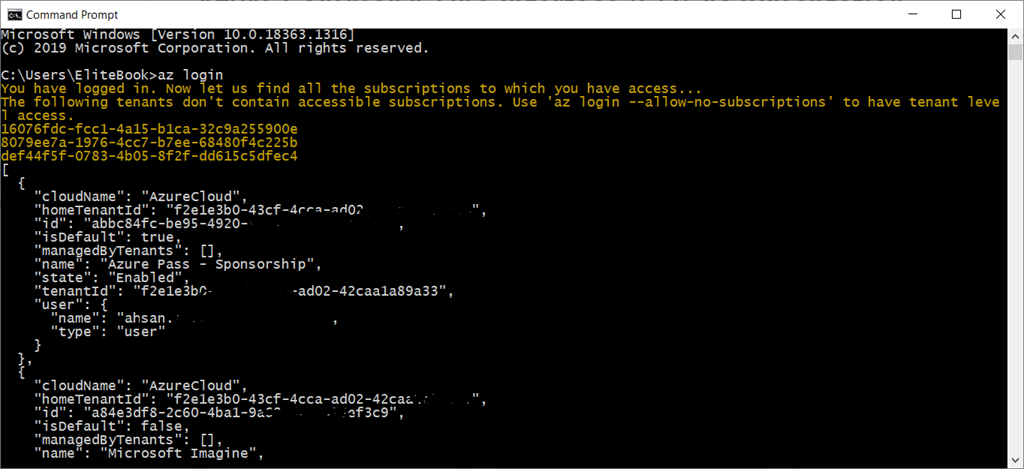
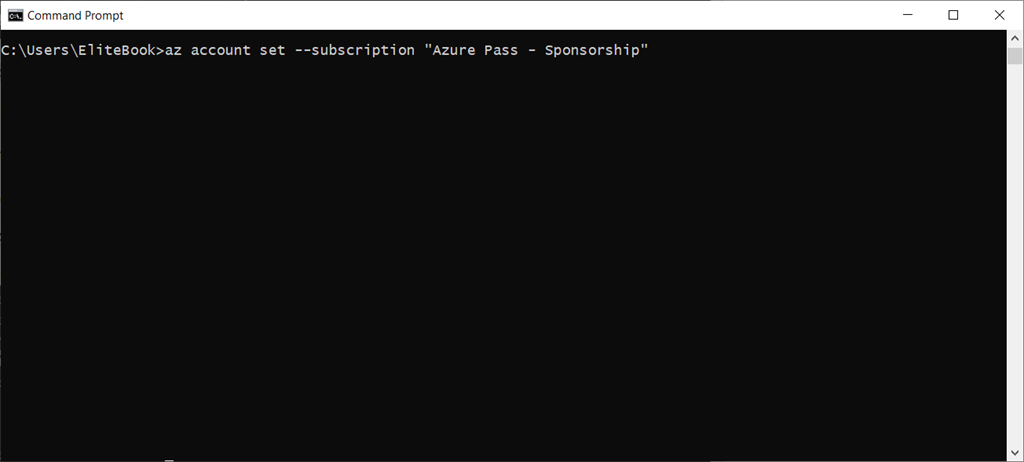
After logging in, you may see your all lively subscriptions within the output and you want to set the subscription for this present context. To take action use the next command. I’ve a number of subscriptions and I’ll use my Azure move sponsorship for this context.
- az account set –subscription “Visual Studio Enterprise Subscription” //Write your subscription title
Step 2 – Allow Question Acceleration
- az function register —namespace Microsoft.Storage –name BlobQuery
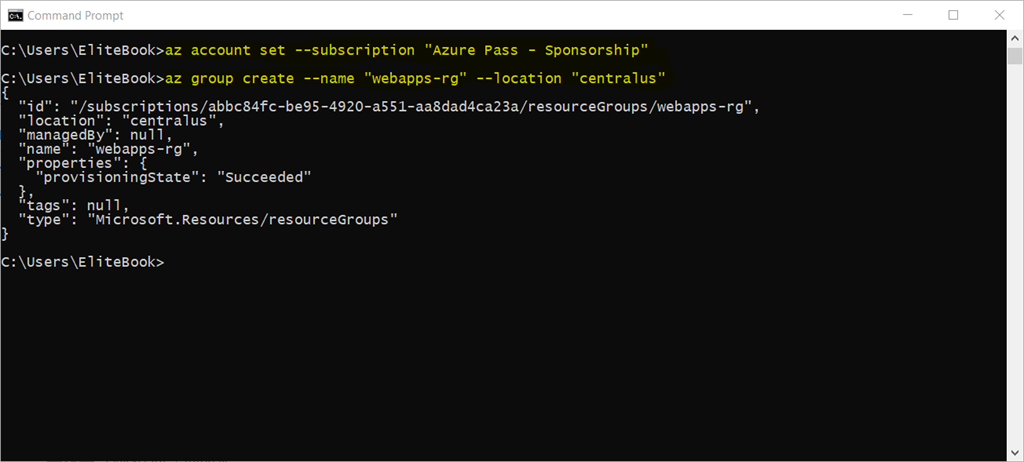
Step 3 – Create an Azure Useful resource Group Utilizing Portal and CLI
As you realize, we already logged in utilizing CLI. Now we’ll create a useful resource group for the Azure knowledge lake storage gen2. We are going to hold our all sources on this useful resource group that we’re creating. Use the next command as a way to create the useful resource group.
- az group create –name “datalake-rg” –location “centralus”

Step 4 – Create Azure Information Lake Storage Gen2 Account
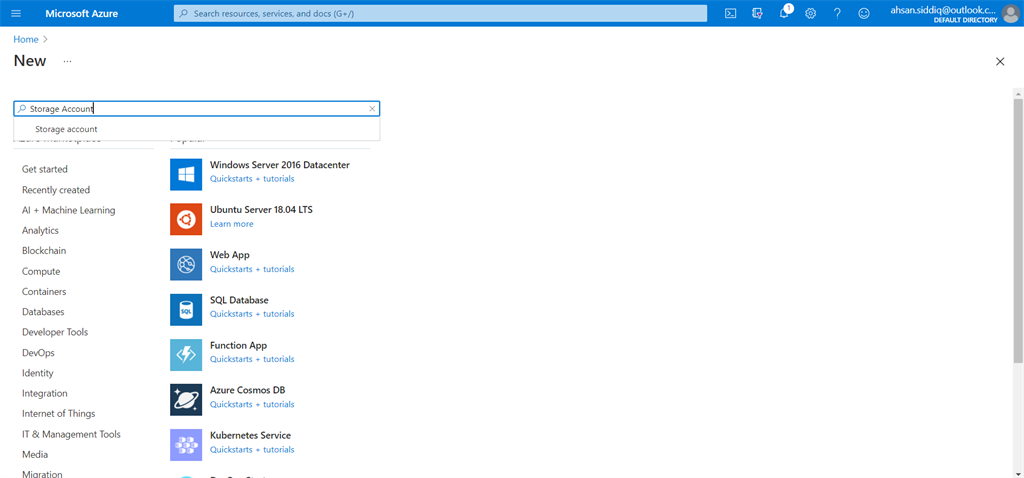
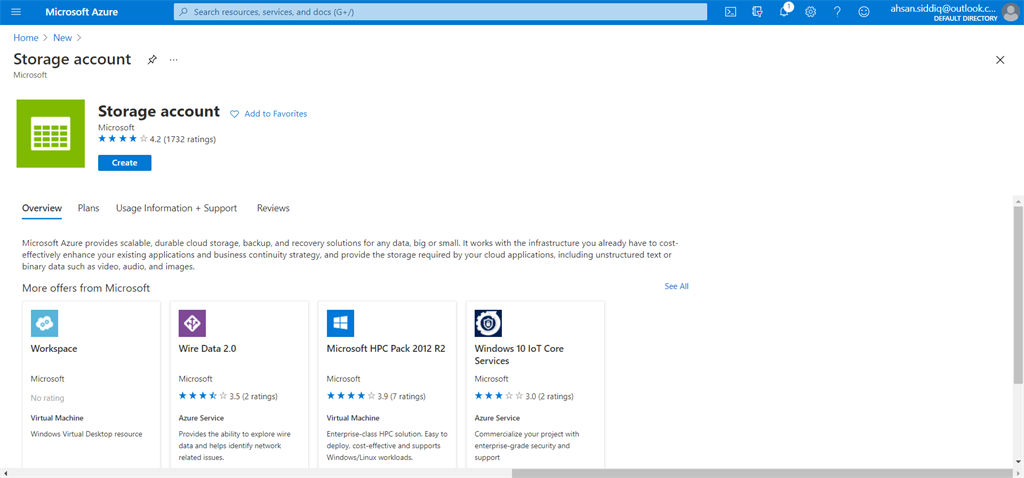
Click on on create a brand new useful resource and search storage account and select the storage account from the consequence. It’s also possible to use the next instructions as a way to create the storage account utilizing Azure CLI.
- az storage account create –name <STORAGEACCOUNTNAME>
- –resource-group <RESOURCEGROUPNAME>
- –location eastus –sku Standard_LRS
- –kind StorageV2 –hierarchical-namespace true
Select your subscription, useful resource group, and storage account title and click on Subsequent: Networking >
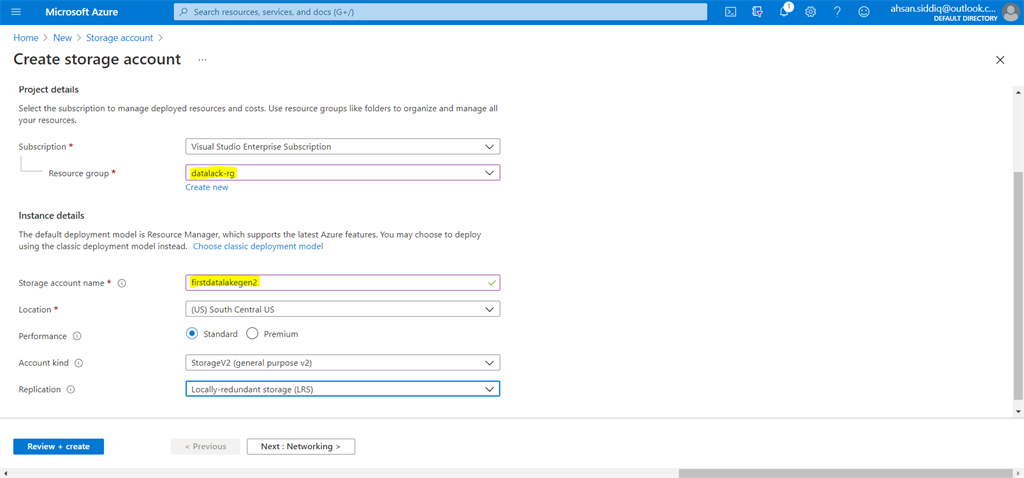
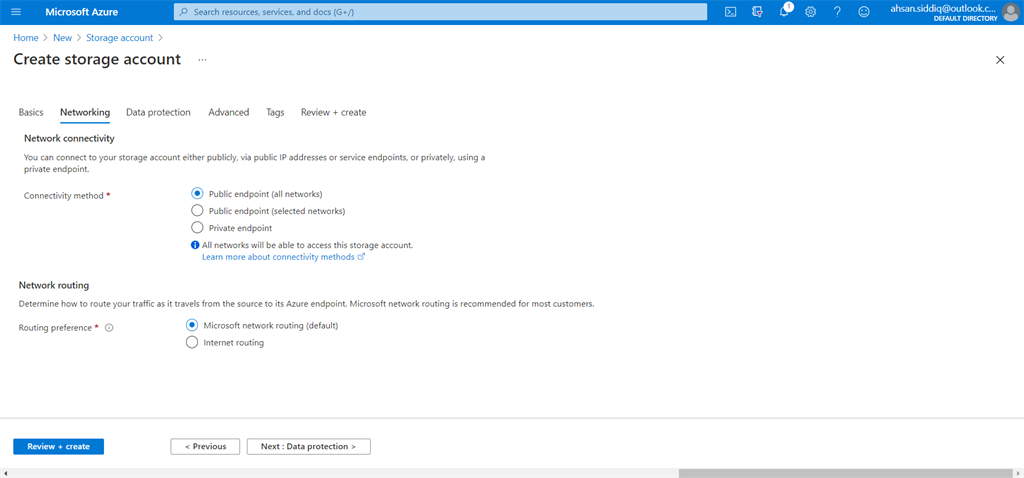
The networking, tab these are the default chosen choices and possibly you wish to use one other one however for this demo please use the default chosen choices and hits Subsequent: Information Safety >
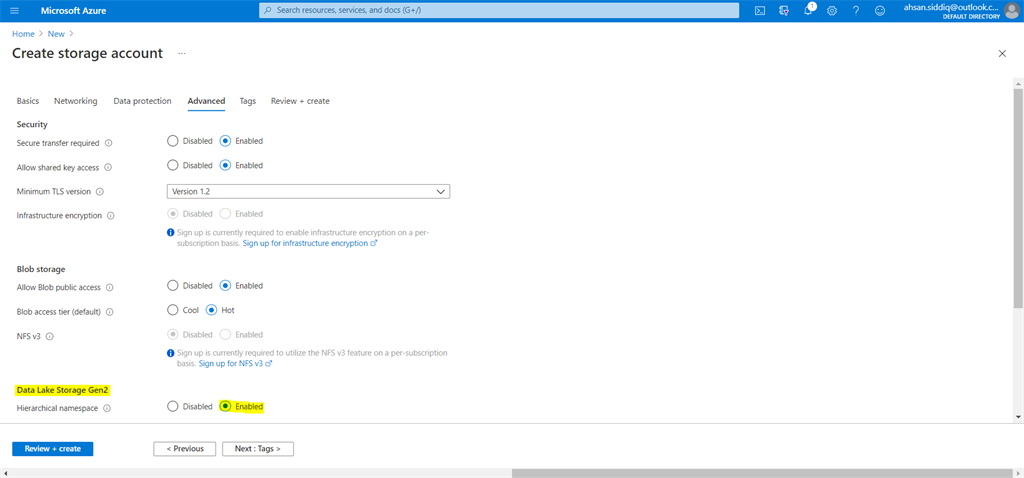
The info safety, tab these are the optionally available choice you wish to use however for this demo please additionally use the default chosen choices and hits Subsequent: Information Safety >

The advance, tab is the default chosen choice and possibly you wish to use one other one however for this demo please use the default chosen choices and select the allow towards the Information Lake Storage Gen2 choice, and hits Subsequent: Tags > and subsequent assessment + create.
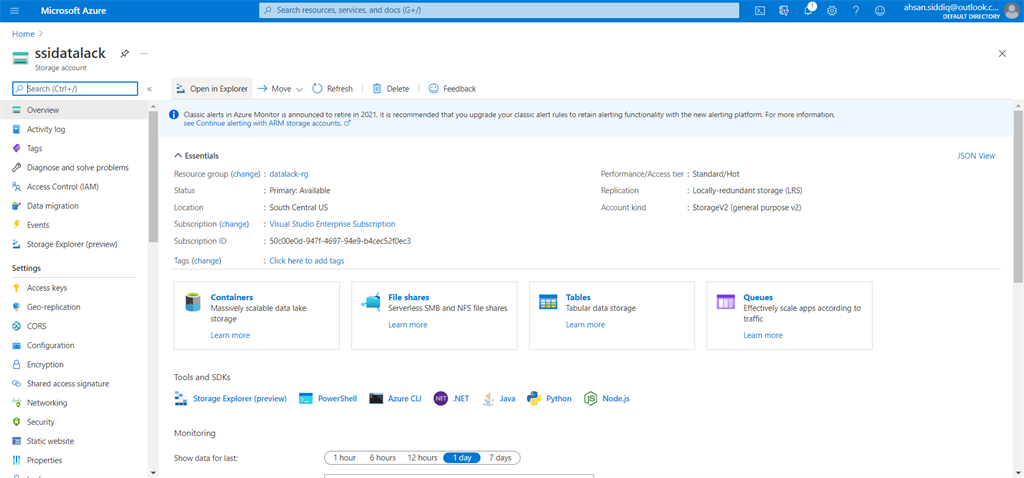
After creating the azure knowledge lake gen2 account, open the newly created azure knowledge lake storage gen2 account.
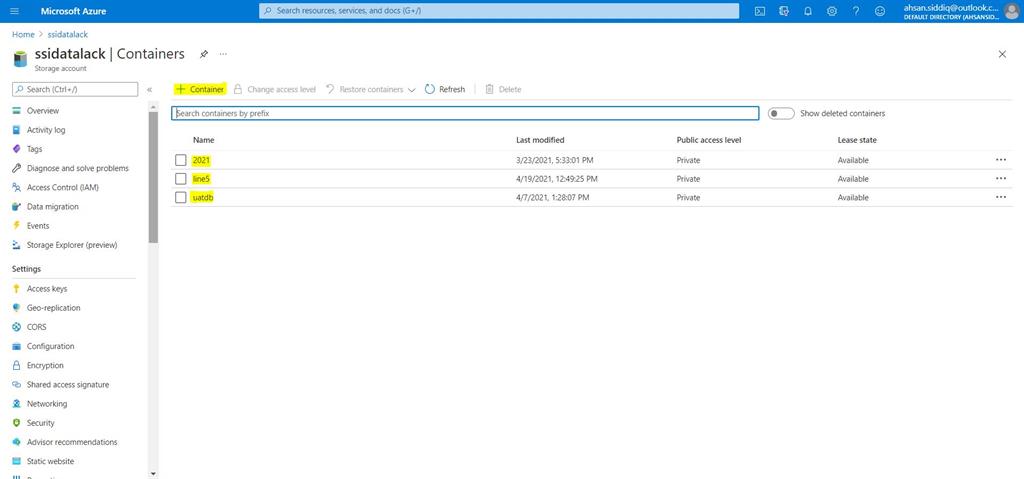
Step 5 – Create Azure Information Lake Container
Choose the container choice from the left navigation. Click on on the + Container button and create a brand new container.
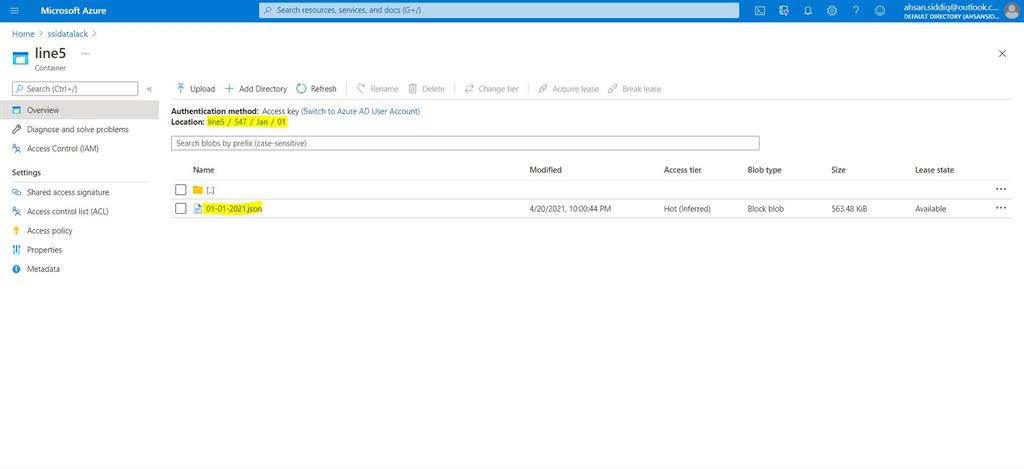
Step 6 – Add Json File
Open the newly created container and add a JSON file contained in the container. I additionally hooked up the pattern Json file on the highest. You possibly can obtain and use it in your studying.
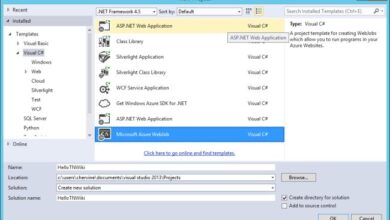
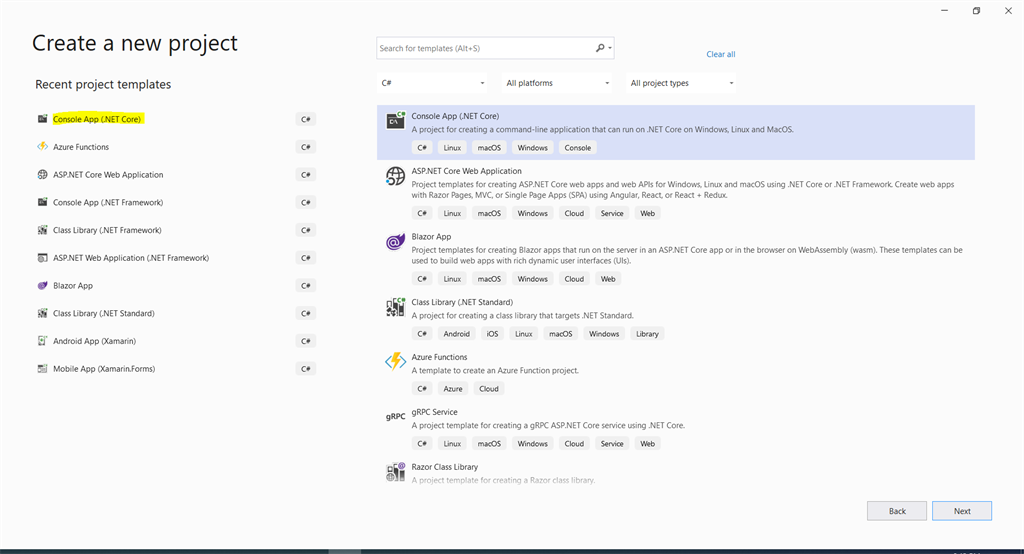
Step 7 – Create a brand new Console App in Visual Studio 2019
Open the visible studio and create a brand new venture and add a console app (.Internet Core) with C#.
Step 8 – Add References to NuGet Packages
Initially, in References, add the references to Azure.Storage.Blob and Newtonsoft.Json utilizing NuGet Bundle Supervisor, as proven beneath.

Step 9 – Question Acceleration Principal Logic
Open the Program class and exchange the next code with an acceptable namespace. Please seize your connection string out of your storage account and exchange it within the code and likewise use your container title contained in the code.
- utilizing Azure.Storage.Blobs;
- utilizing Azure.Storage.Blobs.Fashions;
- utilizing Azure.Storage.Blobs.Specialised;
- utilizing Newtonsoft.Json;
- utilizing System;
- utilizing System.Collections.Generic;
- utilizing System.Diagnostics;
- utilizing System.IO;
- utilizing System.Threading.Duties;
- namespace AzureDataLake.QueryAcceleration
- {
- class Program
- {
- static void Principal(string[] args)
- {
- MainAsync().Wait();
- }
- non-public static async Activity MainAsync()
- {
- var connectionString = “DefaultEndpointsProtocol=https;AccountName=ahsan;AccountKey=51sarUyYuhNLCv/+w9LjcbT7914Q==;EndpointSuffix=core.home windows.internet”;
- var blobServiceClient = new BlobServiceClient(connectionString);
- var containerClient = blobServiceClient.GetBlobContainerClient(“ContainerName”);
- await foreach (var blobItem in containerClient.GetBlobsAsync(BlobTraits.Metadata,BlobStates.None, “File Prefix”))
- {
- var blobClient = containerClient.GetBlockBlobClient(blobItem.Title);
- var choices = new BlobQueryOptions
- {
- InputTextConfiguration = new BlobQueryJsonTextOptions(),
- OutputTextConfiguration = new BlobQueryJsonTextOptions()
- };
- var consequence = await blobClient.QueryAsync(@“SELECT * FROM BlobStorage WHERE measuringpointid = 547”, choices);
- var jsonString = await new StreamReader(consequence.Worth.Content material).ReadToEndAsync();
- Console.WriteLine(jsonString);
- Console.ReadLine();
- }
- }
- }
- }
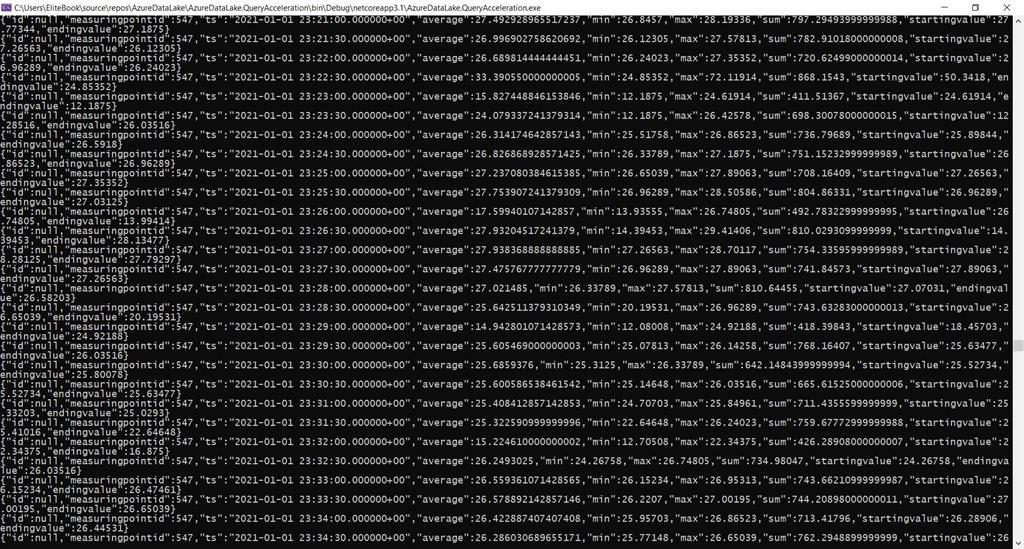
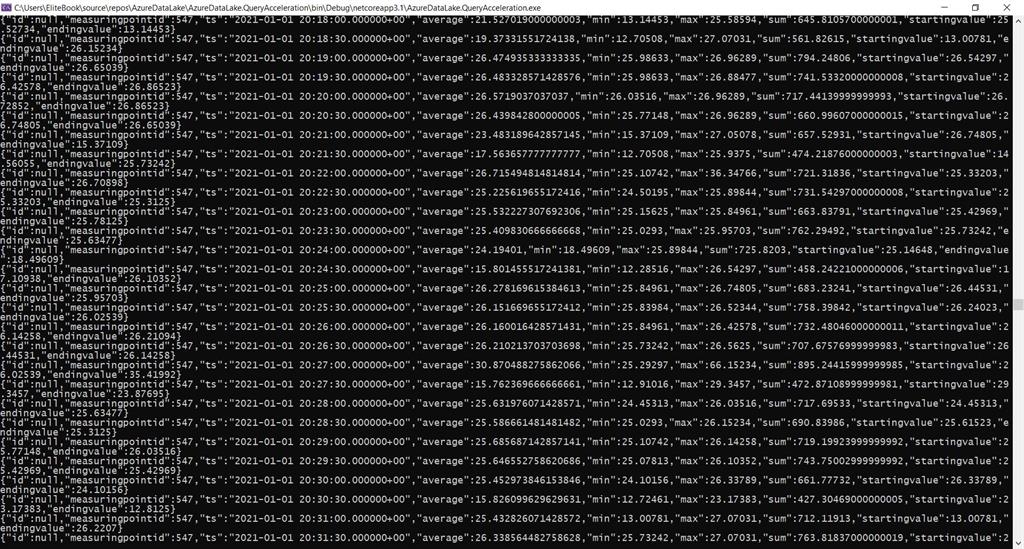
Run your console app after which you will notice the next output within the console.