Introduction
The Azure personal DNS zones auto registration functionality is liable for managing DNS data for digital machines in a digital community. After we join a digital community to a non-public DNS zone with this setting enabled, a DNS document for every digital machine within the digital community is created.
A document can be created for every digital machine. DNS entries for freshly deployed digital machines are additionally created robotically within the related personal DNS zone. If we delete a digital machine, all of the DNS data are robotically faraway from the personal DNS zone.
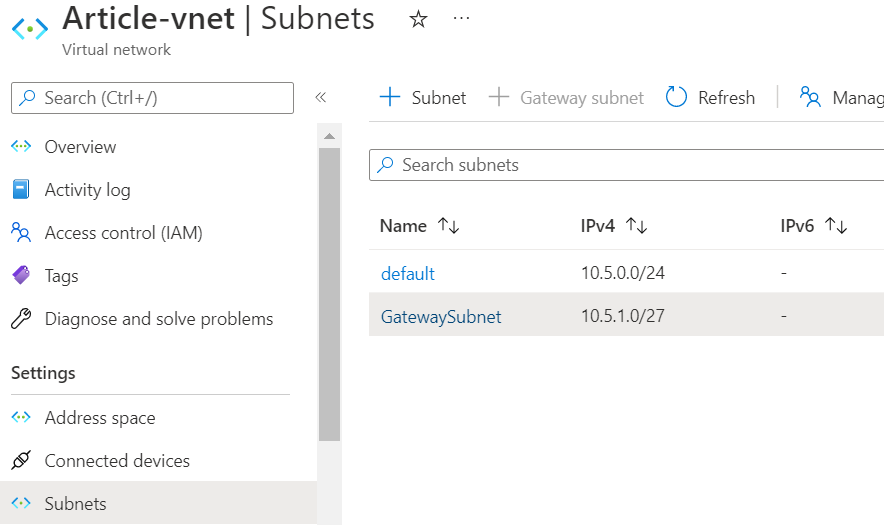
In my present situation, I’ve a Digital Community with subnets.
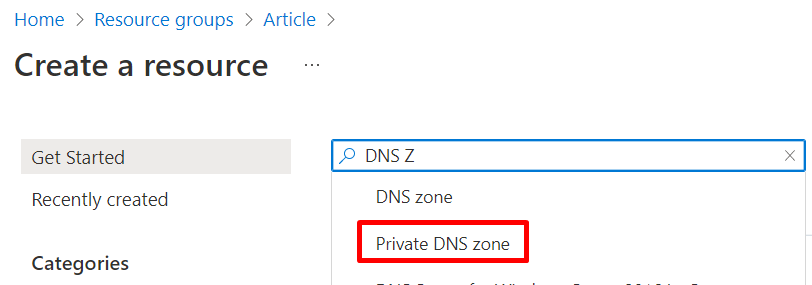
Step 1
On the Azure Portal, Click on + Crate, and within the search bar, kind DNS, after which choose Non-public DNS zones.
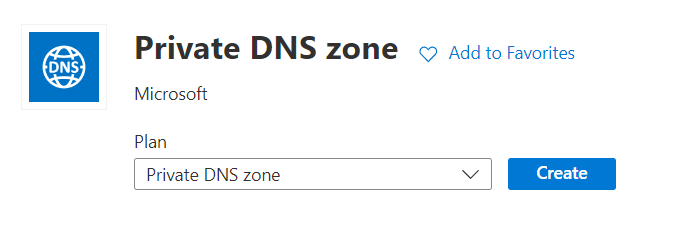
Step 2
In Non-public DNS zones, Click on Create.
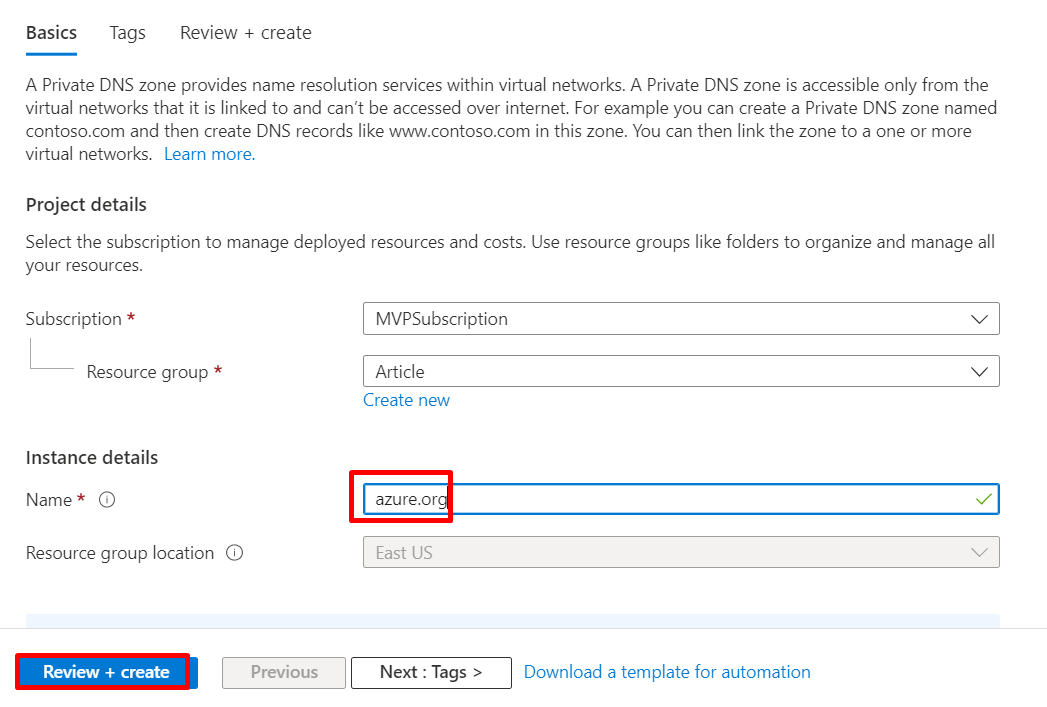
Step 3
Enter the personal DNS zone’s identify, click on Evaluation + Create, after which click on Create.
Step 4
In our Non-public DNS zone (azure.org), choose Digital community hyperlinks below the settings, after which choose + Add.

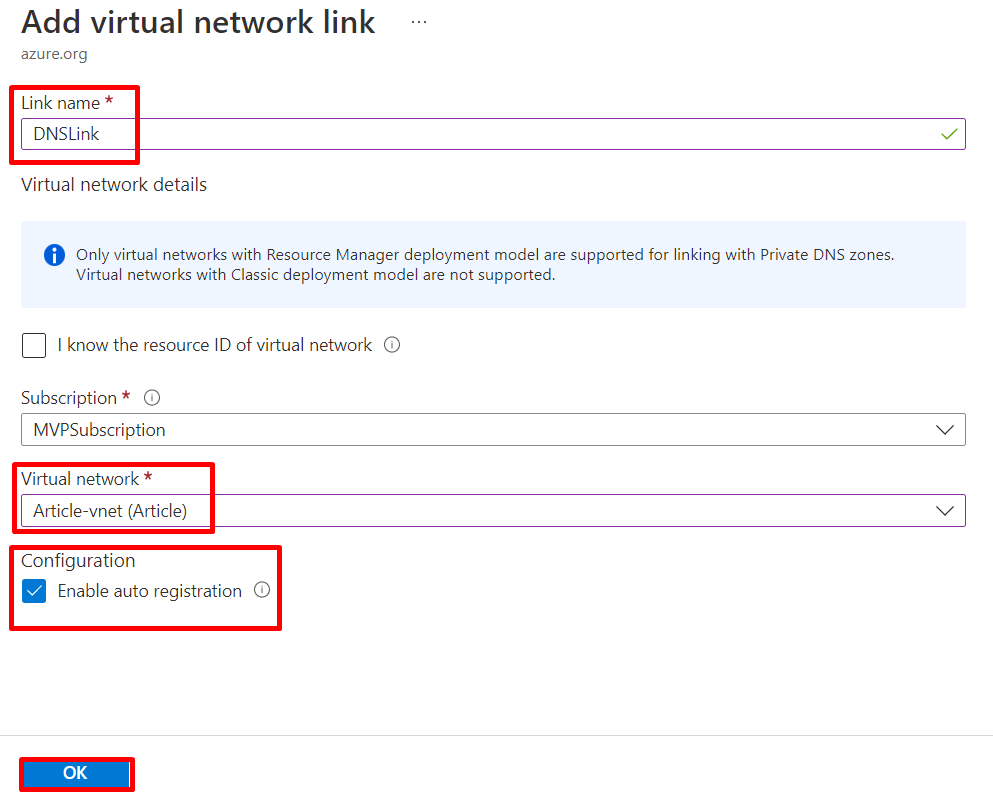
Step 5
On the Add digital community hyperlink, enter the identify for the Hyperlink identify, choose the Digital Community, choose the Allow auto registration, after which click on Okay.
Step 6
Create a Digital Machine to confirm the Auto registration.

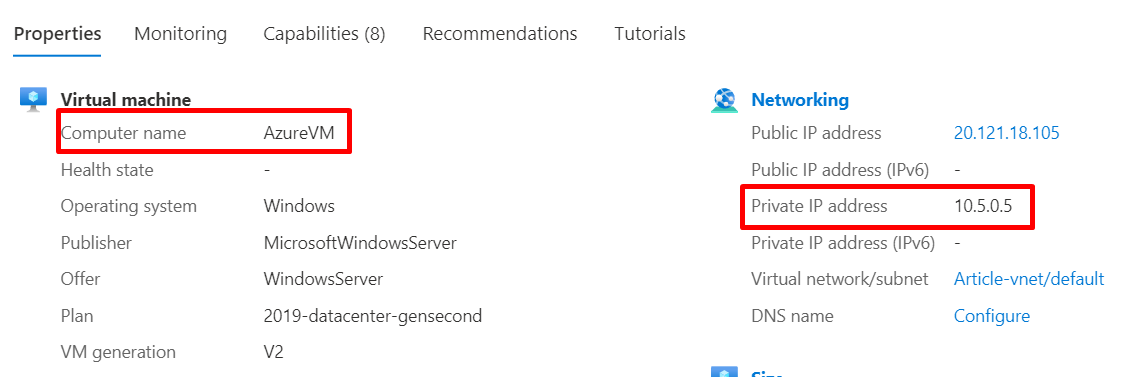
Step 7
Open the Digital machine and confirm the Non-public IP handle.
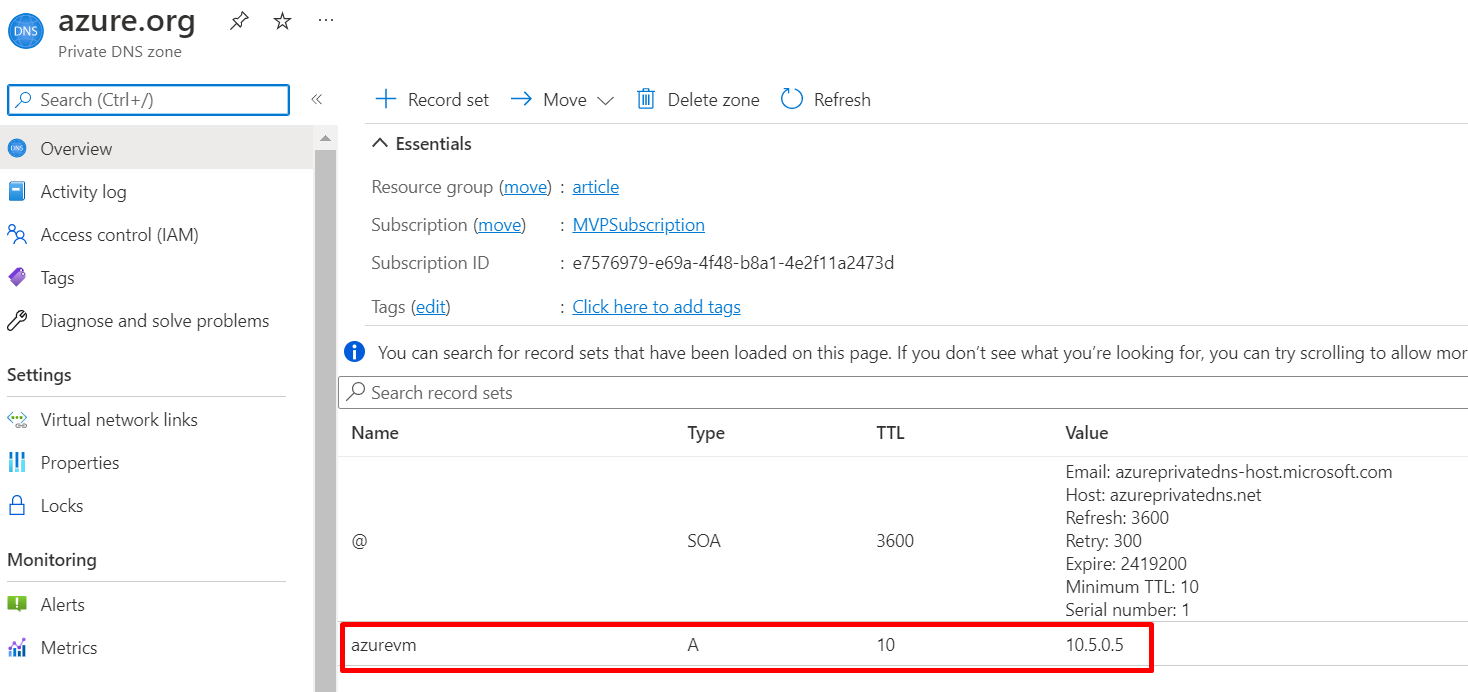
Step 8
To confirm data are added to the DNS zone, open the Non-public DNS zone, and we are able to discover our Digital Machine robotically added to our DNS zone.
Abstract
On this article, we discovered find out how to configure a Non-public DNS zone to arrange an Auto registration course of. In case you have any questions, be happy to remark below the article.


