Introduction
On this article, we’re going to cowl how we are able to grant entry to Azure SQL Server-managed Databases. To do that we want the SQL Server together with configured database in Azure. Let’s first create the SQL Server with a view to work with the SQL database.
Desk of Contents
- Azure SQL Server Setup
- Azure SQL Database Setup
- Configure the Azure Lively Listing Admin
- Azure Lively Listing Authentication utilizing SSMS
- Grant entry for different customers
- Conclusion
Azure SQL Server Setup
Step 1
Open the Azure Portal, click on right here to entry the portal, and log in with the credentials. To work with SQL Server we want a useful resource group to be already arrange for a selected area (US, Europe, and so on).
Step 2
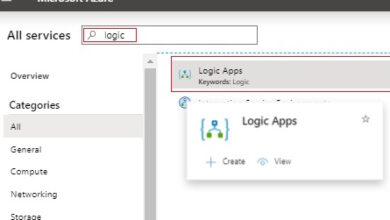
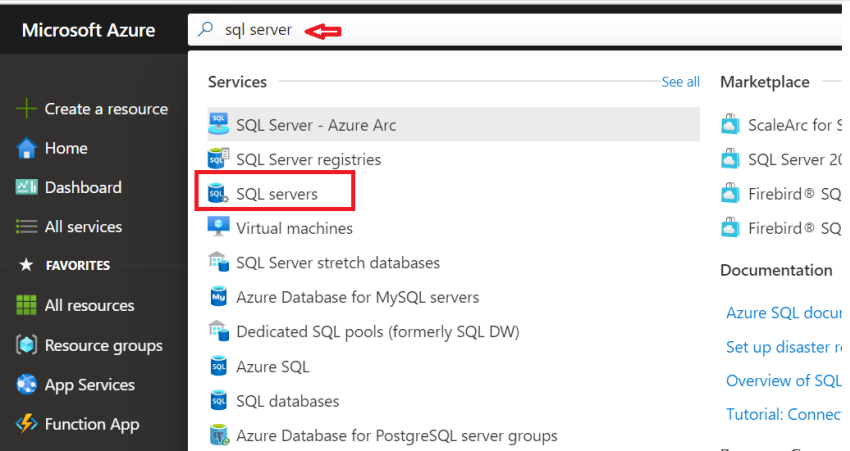
Kind the SQL Server within the search bar to navigate to the SQL setup web page.
Step 3
Click on on the Create button within the prime left nook to entry the Azure SQL server web page.
Step 4
If the useful resource group has already been created select the precise useful resource group from the drop-down checklist or else there’s an possibility Create new within the down the place we are able to create a brand new useful resource group by accessing that
- Be sure to enter the server configuration particulars
- Administrator account (if required )
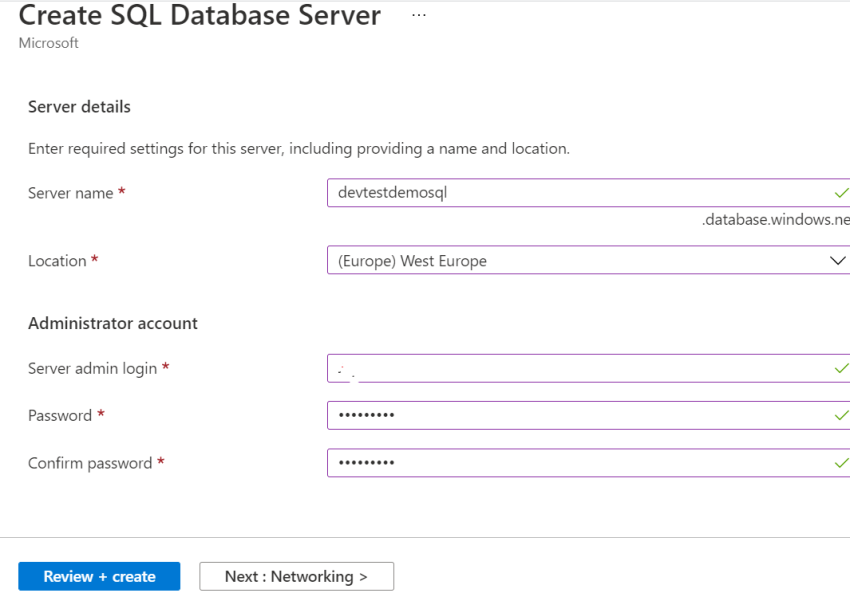
Click on on the Overview + Create button to arrange the Server configuration contained in the useful resource group and it’ll take a min to be configured in Azure.
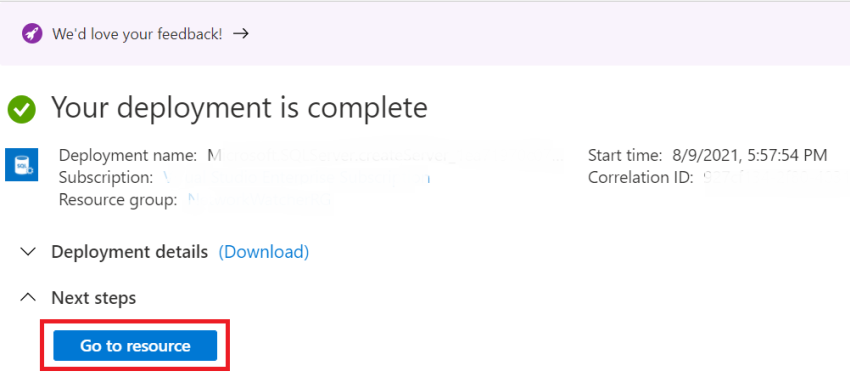
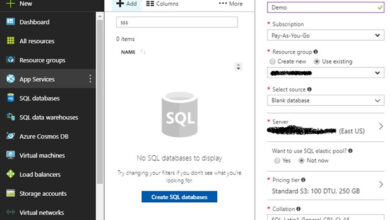
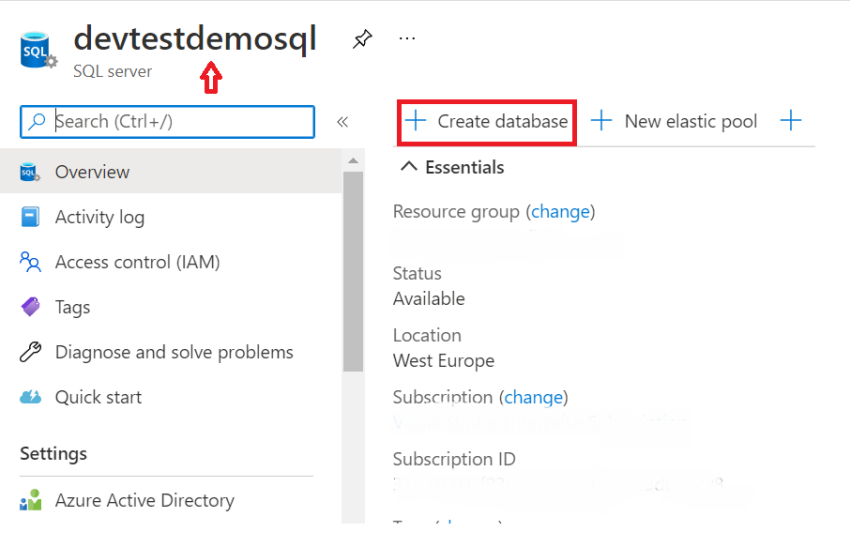
Let’s create the SQL database beneath that SQL Server. To do this on the appropriate aspect there’s a button named create Database click on on that to make configuration for creating the SQL database.
Azure SQL Database Setup
At first, it would initially take the venture particulars from the subscription itself just like the useful resource group in order that we have to simply add the database configuration particulars to create a SQL database.
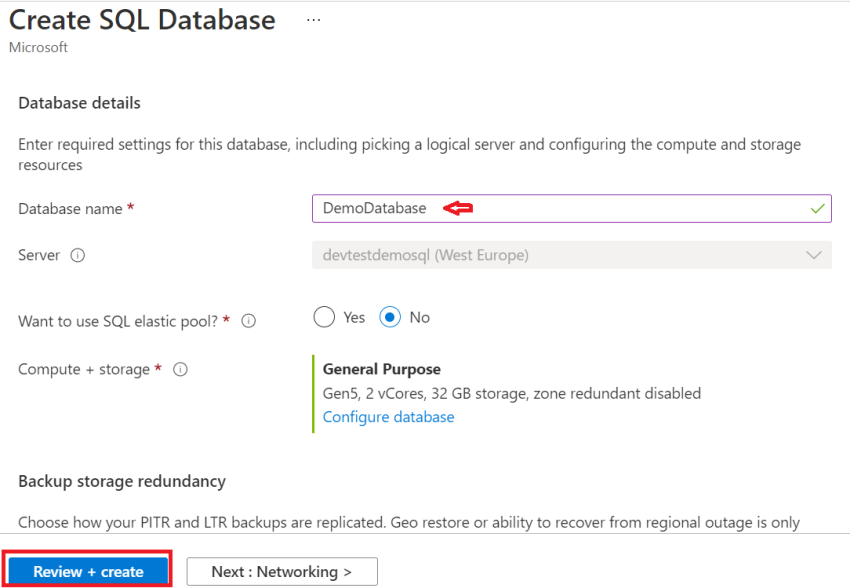
As soon as after clicking on the Create button, it would initialize the method after which the database will likely be created beneath the server. Beneath you may see within the determine.
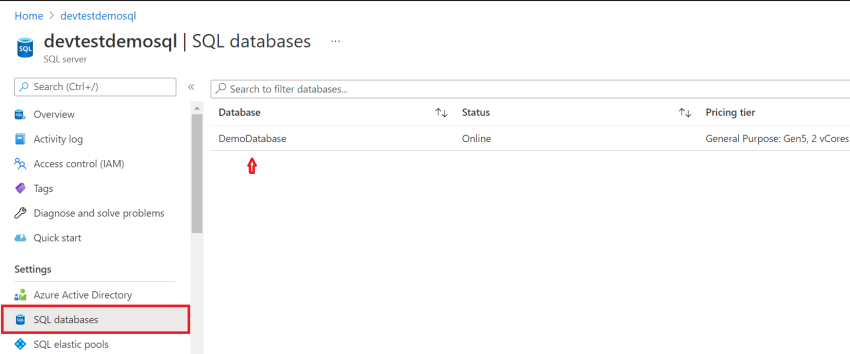
With the intention to arrange the Azure Lively Listing Authentication, we have to configure the Lively Listing Admin for the SQL Server we’ve got deployed beneath the Azure Useful resource group.
Configure the Azure Lively Listing Admin
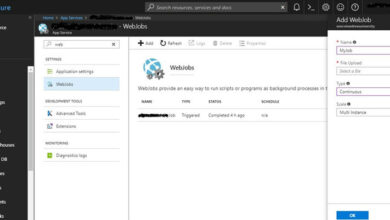
Open SQL Server and within the left aspect menu beneath the settings, we are going to discover the choice as Lively Listing Admin. Click on that and it’ll take you to the subsequent web page to arrange the admin configuration. Click on on the Set Admin and seek for the admin e-mail to whom you wish to be added because the admin and as soon as you choose and save the admin particulars it is going to be proven the Lively Listing web page, see the under picture.
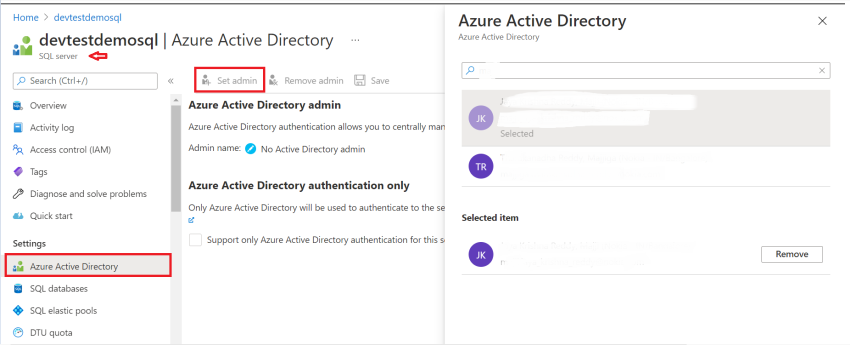
Now we’ve got arrange the admin who can centrally entry the SQL server and now have the privilege to grant entry to others as properly. Open the SQL Server administration studio to examine whether or not we’re in a position to entry it with admin credentials
Azure Lively Listing Authentication utilizing SSMS
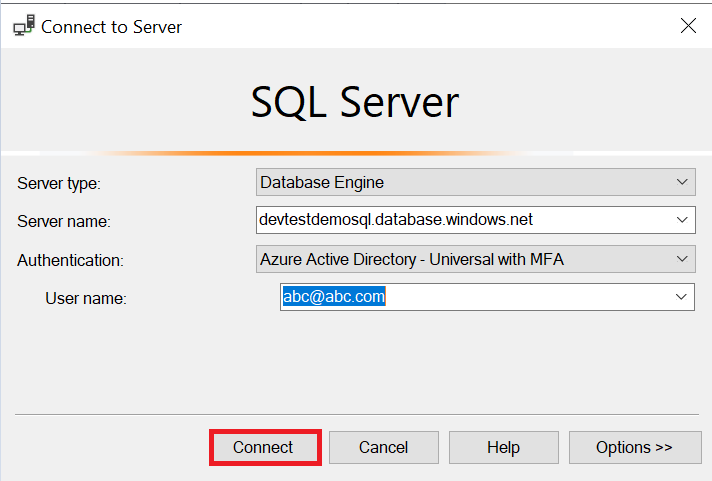
Open the SSMS (SQL Server Administration Studio), add the server identify and select the Azure Lively Listing – Common with MFA (Multi-Issue Authentication). Add the admin e-mail Id to entry the server and as soon as we click on on the join button it would take us by means of the Microsoft Authentication with a view to entry the Database. We’ll use the admin credentials for Microsoft Authentication, see the hooked up picture under
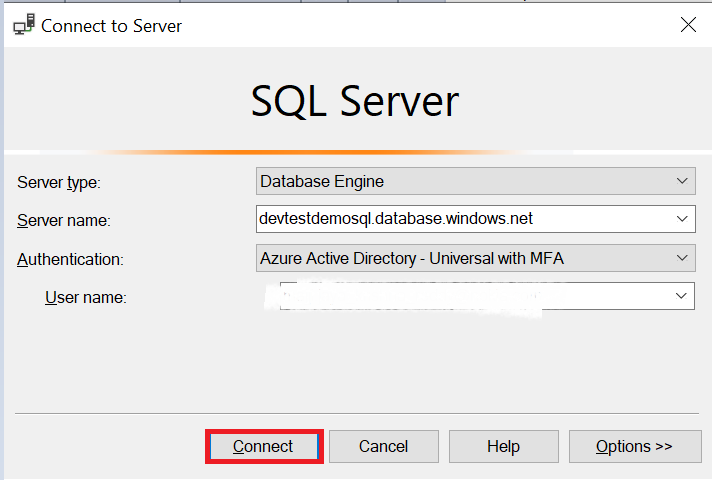
It’s going to authenticate by way of Azure Lively Listing from Microsoft after which it would ask to arrange the firewall in opposition to the SQL server to grant permission for this technique IP deal with. When you click on on Okay you should have an entry to the Database which we’ve got created earlier than.
No want to alter any settings within the Community Firewall it’s routinely taken care of by the Azure itself.
Grant entry for different customers
After logging in with admin credentials, you can see a number of choices for granting entry to the SQL server and the SQL database, which will likely be coated on this article.
- SQL Server Fundamental Authentication
- Azure Lively Listing Authentication
SQL Server Fundamental Authentication
To Grant entry for others, we have to create the consumer beneath the server degree. Then we are going to add the roles for that particular consumer to entry the database to grant permission for the studying and write operations. I’ve added the bottom username and password for the demo function you may select as per your necessities.
Step 1
-- swap to grasp
-- create a brand new sql login and provides them a password
create login Appuser with password = 'admin@123';
Step 2
-- hook up with Database
-- create a brand new SQL consumer for that login
create consumer Appuser for login Appuser;
Step 3
-- untill you run the under two instructions, Appuser has no entry to learn or write information.
alter function db_datareader add member Appuser;
alter function db_datawriter add member Appuser;
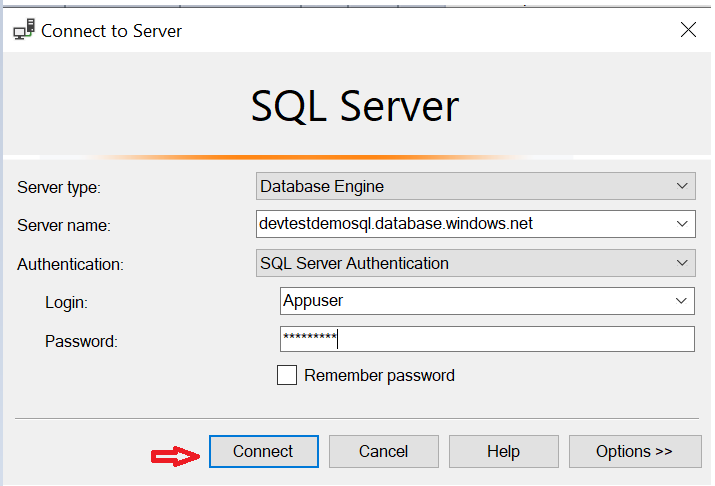
We have now efficiently created a brand new consumer to entry the database. See the under picture for accessing the SQL server with newly created credentials.
Azure Lively Listing Authentication
To grant entry to a selected tenant inside your group right here is the simplest means that we are able to grant entry for fellow members as particular person contributors. This will solely work when the tenant needs to be matched with the identical group.
Step 1
/*swap to grasp */
create consumer "abc@abc.com" from exterior supplier
Step 2
/*Swap to database and execute the for reader or author entry - Azure AD*/
exec sp_addrolemember 'db_datareader', 'abc@abc.com'
exec sp_addrolemember 'db_datawriter', 'abc@abc.com'
Go
Step 3
grant execute on schema :: dbo To "abc@abc.com"
Conclusion
The above article demonstrates the Azure Lively Listing Setup with the SQL Server Fundamental Auth for Azure SQL Server managed Databases
Thanks for studying, please let me know your questions, ideas, or suggestions within the feedback part. I respect your suggestions and encouragement.
Preserve Studying …!