Azure Energetic Listing Area Providers Managed to the Azure Home windows Server Digital Machine
Introduction
Find out how the Microsoft Azure Energetic Listing Area Providers (Azure AD DS) offers managed area companies. It additionally offers area joins group coverage, and LDAP, NTLM authentication that’s utterly good with Home windows Server Energetic Listing. The Azure AD DS managed area offers an incredible service that enables becoming a member of area options and administration to digital machines (VMs) in Azure. Some traits of Energetic Listing embrace:
- Hierarchical listing
- Extensible schema
- Shops objects akin to customers, computer systems, teams and safety principals
- Group Coverage for the person and system administration
I already created an Azure Energetic Listing Area Providers (Azure AD DS). You probably have any Home windows Server VM, you possibly can join` with Azure Energetic Listing Area Providers. This text finest method learn how to create a Home windows Server VM then Connect with an Azure AD DS managed area.
Create a Home windows Server digital machine (VM)
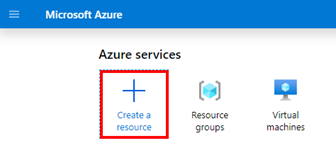
Signal into the Azure portal. (Your Azure subscription), then click on on the Azure portal menu and click on the Create a useful resource choice.
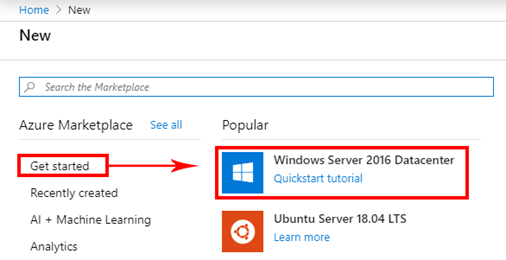
On the left pane, click on Get began, select Home windows Server 2016 Datacenter.
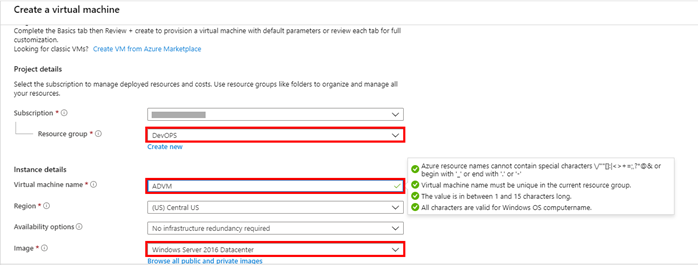
Then, configure the Fundamental settings for the digital machine. If you choose the identical Useful resource Group, The Azure Energetic Listing Area Providers join together with your VM. Enter the digital machine title, Area and Picture choice.
After that, Configure the Measurement half. It is primarily based on Customary dimension and Administrator account. Set the worth password.

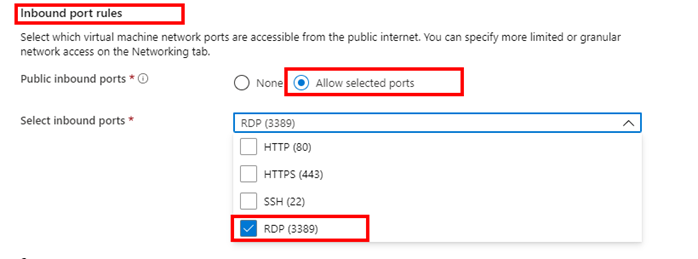
Permit the Public inbound ports and choose the RDP choice as a result of the necessity to hook up with the VM utilizing the distant desktop protocol (RDP) after which be a part of the Home windows Server to the Azure AD DS managed area.
When performed the Configuration, choose Subsequent: Disks choice.

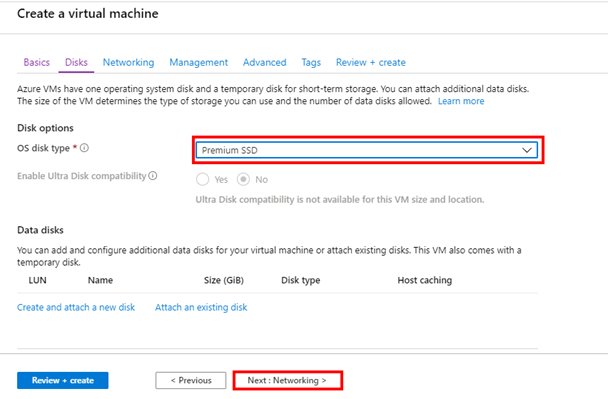
Then, select the OS disk sort’s Customary SSD or Premium SSD, then choose and click on Subsequent: Networking choice.
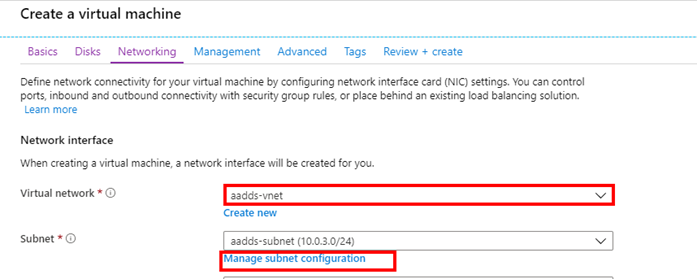
Once you create or choose an present subnet in the identical digital community as your Azure AD DS, the managed area is deployed. Then choose and click on the Handle subnet configuration choice for the explanation to create the prevailing aaads-subnet.
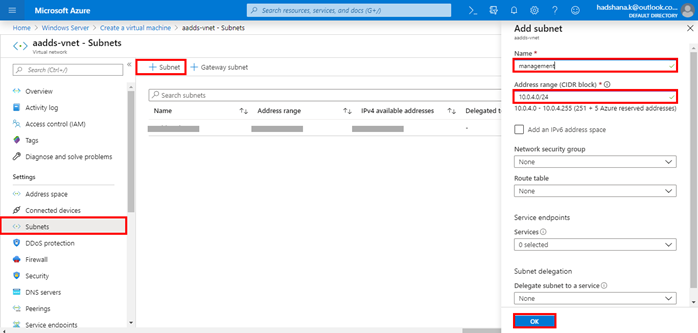
Subsequent, choose +Subnets and click on so as to add a subnet. Then enter a reputation for the subnet and IP tackle vary, after that, click on the OK button.
Subsequent, Choose ‘created the subnet’ choice. Subsequent, choose the Subsequent: Administration choice.

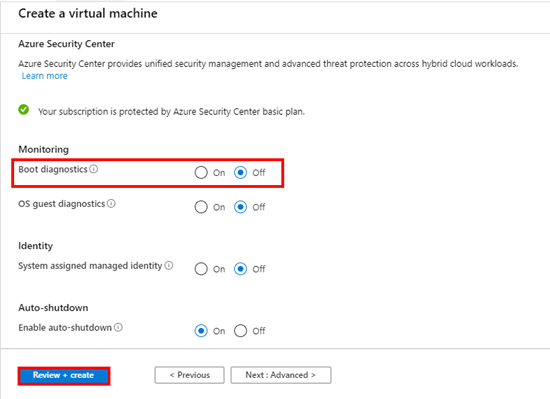
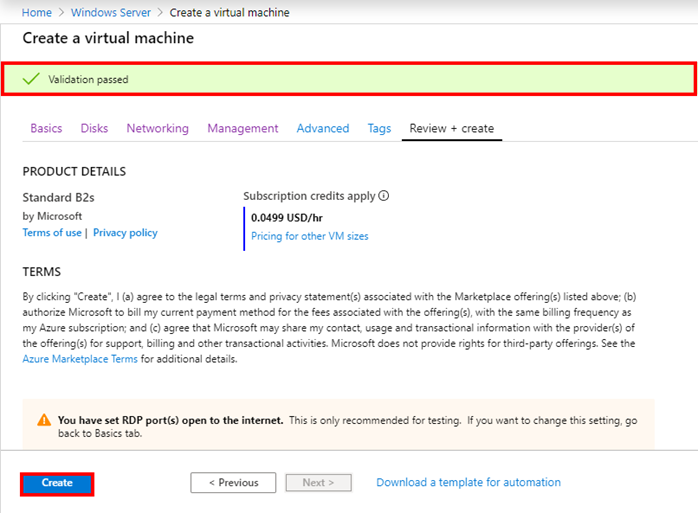
Simply set the opposite choices and Boot diagnostics to Off. Then choose and click on the Evaluation + create choice.
After that, Validation has handed, then choose the Create button.
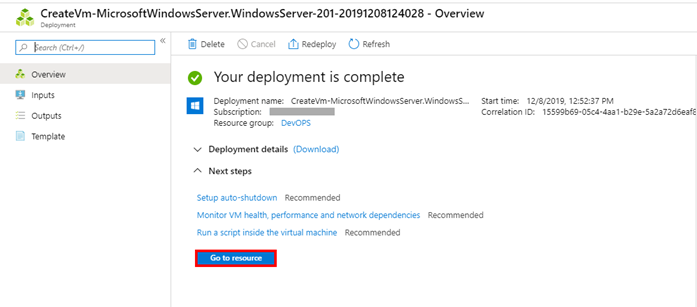
After finishing the deployment course of, click on to Go to the useful resource choice.
Connect with the Azure Home windows Server VM
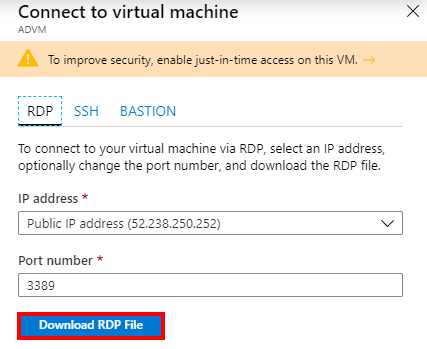
Open the created New VM(ADVM), choose the Join choice.

When clicking the Join choice, present this menu, then click on to the Obtain RDP File for connecting VM.
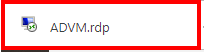
Open this downloaded RDP File.
Subsequent, choose and click on the Join choice.

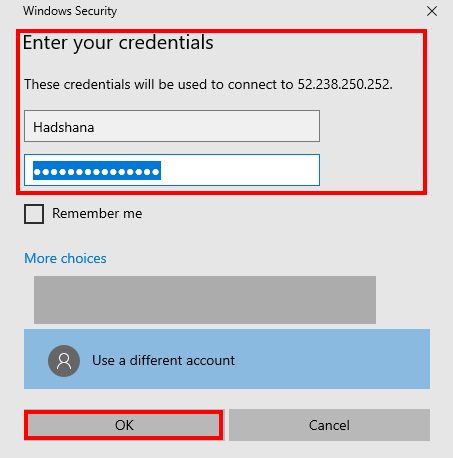
Enter the administrator username and password, then click on the OK button.
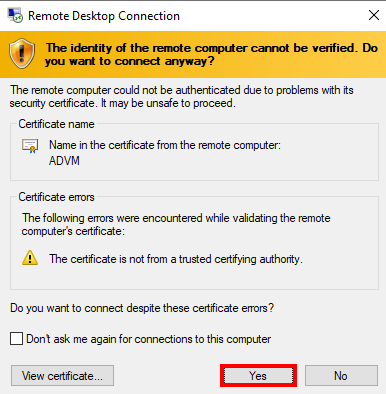
Subsequent, you will notice a certificates warning throughout the sign-in course of. Choose the Sure button to proceed to attach.
Join the VM to the Azure AD DS managed area
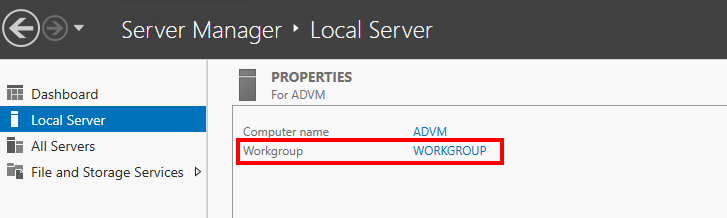
Choose the Begin menu, choose the Server Supervisor choice.
Subsequent, on the Server Supervisor window, choose and open Native Server. Then Choose and open the WORKGROUP.
Subsequent, you will notice the System Properties window. Choose and open Change choice to affix the Azure AD DS managed area.
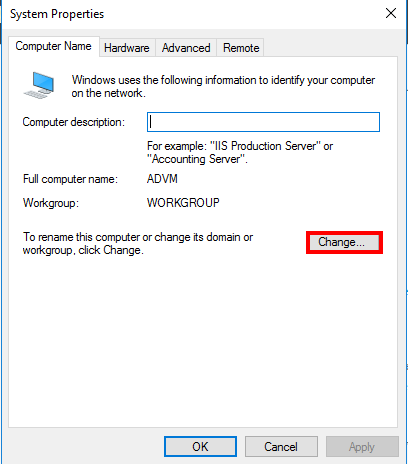
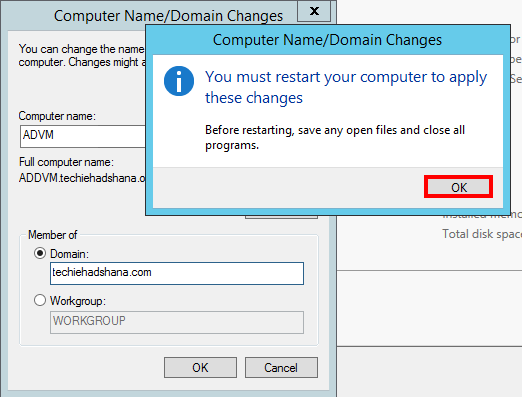
Within the Area field, enter the title of your Azure AD DS managed area (already created), for instance, techiehadshana.com, then choose OK.

Subsequent, enter the area for connecting the Azure AD DS managed area, then click on the OK button. Show the restart and choose Okay.
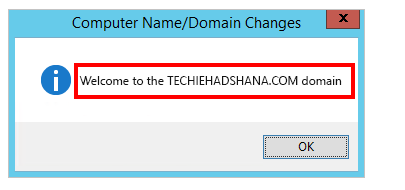
It takes a number of seconds to affix to the Azure AD DS managed area. When full, it is going to show the message that welcomes you to the area.
Abstract
On this article, we are saying learn how to join an Azure Home windows server digital machine to the managed Azure Energetic Listing Area Providers. In my subsequent article, I’ll cowl the following step of this sequence on Putting in Administration Instruments.