Introduction
Azure Automation allows directors to automate recurring cloud administration duties that may be time-consuming and problematic, consequently, it’s efficient at lowering working prices and enhancing effectivity. On this article, I’ll go over the best way to use PnP PowerShell to connect with SharePoint with Azure Automation. This may show the best way to create the Azure Automation account, Run E book, set up modules and configure the variables and credentials required and connect with SharePoint.
Steps
- Create an Azure AD App Registration utilizing PnP.Powershell
- Create an Azure Automation
- Create a PowerShell Runbook
- Take a look at
Create an Azure AD App
Step 1
Set up PnP.PowerShell if not put in,
Set up-Module -Identify PnP.PowerShell
Step 2
Register a brand new Azure AD app registration utilizing the under command, On this case, my password is “password”, preserve ut helpful as we want this in additional steps.
Register-PnPAzureADApp -ApplicationName sp1226Automation -Tenant sp1226.onmicrosoft.com -OutPath c:userslovy.jain -CertificatePassword (ConvertTo-SecureString -String "password" -AsPlainText -Drive) -CommonName MyCertificate -DeviceLogin
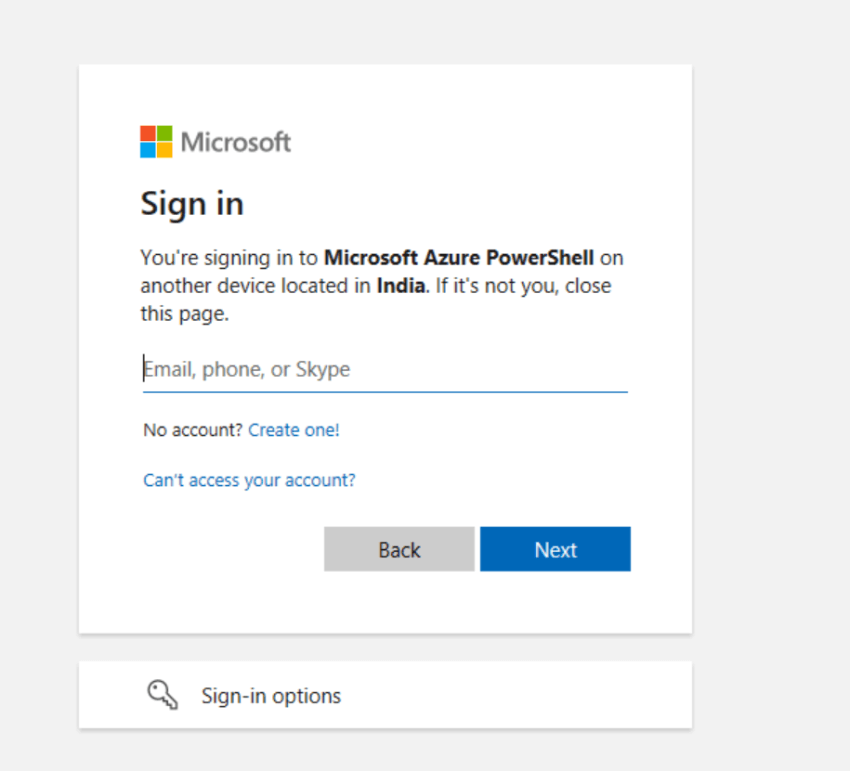
Step 3
Authenticate utilizing your tenant admin account and click on OK
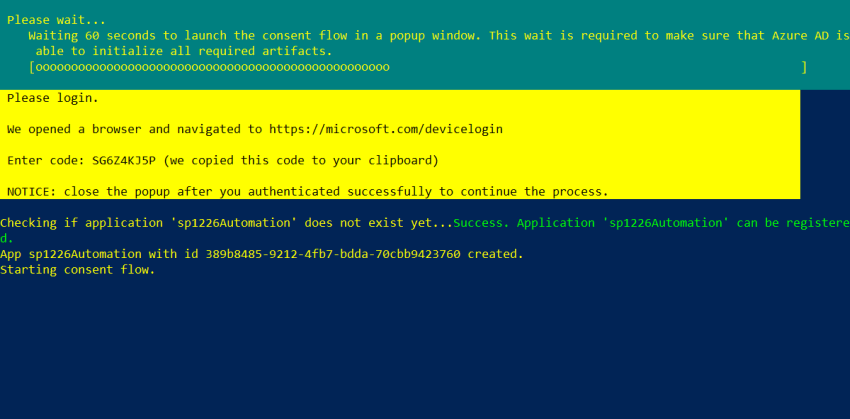
Step 4
After sign-up and verification, it’s going to begin consent circulation.
Step 5
After that, you will need to consent to the default permission utilized to this App. Try the default permission utilized to the app.

Step 6
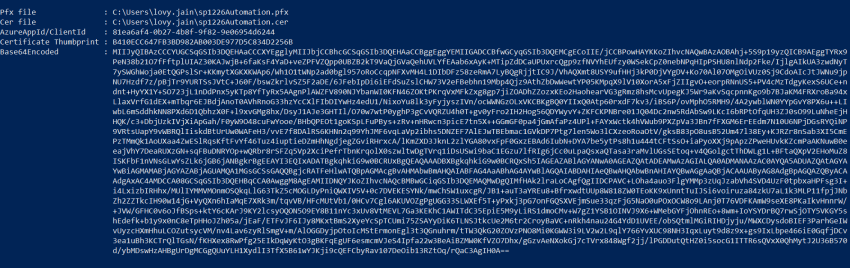
After this step, the App is created efficiently in Azure Portal and the Certificates (pfx,cer) are generated within the native folder specified. Save the trail of the file as we want the pfx file in additional steps.
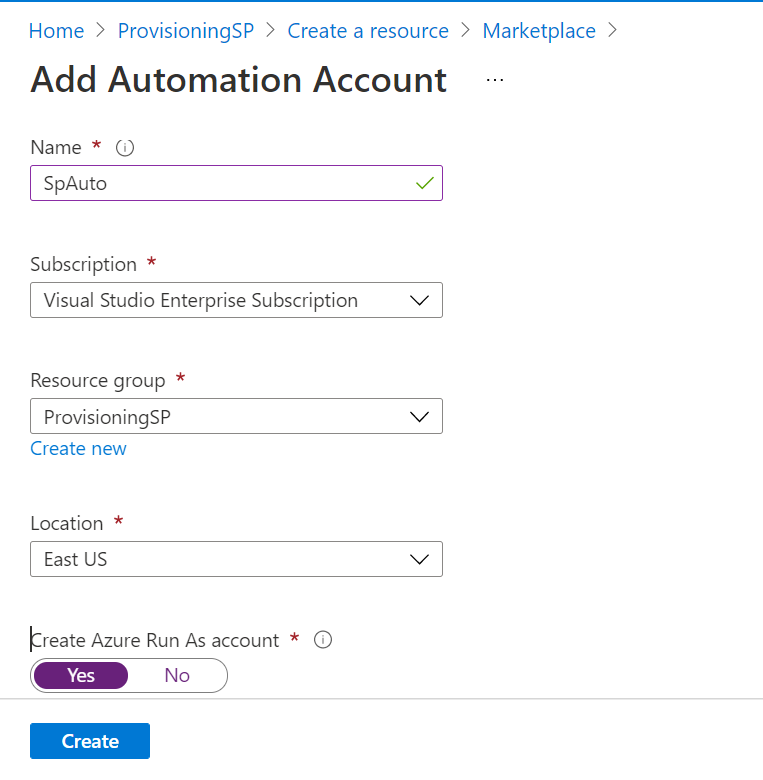
Create an Azure Automation account and configure the settings
Step 1
Flick thru the Azure assets within the market and seek for “Automation” and create it.
Step 2
After the profitable creation of the Azure Automation account, we have to add the pnp.powershell module which will likely be used to authenticate SharePoint in PowerShell. Choose the module tab within the left tab.
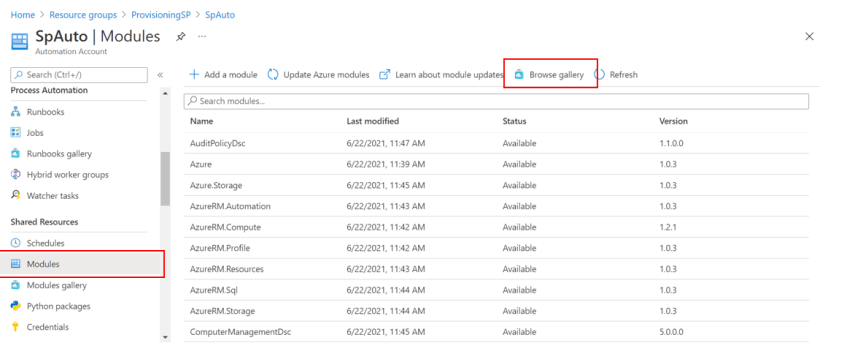
Step 3
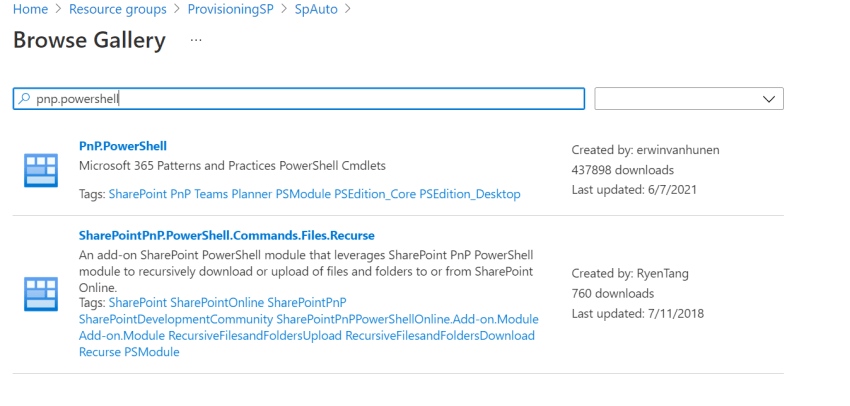
Now after clicking on Browse Gallery, choose the pnp.powershell as this module will not be out there by default.
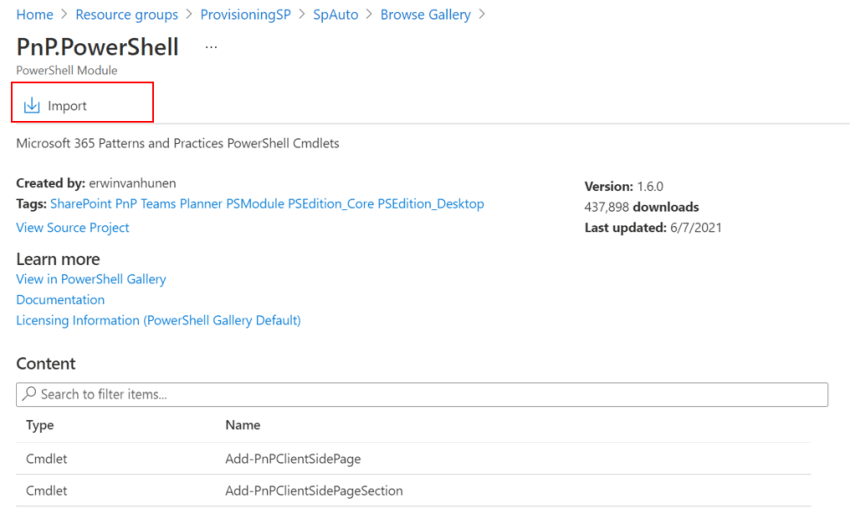
Step 4
And click on on import to incorporate in your Automation account.
Step 5
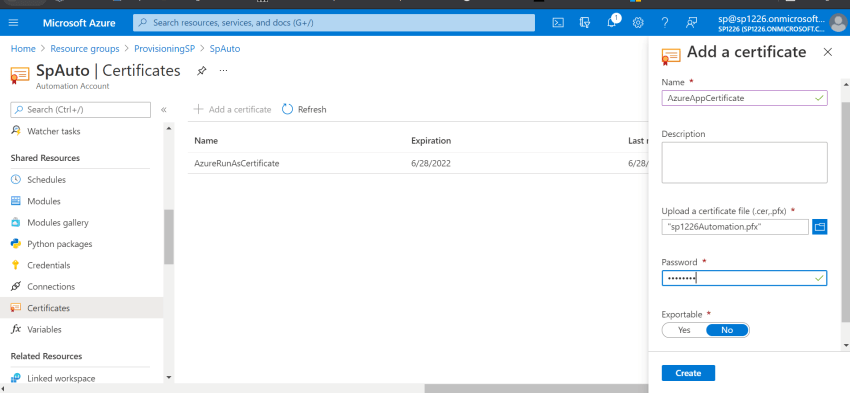
Now create the certificates – Go to the Certificates tab in your Shared Assets of Automation account. Add the certificates(pfx) generated on the finish of Step 1 and enter the password given whereas creating the Azure AD app in Step 1.
Step 6 – Create the credentials
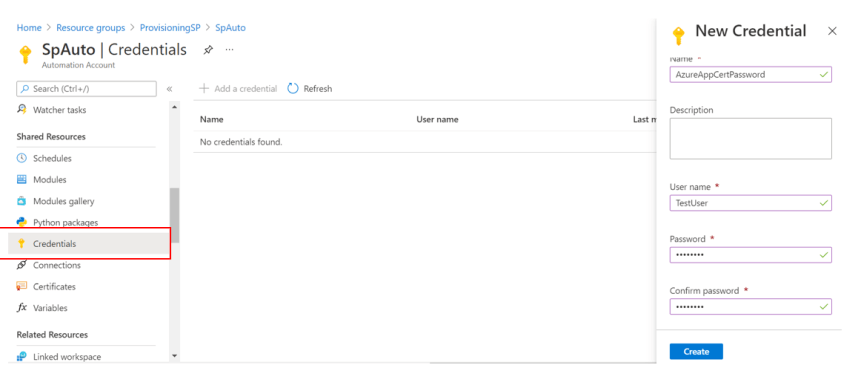
Go to the Credentials, and add the brand new credential. We will add a brand new person identify and password (which is similar which we have now given whereas creating an Azure AD app on this case it is “password”).
Create a brand new runbook and authenticate SharePoint utilizing PnP.PowerShell
Step 1
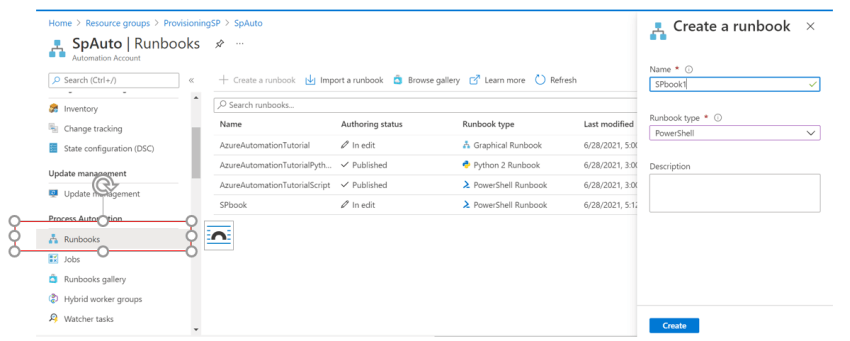
Create a brand new Azure runbook with the kind PowerShell.
Step 2
Edit the runbook created and paste the under code. On this, we’re connecting with SharePoint utilizing PnP.PowerShell.
Change the under code to incorporate your appid (created in step 1) and appAdTenant (identify of your tenant). For finest follow retailer these within the Automation variable however let’s use them right here solely.
$azureAutomateCreds = Get-AutomationPSCredential -Identify 'AzureAppCertPassword'
$appCert = Get-AutomationCertificate -Identify "AzureAppCertificate"
$baseSite = "https://sp1226.sharepoint.com/websites/portal"
$appId = "81ea6af4-0b27-4b8f-9f82-9e06954d6244"
$appAdTenant = "sp1226.onmicrosoft.com"
 $base64Cert = [System.Convert]::ToBase64String($appCert.Export([System.Security.Cryptography.X509Certificates.X509ContentType]::Pkcs12, $azureAutomateCreds.Password))
 # Hook up with the usual SharePoint Website
 $siteConn = Join-PnPOnline -ClientId $appId -CertificateBase64Encoded $base64Cert -CertificatePassword $azureAutomateCreds.Password -Url $baseSite -Tenant $appAdTenant -ReturnConnection
 $net = Get-PnPWeb -Connection $siteConn
 $net.Title
 $record = New-PnPList -Title "Demo Checklist" -Url "lists/DemoList" -Template Bulletins
 $record.Title
Take a look at the answer
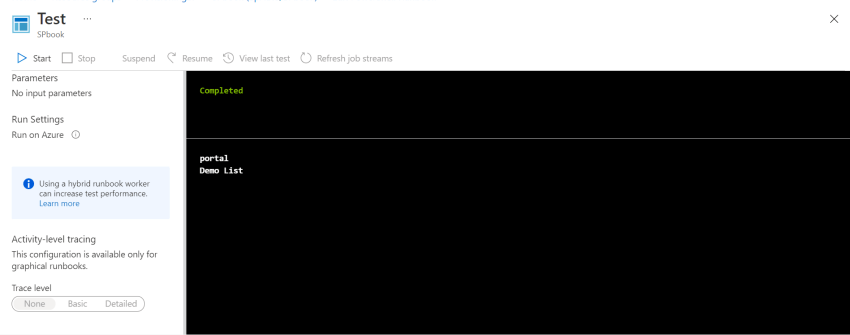
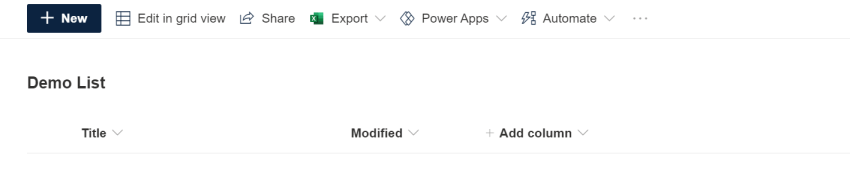
Now it can save you the Azure runbook created and publish it. It is now prepared for use, We will take a look at it utilizing the Take a look at pane. On this code, we’re getting the Title of the Website and creating a brand new record on the identical web site. As you’ll be able to see right here “Portal” is the title of the location assortment and “Demo Checklist” is the title of the newly created Checklist.
Last Ideas
On this train, we see how we will use the Azure Automation account to create a runbook after which getting the title of the location and creating a listing. Additional Automation Runbooks may be configured to run in a number of methods: manually, from a schedule, from different Runbooks or PowerShell scripts, or utilizing a Webhook. A superb use case could also be to provision a SharePoint web site assortment and apply the template on the newly created web site.
Hope you be taught one thing!!