This text will information you, on easy methods to add a customized area identify and confirm it to be used along with your Azure Energetic Listing,
Azure Energetic Listing tenants include an preliminary area identify, “domain-name.onmicrosoft.com”. You’ll be able to’t change or delete the preliminary area identify, however you possibly can add your group’s names. Including customized domains lets you create person names which are acquainted to your customers, akin to Person@techshifa.com
Necessary: (It’s essential to embody .com, .internet, or every other top-level extension for this to work. When including a customized area, the Password Coverage values can be inherited from the preliminary area.)
Earlier than you possibly can add a customized area identify, create your area identify with a site registrar akin to Google area, GoDaddy, Namecheap, and Bluehost ext.
Step 1. Add your customized area to Azure AD
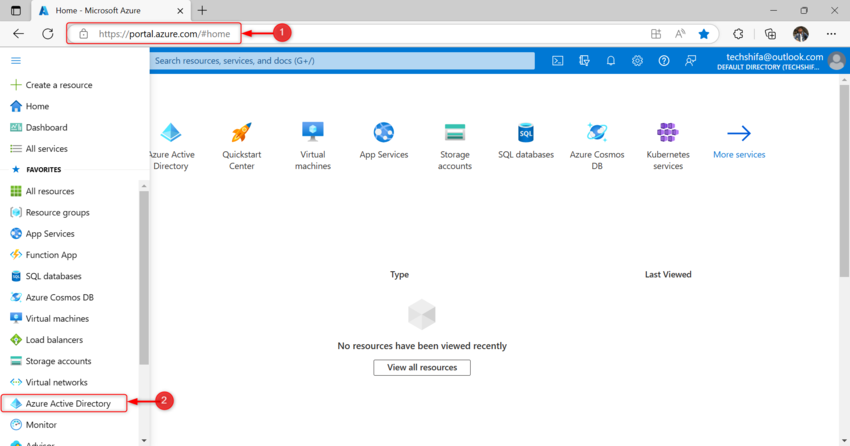
- Go to Azure portal then Sign up to the Azure portal.
- Then Choose Azure Energetic Listing
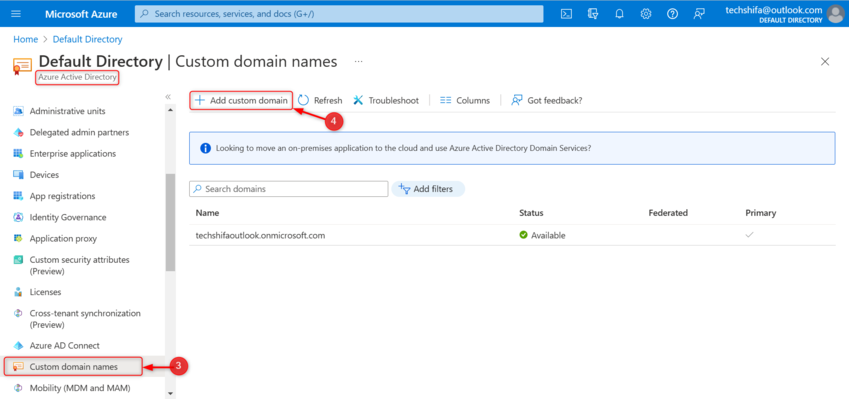
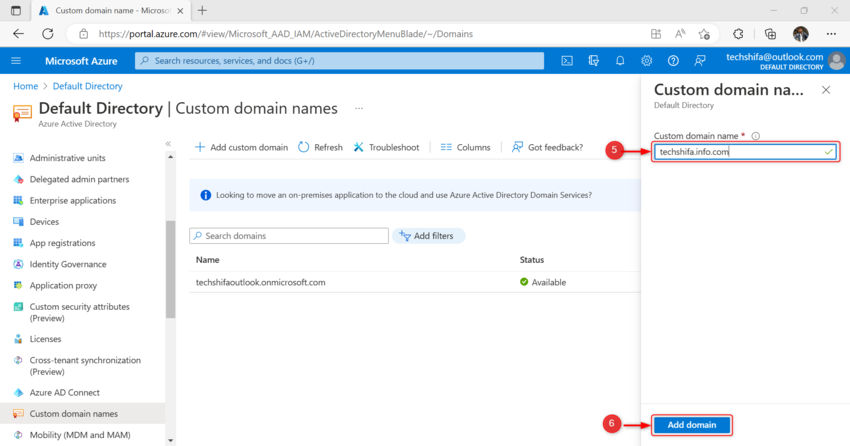
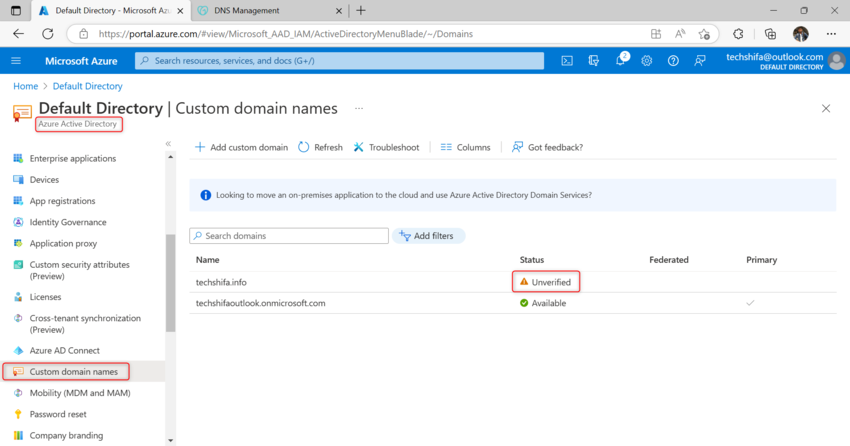
- Choose “Customized Area Title” from Azure Energetic Listing,
- After which Click on “Add customized area“.
It’s essential to embody .com, .internet, or every other top-level extension for this to work. When including a customized area, the Password Coverage values can be inherited from the preliminary area. - Within the Customized area identify discipline, enter your registered area identify. instance, techshifa.com.
- After which choose “Add area“
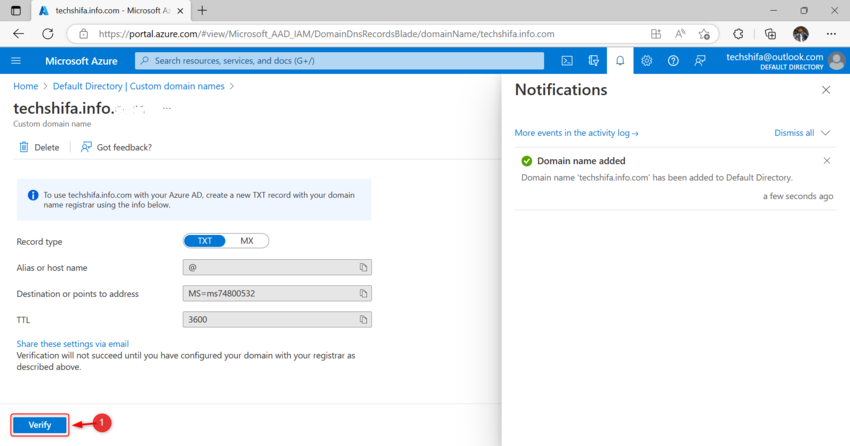
The unverified area is added. The techshifa.com web page seems displaying your DNS data. You want it later to create a TXT file to configure DNS.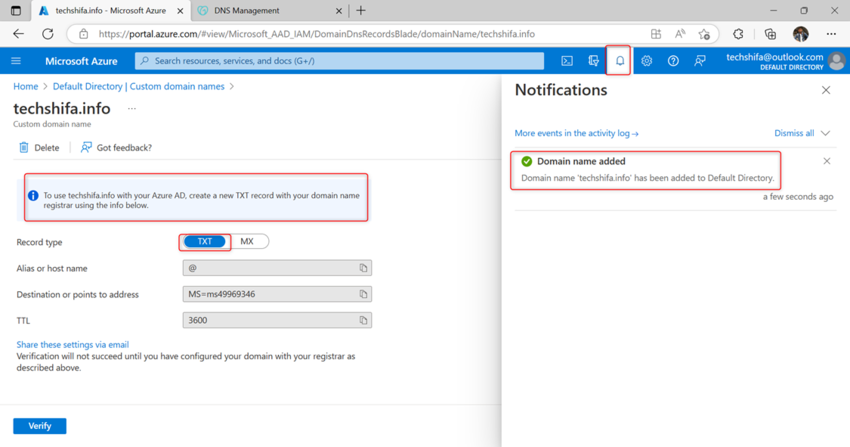
Step 2. Configure DNS with a TXT Document
After the area is added it is advisable to confirm the area, you have to to configure DNS with a TXT file, by way of the area registrar,
On this case, I registered the area with the GoDaddy area supplier.
If you’re registered with GoDaddy, you possibly can observe these steps so as to add the TXT DNS file to your area DNS
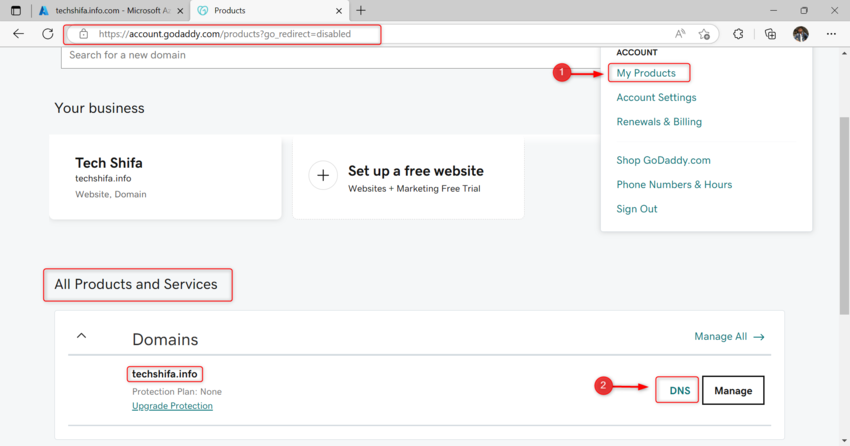
- Log in to your GoDaddy account
- Then Choose “My Product” after which click on “DNS”
- Then click on “Add” so as to add a TXT file then add Document
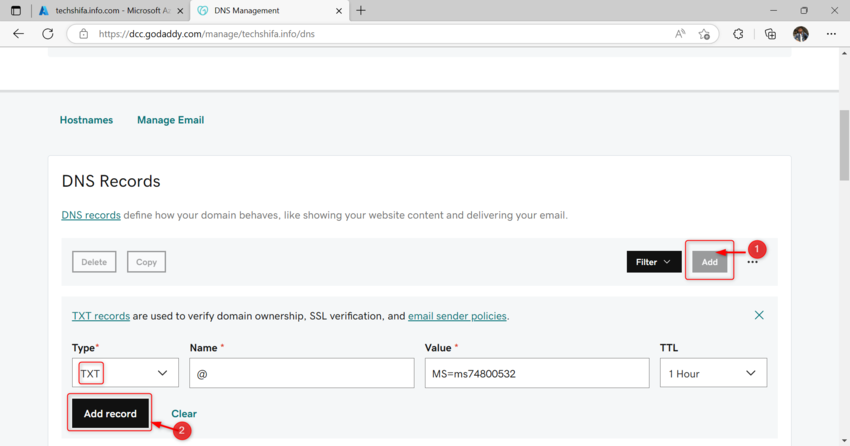
After efficiently TXT file is added, you possibly can confirm your customized area identify!
Step 3. Confirm your customized area identify
- Go to Azure Portal
- From the “azure lively Listing” Choose “Customized Area Title”
- Then choose your unverified Area Title to confirm
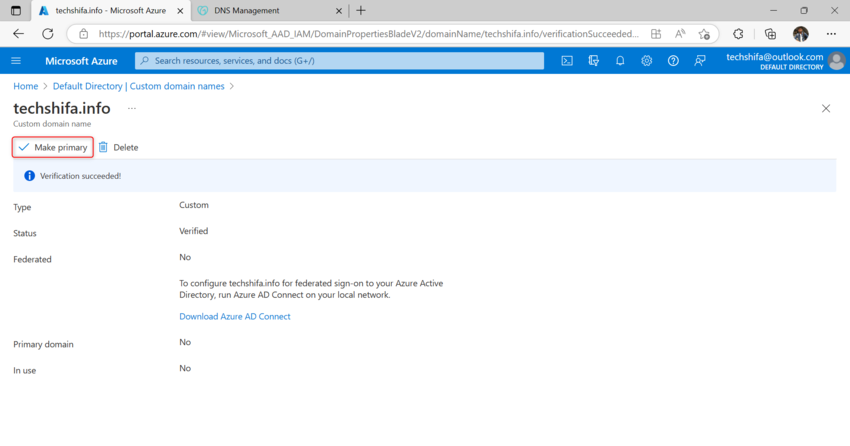
- On the techshifa.data web page, choose Confirm
- The Customized Area Title is efficiently verified, If you wish to make the customized area your main area, choose the customized area, and choose Make main.